Washing a black car without causing ugly scratches and swirl marks in the clear coat can be a bit of a nightmare. But there are tonnes of ways to prevent these scratches and keep your vehicle looking shiny.
In this article, I’ll be going through 11 essential tips to keep your black car scratch and swirl mark free when you wash and dry it. So let’s get started.
The Quick Answer
To prevent scratches and swirl marks when washing a black car, make sure you prewash it thoroughly using a pressure washer and prewash chemical, such as snow foam. Use use plenty of lubrication (car shampoo and water) and a microfiber wash mitt instead of a sponge or brush.
How to Prevent Scratches When Washing a Black Car
- Use a pre-wash or snow foam
- Lubricate the paint with car shampoo and water
- Use a microfiber wash mitt (never a sponge or brush)
- Wash from top to bottom
- Keep checking your wash mitt for dirt
- Use straight line motions
- Use separate buckets and mitts for the wheels and paint
- Wash the car more often to prevent dirt build-up
- Use pressurised air and microfiber to dry
- Never let the microfiber touch the ground
- Apply a wax or sealant
Where Do Scratches Come From?
It’s important to understand how these scratches occur, before we jump into the best ways to avoid them during the wash process.
There are three types of scratches you can get on your car: clear coat scratches, base coat scratches and primer scratches. Check out this diagram.
Your car’s finish consists of several layers. The different types of scratches are named according to which layer they penetrate.
The most common type of scratches you’ll see on black cars, are clear coat scratches. These aren’t often visible in dull lighting, but when the sun comes out, they look terrible.
They often look like swirls, or spider webs, and the cause, is improper wash technique.

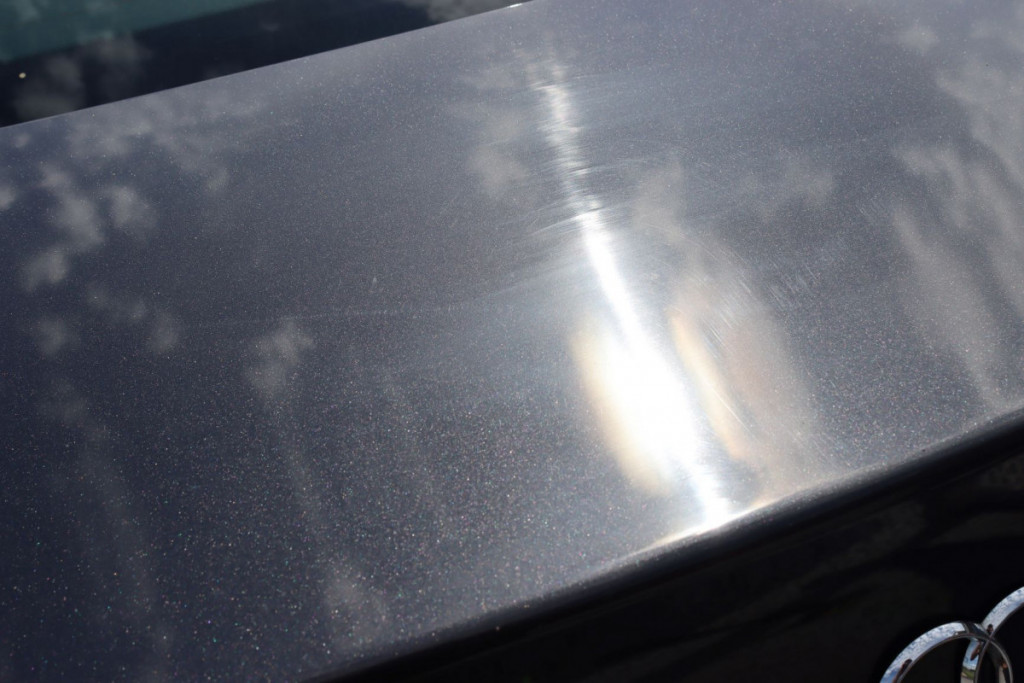
Not only do they look terrible in direct light, but they also cause the finish to look dull and flat in darker lighting. So if you want a shiny and glossy finish, you need to prevent these clear coat scratches from occurring.
The problem with black cars, is that these clear coat scratches are far more visible than on lighter cars due to the contrast. The light picks them up far more easily, and they can ruin the look of your vehicle.
Safe Washing is Essential
So in order to prevent these clear coat scratches and swirl marks, you need to wash the care “safely”. So what do I mean by this?
The clear coat is super delicate, and any kind of friction (even very mild) can cause scratches. So you need to eliminate or at least minimise any abrasion over the paintwork.
So you need to be super careful when you wash your vehicle because there are many opportunities for this friction to occur. The dirt and dust on your car is abrasive and will scratch the vehicle when dragged over the paint. Also, if you use aggressive tools (sponges, brushes, bath towels) to wash and dry the paint, you will also scratch the finish.
Never take your car to an automatic car wash, because these are the biggest culprits for scratches and swirls.
What You’ll Need
Here is everything you will need to wash a black car without causing scratches or swirl marks:
- Pressure washer (or high-pressure hose nozzle)
- Car shampoo
- Microfiber wash mitt
- Two large buckets
- Microfiber drying towel
Also Recommended:
- Snow foam cannon and snow foam
- Hard bristle brush (for the tyres)
Tip #1 Pre-Wash or Snow Foam
Like I said previously, dirt and dust, when dragged over the paintwork, will cause scratches that are very visible on black paint. So one of the best ways to minimise this, is to remove as much dirt as possible, before you even touch the paintwork.
This process, is known as a pre-wash. It’s also commonly referred to as a contact-less wash. By itself, it won’t remove all the dirt (you’ll need to actually touch the paint to do this), but it can remove a lot of it to make the next steps much safer.
Here’s how to effectively pre-wash your car to reduce the risk of scratches.
- Use a pressure washer to rinse the car down. Use a fan setting and hold the nozzle around 2 meters away from the paint.
- Cover the car in snow foam using a snow foam cannon. Alternatively, spray a “pre-wash cleaner” onto the panels.
- Let it dwell for the manufacturer’s recommended time (usually 5 minutes).
- Rinse with a pressure washer again.
This is an essential step, so don’t skip it. If you don’t have a pre-wash spray, or a foam cannon, then go ahead and get one because it’s one of the best ways to reduce the risk of scratching your car’s paint when washing.
If you want to learn more, then check out this article I’ve written on snow foam to learn more about this technique.

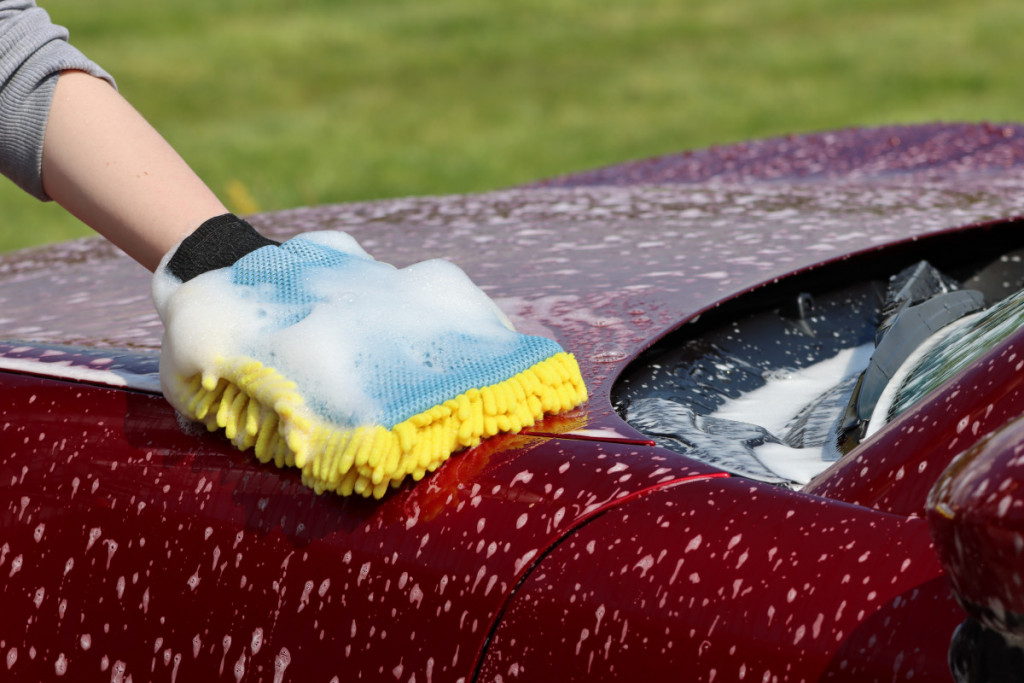
Tip #2 Lubricate the Paintwork
Keeping the paintwork lubricated when you’re washing it, is absolutely critical to prevent scratches and swirl marks.
Like I said earlier, dust and dirt is abrasive to the clear coat and will cause scratches if you drag it along the surface. However, in order to remove if effectively, you do need to do this to a certain extent when you wash it.
However, you can drastically reduce the risk of inflicting clear coat damage by lubricating the paintwork. So how do you do this? Well here are some ways.
- Always keep the paint wet. If a panel dries during the wash process, wet it again using your hose before washing it with your mitt.
- Use a high quality car shampoo to provide plenty of lubrication.
Follow these steps, and you’ll drastically minimise the risk of scratching the paint when you wash the panels.
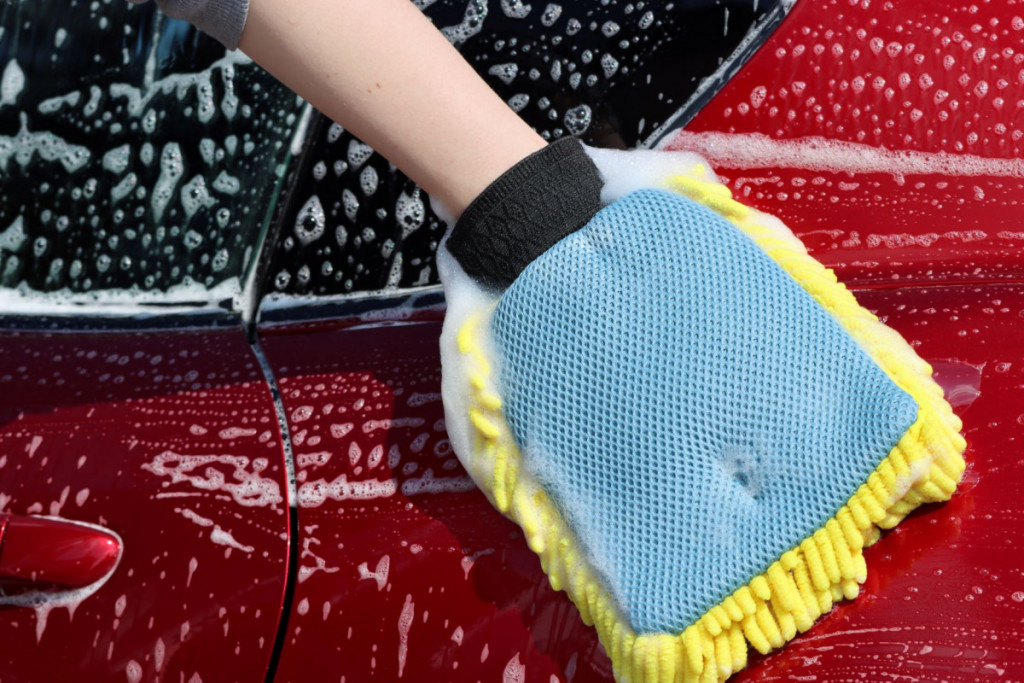
Tip #3 Use a Microfiber Wash Mitt (Never Sponges or Brushes)
So the next step in the process, is to actually touch the paintwork to remove the remaining dirt. The tools you use to do this are very important if you want to avoid scratches.
There are two tools you can use wash the paint safely:
- Microfiber wash mitt
- Lamb’s wool wash mitt
These two tools are very soft, so won’t cause scratches themselves. They also do a great job of lifting dirt of the paint instead of grinding it across the surface to reduce the risk of clear coat damage. Plus, they rinse very easily.
There are several tools that you should never use on the paint because they cause scratches.
- Sponges
- Brushes
- Cloths and towels
These all grind dirt into the paint, and are abrasive by themselves so you will certainly cause ugly scratches on black paintwork.
Check out my recommended wash products page to read about the tools and products I use to wash my car without causing scratches.
Tip #4 Wash From Top to Bottom
Another great tip to minimise the risk of scratches when washing your vehicle, is to wash it from top to bottom, rather from bottom to top. Here’s why.
Most of the dirt on your car will be on the lower panels and sections of your car. This is because dirt and muddy water splashes up onto the paint when you’re driving in rainy conditions.
You need to wash the bottom sections last to avoid transferring dirt from the dirtiest areas, back to the cleaner sections.
It’s less likely that you’ll scratch the paint if you move from the cleaner to the dirtier areas of your car, because there’s less chance of you grinding dirt and grit into the paintwork.
Here’s the best order to wash each section of the paintwork.
- Start with the roof
- Then move to the bonnet
- Next wash the top of the boot/trunk
- Wash the top half of each side of the car
- Wash the bottom half of each side of the car
- Wash the front bumper and rear bumpers
If you want to learn more about this process, then take a look at this article on why washing your car from top to bottom is so important.
Tip #5 Keep Checking Your Mitt
It’s also super important to keep inspecting your wash mitt when you’re cleaning your car. You always want to make sure the mitt isn’t getting dirty, or you’ll rub that dirt into the paint and cause scratches.
I recommend inspecting the wash mitt after you’ve wiped half of each panel to be on the safe side. Then you should either swap it out for a new wash mitt, or rinse it thoroughly.
There are a few ways to wash your car using a mitt:
- Two bucket wash method (or three bucket)
- Using multiple wash mitts
The two bucket wash method uses on bucket for rinsing, and one with shampoo. The three bucket is a slight variation where you use an extra bucket for the wheels.
The multi-wash mitt method does what it says on the tin. Instead of rinsing your mitt in a bucket, you just swap it for a new one when it gets dirty.
Tip #6 Use Straight Line Motions
Using straight-line motions to wash your car is great for two reasons:
- It ensures you thoroughly cover the area but without going over it twice.
- Any minor scratches caused will be far less visible because they don’t catch the light as much as angled or circular scratches.
Starting with reason #1. It’s really important to wash the car thoroughly and cover each section so that you don’t rub any dirt into the paint during the drying process. It’s also important because you don’t want to go over an area more than once, because that increases the risk of scratches.
Now onto reason #2. Of course, the aim is to cause zero scratches when washing your vehicle. However, mistakes can happen and scratches can occur from time to time during the wash process.
But straight line scratches are far less visible than circular ones. So even if you do cause minor clear coat damage, then chances of it being noticeable are far lower if you use a straight-line motion than a circular one.
Tip #7 Use Separate Tools for the Wheels and Paint
It’s also super important to use separate tools for the wheels and the paintwork.
The wheels are the dirtiest area of your car, and the last thing you want to do is to transfer dirt and grit from the wheels, back onto the paint and cause scratches.
So it’s important to use different wash mitts and buckets to wash the wheels and paint.
If you’re serious about keeping your car scratch free, then assign wash mitts and buckets to the wheels and paint permanently, not just during a single wash.
Personally, I label my wash buckets so I don’t accidentally use the wrong one for each area. Then I use different colour wash mitts for different sections so I never make this mistake.
It’s important to note here, that you should always start the wash process with clean tools. Make sure the wash mitts are dirt and dust free, and rinse your wash buckets before and after use to keep them clean.
Remember that the tools you use are one of the most common causes of scratches and swirl marks, so look after them and keep them clean.
Tip #8 Wash the Car More Frequently
This may sound a little bit strange, but one of the best ways to prevent scratches during the wash process, is to wash your car more often.
Although it’s a valid idea to think that washing more increases the risk of scratches, it doesn’t really work that way in my experience.
Like I said earlier, the more dirt and dust you have on your car, the more chance you have of scratching it because it is abrasive to the paint. And that’s why you should try to remove as much of it as possible during the pre-wash stage.
So if you wash your car less often, more dirt and grime will have built up, increasing the risk of scratches.
Washing your car more often prevents this, and means that most of the dirt will be removed in the pre-wash stage, hence reducing the risk of clear coat damage.
Personally, I recommend washing your car every 1-2 weeks, especially if it is driven daily and stored outside.
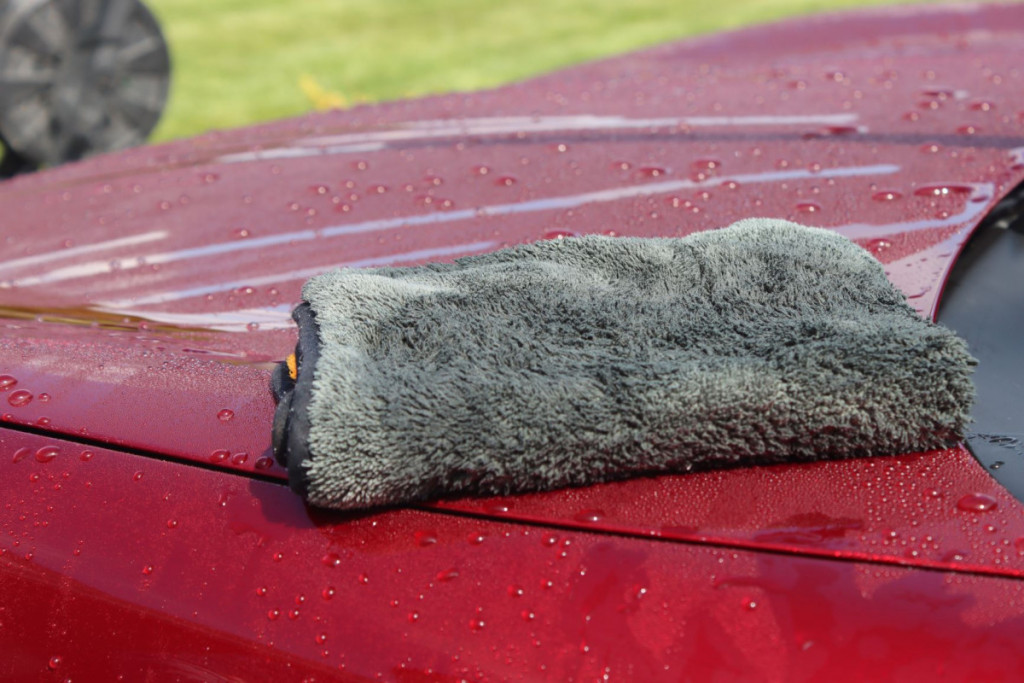
Tip #9 Drying Using Pressurised Air or Microfiber Towels
Now that you’ve got the car clean, you’ll need to dry it, otherwise you’ll be left with tonnes of hideous water spots which can eat away at the clear coat and cause permanent damage.
Unfortunately, the drying process is one of the most common causes of scratches.
If you’ve done a thorough job with the wash process, then the car should be dirt and dust free so that risk of scratches will be removed.
However, the tools you use to dry the paint can also cause swirls and scratches because they cause friction. So how do you avoid this?
- Minimise the amount of contact you have with the paint
- Use soft materials
I won’t go into the whole process here, except I’ll say that you should only ever contact-dry the car with microfiber.
Never use squeegees, chamois leather or bath towels, because they are too harsh and will cause scratches.
Personally, I use a car dryer (BlO Air-RS) to remove as much water as possible. Then I use a soft, clean and plush microfiber to dab away any excess spots of water.
Notice that I said dab, and not wipe. Wiping increases the risk of scratches because it creates friction. Instead, just lightly press the microfiber onto the paint and it’ll soak up the water without risking damage to the paint.
Take a look at this article I’ve written on how to dry your car without causing scratches and swirl marks to learn exactly what kind of tools and safe, and which should be avoided.
Tip #10 Never Let Your Microfiber Touch the Floor
Another tips for washing and drying your car safely, is to keep your microfiber clean. This means it should never touch the floor, even when you’re done for the day and ready to wash it.
Microfiber picks up dirt and dust very easily, so whenever it touches the floor it attaches all kinds of grit and grime. Even if you thoroughly wash the microfiber afterwards, there’s a decent chance it won’t all be removed.
So the best practice, is to put your microfiber wash mitts and towels straight into a clean tub once you’re done with them, so they are in a safe place ready to be washed properly.
Tip #11 Apply a Wax or Sealant
The final tip on this list, is to apply a good quality sealant or wax. These sit on top of the clear coat to protect it and preserve the base coat underneath.
Here are two of the main ways applying a sealant or wax can reduce the risk of scratches.
- The are hydrophobic and dirt-repellent so less dirt will stick to the car in the first place making washing easier and safer.
- They provide a protective layer on the car against friction. They won’t completely eliminate the risk of scratches, but they do provide some level of added protection.
Of course, they also have a number of other benefits including UV protection and added shine and gloss.
I’ve got a page on my recommended paint protection products to check out if you want to learn more about the products I use to keep my car shiny and preserve the paintwork.
The Full Wash Process
We’ve been through some essential tips, but if you want a more complete step-by-step guide explaining the wash process to prevent scratches and swirl marks then check out the article I’ve written.
Check out this complete guide to washing your car without causing scratches.
More Frequently Asked Questions
Don’t worry if you’ve still got some more questions. Here are the answers to some of the most FAQs about washing a black car.
How do you wash a black car without causing water spots?
To prevent water spots on a black car you should dry the car as quickly as possible and avoid washing in direct sunlight. Also applying a coating or sealant can help prevent water spots.
Take a look at this article on the 9 best ways to prevent water spots to find out more.
How do you deal with scratches and swirl marks on black cars?
You can remove scratches and swirl marks caused by improper wash technique using either a compound or a polish, by hand or by machine. Using a machine (dual-action polisher) is more effective and efficient. Take a look at this article I’ve written on polishing and compounding to learn more about this process.
However, removing scratches involves removing a layer of paint which has several risks involved. I’ve outlined the risks of paint correction in this article.
If you don’t want to remove a layer of paint to permanently remove the scratches, then you can use a glaze to hide them instead. This helps to mask the scratches and swirls but without actually removing any clear coat. Take a look at my complete guide to glazes to learn more.
Thanks for reading! I hope you’ve found this article helpful. Take a look at the rest of the website to learn everything you need to about washing and detailing your car.
