Water spots can be really annoying, and ruin the look of an otherwise glossy finish. However, water spots cause more issues than just looking bad.
In this article, I’ll go through the main ways to remove water spots from the paintwork, and glass, so that your car’s finish looks flawless. So let’s get started.
How to Remove Water Spots
Mild and fresh water spots can be removed using car shampoo or a quick detailer spray. More stubborn water spots can be removed using water spot remover sprays, paintwork cleansers or even clay. Water spot etching can be removed using polishing or compounding techniques.
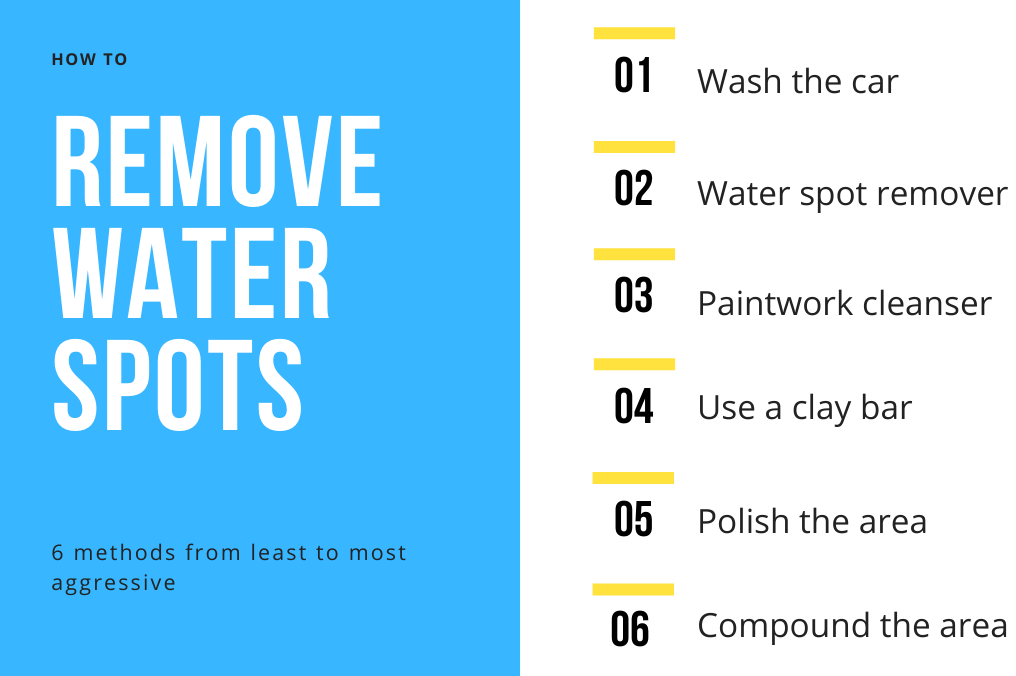
6 Ways to Remove Water Spots
- Wash the car again
- Use a water spot remover spray
- Apply and paintwork cleanser
- Use a clay bar
- Polish the area
- Compound the area
Types of Water Spots
There are two main types of water spots you need to be conscious of, and they can be distinguished by their severity.
Some water spots are just on the surface of your car’s glass or paint. They can be easily removed and haven’t caused any permanent damage.
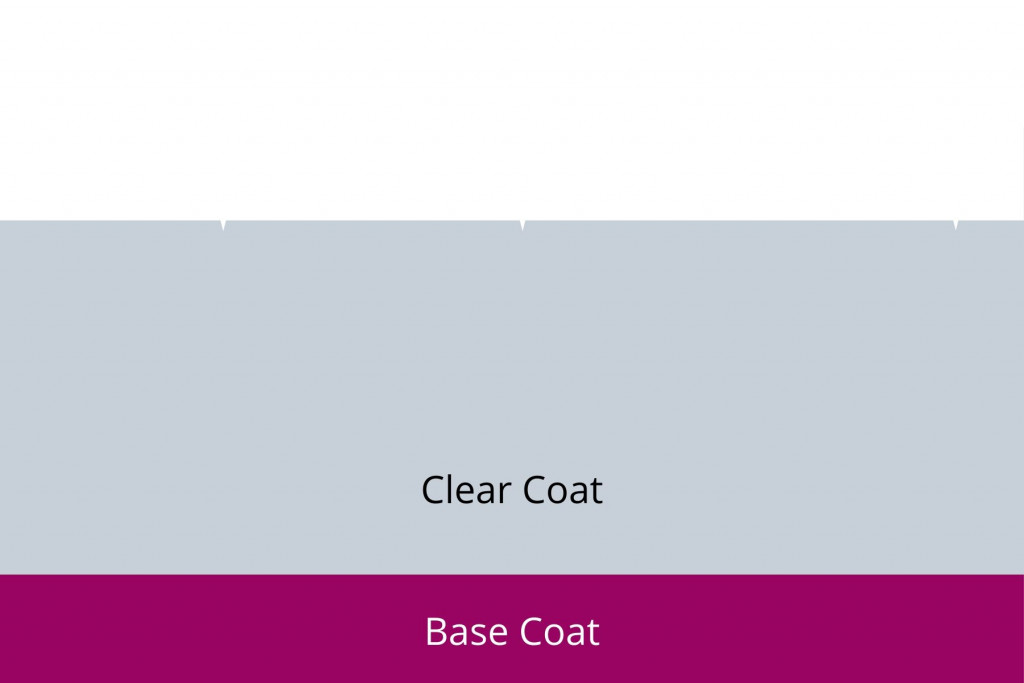
The second type, occurs when the water spot has been left to sit on the car for much longer. This causes “etching”, which means that the minerals have actually corroded the clear coat. Check out this diagram.
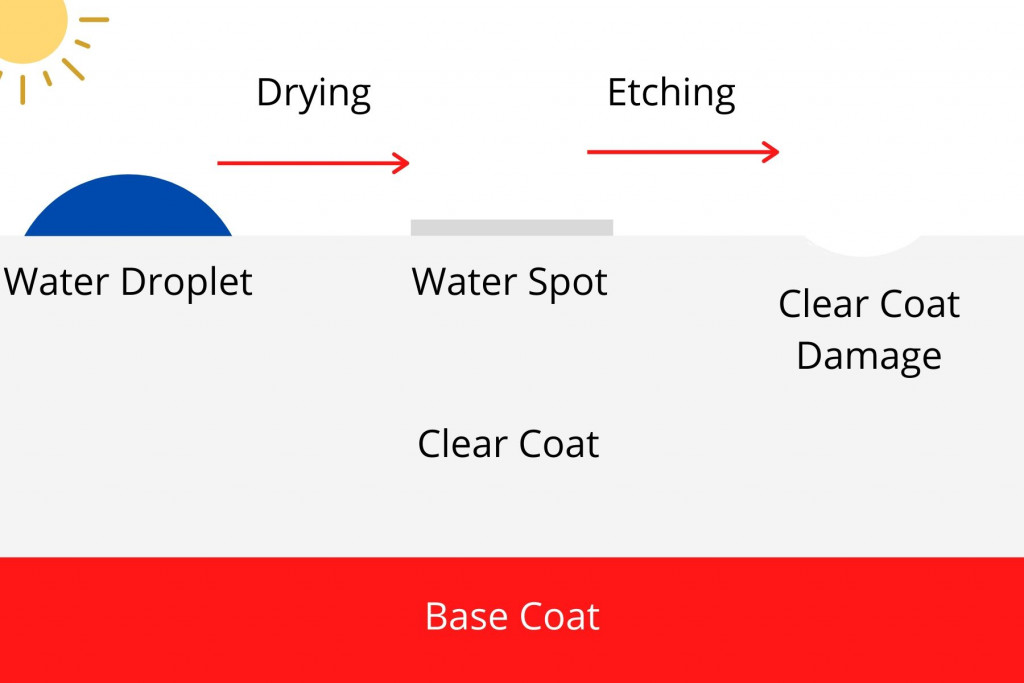
This type of water spot won’t be removed easily, because the clear coat has now been damaged.
It’s the impurities that are left to dry on the car that cause this corrosive effect. When the water evaporates, it leaves behind trace chemicals that eat away at the clear coat if left to sit on there.
Water spots should be removed as quickly as possible before they damage the clear coat permanently. It’s less of an issue on glass because it’s much tougher, but it’s still important to remove them sooner rather than later.
Now let’s talk about the different methods of removing water spots from both the paintwork and the glass. I’ll start with the least aggressive methods, so go through this list and try each method chronologically to avoid exposing your car’s paintwork to harsher treatments.
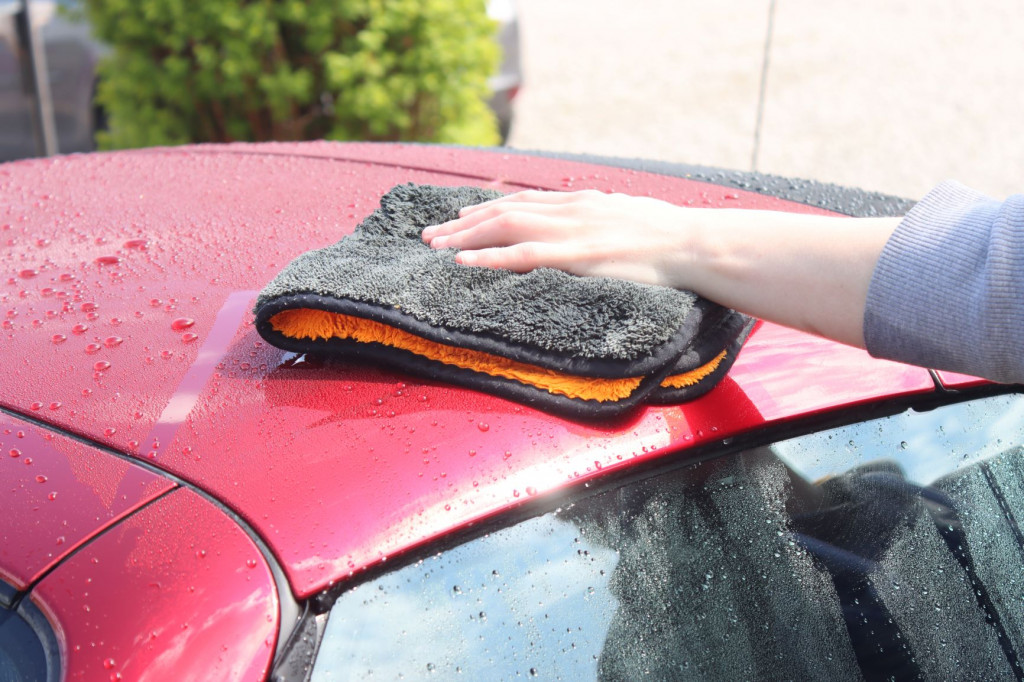
1. Wash the Car Again
The easiest way to remove water spots that are relatively fresh, is to wash the car.
If you do not dry the car fast enough after washing it, then you’ll seen plenty of water spots on the paint and glass, especially if it hasn’t been coated.
Luckily, since these water spots haven’t been allowed to sit for too long, they won’t have turned into the type that causes permanent damage.
The best way to get rid of these kinds of water spots, is by simply washing the car again. You can also use a quick detailer spray, but only if the car is free from dust, otherwise you risk scratching the clear coat.
Wipe away the water spots using a wash mitt or detailer spray with plenty of lubrication. Don’t scrub at the water spot, it should be removed quite easily if it’s fresh.
If the water spot isn’t immediately removed, then skip ahead to the next step. Don’t keep scrubbing because you’ll likely swirl and scratch the clear coat.
Make sure you dry the car using a microfiber towel after washing to avoid these water spots forming again. Take a look at this article I’ve written about how to dry your car and why it’s so important.
Looking for some of the best car cleaning products to make sure your vehicle looks fresh? Make sure you check out my recommended products page for all my current top picks.
2. Use a Water Spot Remover Spray
The next thing you can try, is a water spot remover spray. Most car care brands sell them and they are very simple to use.
You just spray the water spot, then dry using a soft, clean and plush microfiber towel.
You should only ever try this method when the paint is clean and dry though, so just after it has been washed. If you try it at any other time, then you’ll rub dust into the clear coat which can cause scratches.
This method is fine to try on glass though, even if the glass isn’t super clean, although using a glass cleaner first is helpful and in some cases can remove the water spots on it’s own.
A couple of products I’ve tried that are very effective are:
- Koch Chemie FSE
- Tac Systems Water Spot Remover
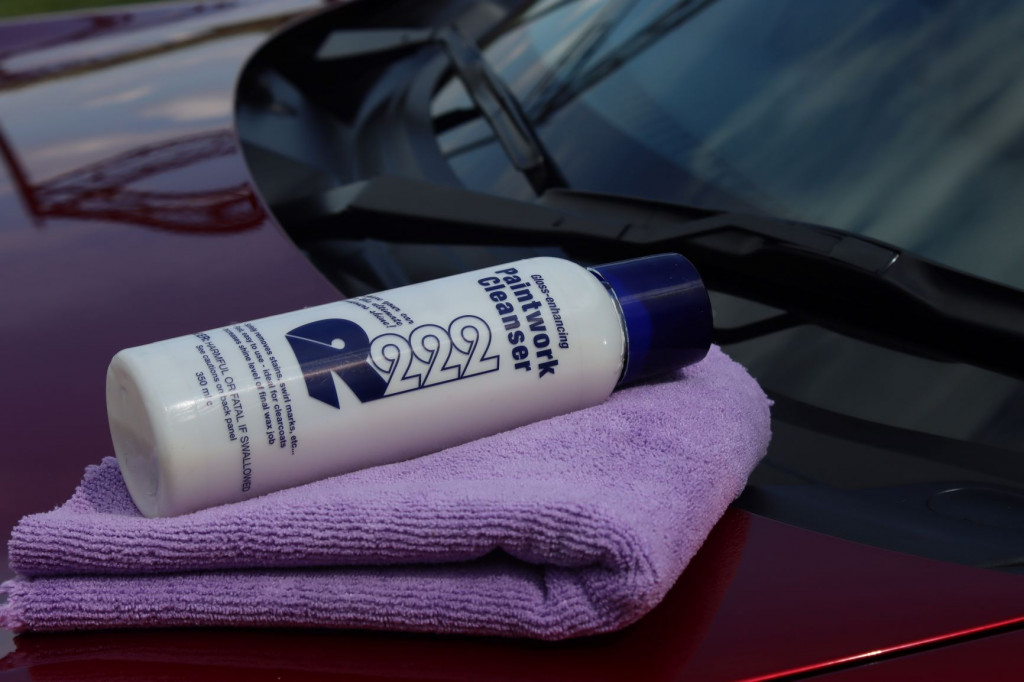
3. Apply a Paintwork Cleanser
The next method is pretty effective and can work on more stubborn water spots. However, it’s still quite gentle in comparison to the later methods on this list.
Paintwork cleansers are used for several reasons including stripping waxes, removing contaminants and most importantly, water spots.
They are very simple to use and can be applied either by hand using a soft foam or microfiber applicator, or using a dual action machine polisher and soft foam pad.
You simply apply the product in a thin layer, work it into the surface a little bit, then leave it to dry according to the manufacturers instructions (usually 5-15 minutes). Then you can just buff it away using a soft, plush microfiber towel.
I use a paintwork cleanser called R222 (P21S). It’s very nice to apply and buffs off easily. It leaves a glossy looking finish and does a good job at tackling water spots.
Like I mentioned earlier, this method is usually pretty effective at removing more stubborn water spots, but it won’t remove the type that have caused any clear coat etching. So try this method, then assess the surface to see if there is any remaining damage.
Also, make sure you apply another layer of paint protection (wax, sealant or ceramic coating), after using a paintwork cleanser as it will remove all the previous layers and leave the paint bare.
4. Use a Clay Bar, Cloth or Mitt
So this is where we start getting into the more aggressive methods of removing water spots. If you’ve not tried the other methods, then don’t just jump to this one. You should only use a clay bar when necessary.
That’s because clay is abrasive. This means it can cause scratches and swirls if used incorrectly, or on delicate paintwork.
However, feel free to try this method on glass because you’re unlikely to cause scratches since glass is a much harder material. Take a look at this guide to using clay on glass to learn more about this technique.
If you’re not familiar with automotive clay, it’s an abrasive putty-like material that’s synthetic and designed specifically to remove forms of contamination from your car’s exterior. This includes water spots.
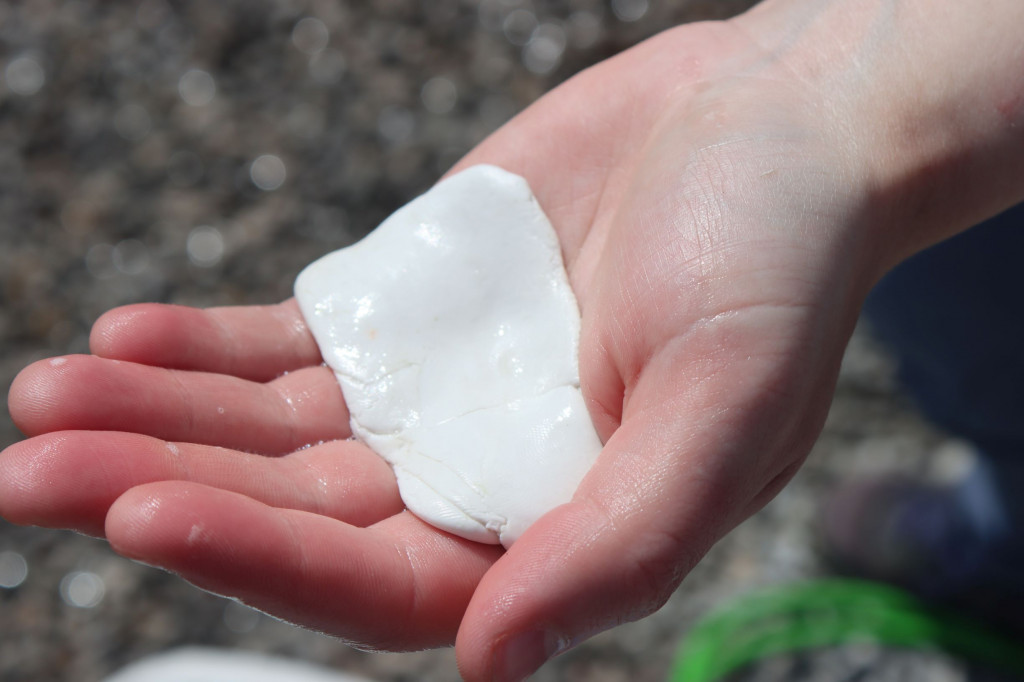
It works by pulling bound contaminants off the paintwork, or by shaving them down until they’re non-existent. Clay comes in three main forms, in a bar, mitt or cloth. Personally, I prefer to use clay bars because I find them easy and effective, plus they’re cheap so you can throw them away after using them.
You do this by gliding the clay across lubricated paint or glass, until the contamination is removed. You’ll know when this happens because the clay will glide more easily across the surface.
Clay is very easy to use, but you do have to follow some rules to make sure you don’t cause too many scratches or swirls.
- Lubricate the car’s surface and the clay using car shampoo and water, or a specifically designed clay lubricant.
- Keep checking the clay bar for contamination, if it looks dirty, fold it to expose a clean side.
- Never drop it on the floor. If you do, then throw it away.
- Be gentle, don’t press to hard. Clay doesn’t need to be pressed into the surface to be effective.
- Use straight line motions.
Take a look at this article I’ve written on using clay safely to learn more about the proper technique.
Also, keep in mind that clay won’t remove water spots that have caused etching, only the next method on the list can do this.
So never scrub at the paint when trying to remove the water spot, because if it doesn’t come off easily, you’re very likely to scratch the paint before getting rid of the water spot. Instead, try this next method.
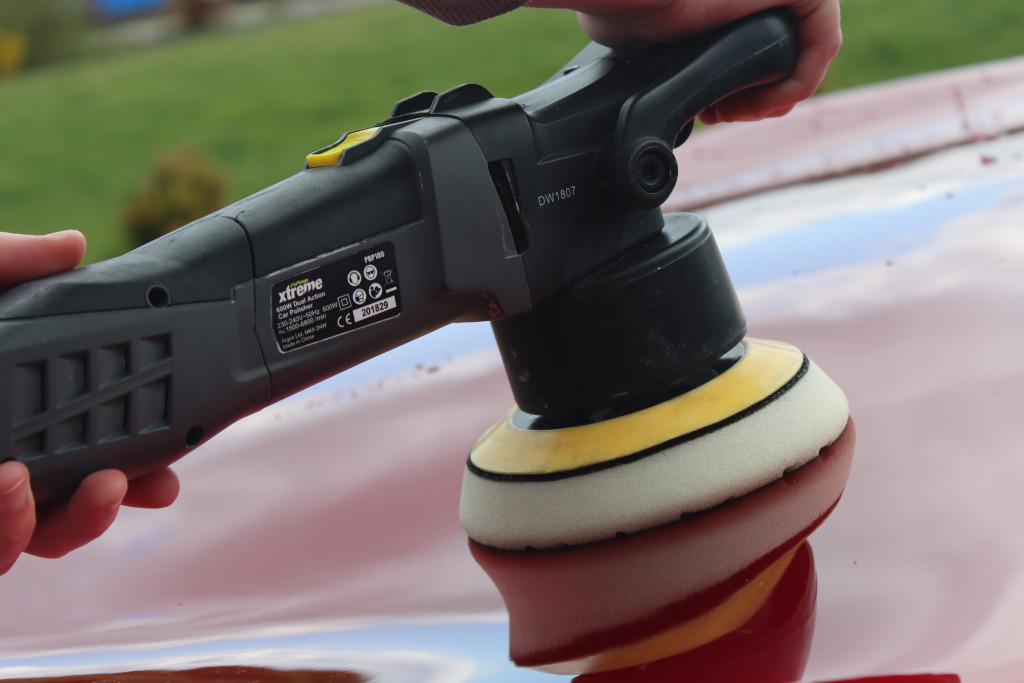
5. Polish the Paintwork
The final method will definitely remove the water spots, but it is the most aggressive choice, so again, try the previous methods before jumping to this choice. Let’s discuss exactly what polishing does, and how it actually works.
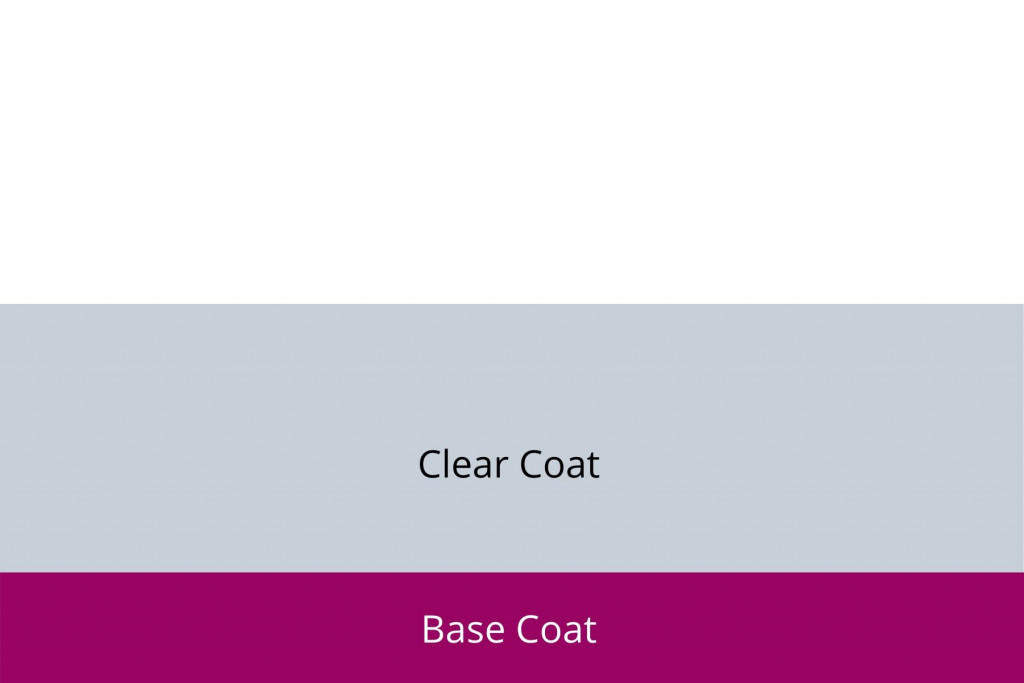
Polishing is a method used to remove a layer of your car’s clear coat. It removes scratches, and etching caused by water spot damage, by essentially revealing a fresh, flat layer of paint.
Take a look at this diagram to demonstrate.
As you can see, this method is by far, more aggressive than the other techniques we’ve already discussed. This is because it causes a permanent change in your car’s paintwork.
You need to keep in mind the risks of paint correction techniques like this.
Your car’s clear coat is designed to protect the base coat (colour), underneath from UV rays, corrosion and fading. If the clear coat becomes too thin, then the base coat will not be adequately protected.
The clear coat is super thin, even thinner than a 10 dollar bill. So removing a layer of it does have risks.
So how do you know if paint correction is safe?
You can use a paint depth gauge to do this. It measures how thick the paint is, to give you an indication of whether it’s safe to continue.
Polishing by hand, using a foam or microfiber polishing pad is less aggressive than using a machine polisher which cuts away the paint much faster. So give this a go if you’re worried.
However, machine polishing is far more effective, and efficient at removing water spot etching.
Take a look at this article I’ve written on how to tell when it’s safe to polish to learn more about this topic.
6. Compound the Paintwork
Sometimes the etching can be very severe, and if even if you’ve managed to remove the actual water spot, minimising the etching effects can be more challenging.
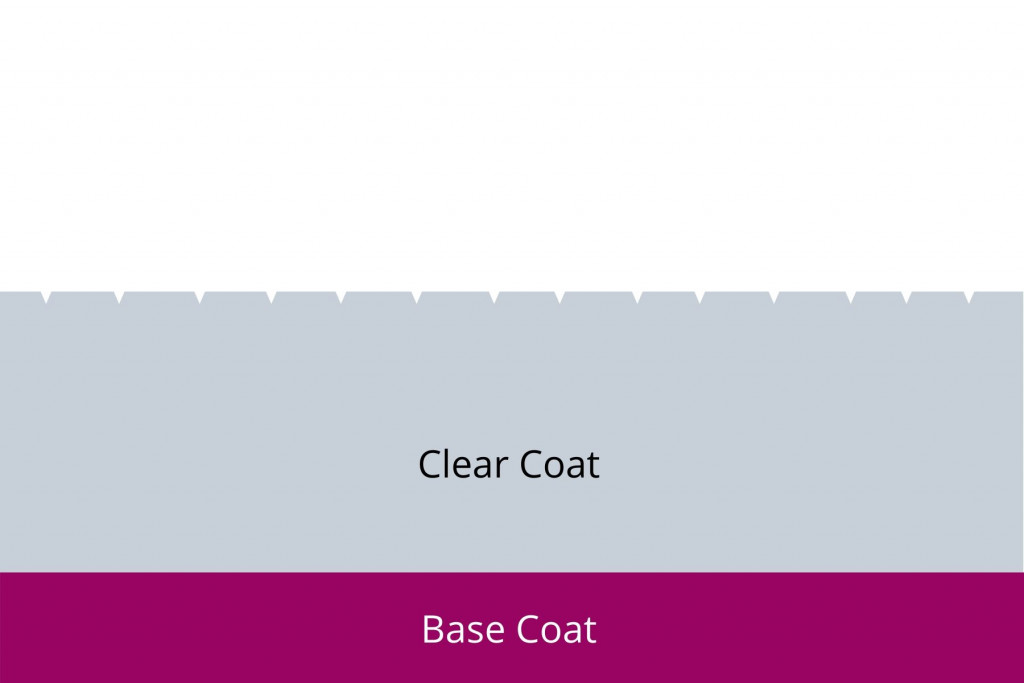
There are two main types of paint correction: polishing and compounding. They both have the same effect, removing a layer of the clear coat. However, compounding is more aggressive.
Compounding cuts the paint away much faster than polishing, hence it’s riskier but more effective at removing the etching.
Compounds and polishes both come in the form of abrasive liquids and can be applied by machine, or hand, using foam or microfiber applicators.
Again, using a machine polisher is more effective. There are two type of machine polisher, dual action (DA) and rotary.
Dual action polishers are far more safe for beginners to try, whilst rotary polishers are usually best left for professionals. Check out this article I’ve written on DA vs rotary polisher machines to learn more.
It’s always best to use a polish first to see if that removes the etching, before using a compound. This helps to preserve the clear coat, which of course is very important to protect the overall finish on your car.
If you need to jump up to using a compound, then you may also need to follow it with a polishing step. This is because compounding often doesn’t leave a complete mirror finish.
Since compounds are more abrasive, they can leave “hazing”, which means the paint isn’t completely refined and glossy, because there are loads of super tiny scratches inflicted by the compound.
A polish is less abrasive, so will remove these tiny scratches to leave a completely flat, shiny surface. Take a look at these diagrams to demonstrate.
Some compounds leave a glossier finish than others though. So inspect the paintwork under a bright light to see if polishing is necessary.
If you’re looking for some polish and compound supplies, then take a look at my recommended paint correction products page to read more about the pads and liquids I use to remove water spot etching and other types of clear coat damage.
What About Using Vinegar?
If you’ve already done a bit of research into water spot removal, then you may have seen vinegar mentioned. However, I would ere on the side of caution when using vinegar.
Do not use vinegar to remove water spots on a car’s paintwork. It will remove all waxes, sealants and coatings, and can corrode the paint. Instead, use a water spot remover, or paintwork cleanser.
Vinegar can be used to remove water spots on glass because it will not be corroded by the acetic acid. You can use vinegar at a push, but a better alternative is a strong glass cleaner, water spot remover spray or clay bar.
That’s why vinegar isn’t on this list of water spot removal techniques. I think it’s a bit old fashioned, and risky. There are far more effective and safer methods to try instead.
Quick Note on Prevention
The old saying is true, prevention is better than cure. There are actually plenty of ways to prevent these water spots completely and eliminate any risk of etching.
So once you’ve removed the water spots, you should take steps to make sure they don’t form again. This is especially important if you’ve used a clay bar, polish or compound to tackle them, because these aggressive methods should only be used when absolutely necessary, not as part of a routine.
One of the easiest ways to prevent water spot damage, is applying a good wax, sealant or ceramic coating to the paint. You can also seal the glass using a water repellent glass cleaner, or a ceramic coating. This will stop the water spots bonding to the actual paintwork, instead they’ll bond to the protective layer. This prevents etching, and makes them far easier to remove.
Check out this article I’ve written on 9 effective ways to prevent water spots to make sure your car is protected.
More Frequently Asked Questions
Don’t worry if you’ve still got a few more questions about water spot removal. Here are the answers to the most common questions car owners ask.
Are water spots permanent?
Water spots themselves are not usually permanent, however they can leave etching which happens when the water spot is left on the paint for a long period of time. Etching can only be removed by removing a layer of the car’s clear coat using polishing or compounding techniques.
Does WD 40 remove water spots?
WD 40 can sometimes remove mild water spots which have not yet caused any etching. However, it’s better to use specifically designed water spot removers, or paintwork cleansers which are often more effective.
Thanks for reading! I hope you’ve found this article helpful. Don’t forget to take a look around the rest of the website to learn more about making your car look its best.
