If you’re looking to polish or compound your car for the first time, you’ll need to make sure you have all the right tools, equipment and products ready to get the best results. In this article, I’ll be going through a complete checklist for polishing your car by machine or by hand. So let’s get started.
The Quick Answer
To polish a car, you’ll need polishing pads, a polishing liquid, microfiber towel, an inspection light, paint depth gauge, and panel wipe solution. For machine polishing, you’ll also need a dual-action or rotary machine polisher, backing plates and low-tack tape to cover the trim.
The exact equipment you’ll need depends on whether you’re planning to polish the car by machine or by hand. So let’s take a look at each option in some more depth.
Unsure if you should machine or hand polish your car? Check out my in-depth comparison between machine and hand polishing to help you decide.
Hand Polishing Checklist
If you’re polishing your car by hand, the good news is that you won’t actually need that much equipment to get started. But keep in mind, that the results won’t usually be as good and you’ll need to work a lot harder to really remove scratches and swirl marks.
What You Need to Hand Polish Your Car
- Polishing compound or liquid
- Pads
- Microfiber cloths
- Inspection Light
- Panel wipe solution
If you want some more detail on the best products, then keep reading to get all the information you’ll need on each product.
Machine Polishing Checklist
Machine polishing is a little more complicated and takes more skills (and equipment), but the results will definitely be better. It’ll definitely cost more to get started with machine polishing, but if you’re serious about removing scratches and swirl marks and want the perfect finish, then this is the best option to go for.
What You Need to Machine Polish Your Car
- Machine polisher (dual-action or rotary)
- Pads
- Backing plates
- Compound or polishing liquid
- Microfiber cloths
- Panel wipe
- Low tack tape
- Inspection light
- Paint depth gauge
Now let’s take a look at each piece of equipment in a bit more detail.
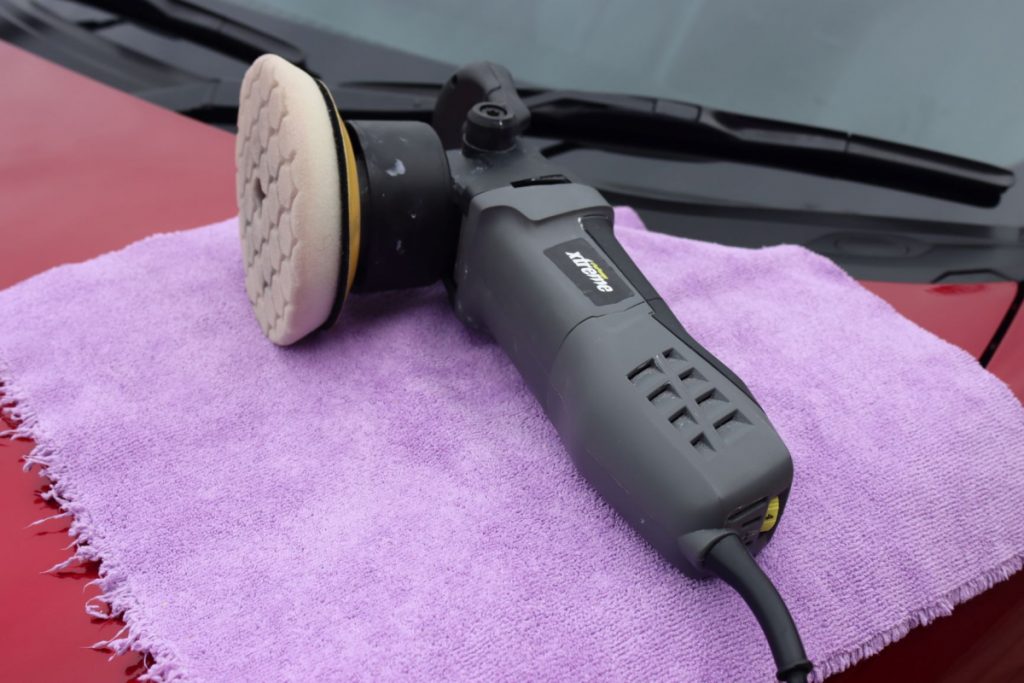
Machine Polisher
There are two main types of machine polisher to decide between: rotary and dual-action.
Rotary polishers are more aggressive and will “cut” away paint faster. This helps them to remove deeper scratches more efficiently. However, rotaries are riskier to use, especially for beginners. It’s much easier to “burn” through the paint and ruin it, than it is with a dual-action.
Dual-action (DA) polishers are safer for beginners because they are less aggressive and cut paint more slowly. This means it takes longer to remove deeper scratches, but the risks of wrecking the paint are far lower.
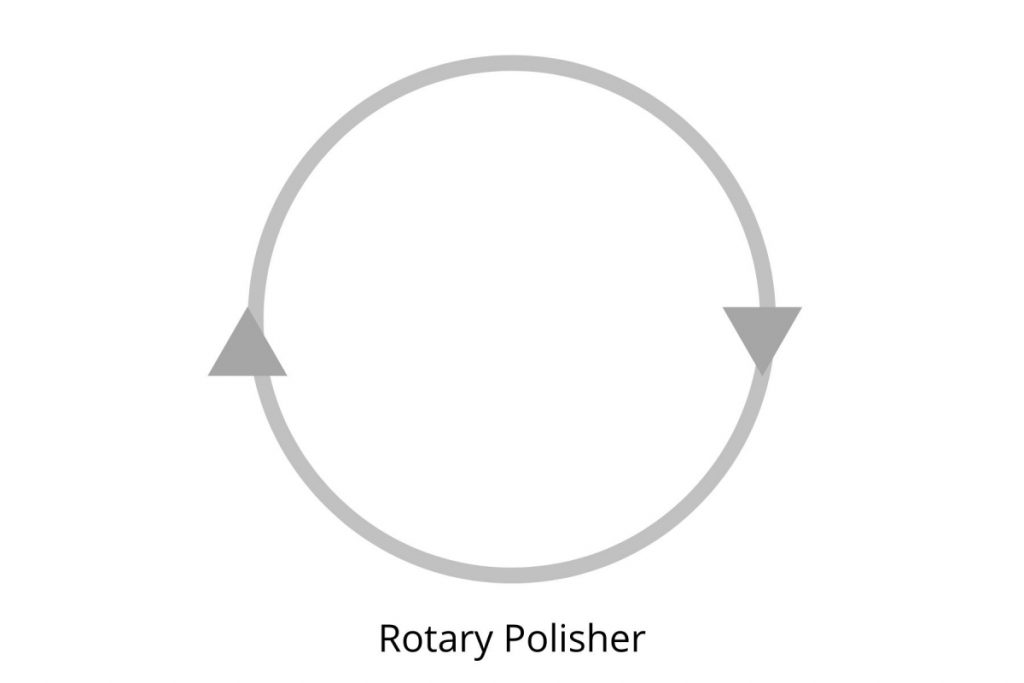
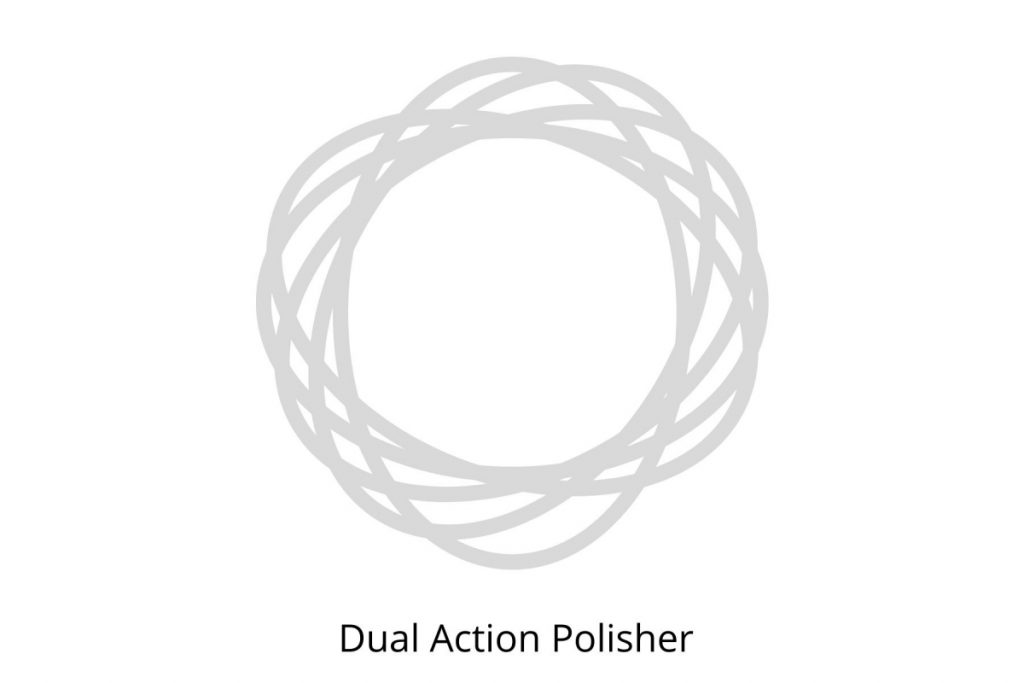
This difference between rotaries and DA’s is caused by the way the pad rotates. With rotaries, the pad rotates in a single, circular motion, which generates more heat and friction to a smaller area. Dual-action polishers rotate in two directions, which helps to spread the friction and heat. Check out this diagram to demonstrate.
If you’re new to machine polishing, dual-action polishers are the best option. They are much safer than rotaries and there’s far less risk of you damaging the paint irreversibly. Plus you can still get a perfect finish, it’ll just take a bit longer.
Take a look at this article on rotary vs dual-action polishers to learn everything you need to know.
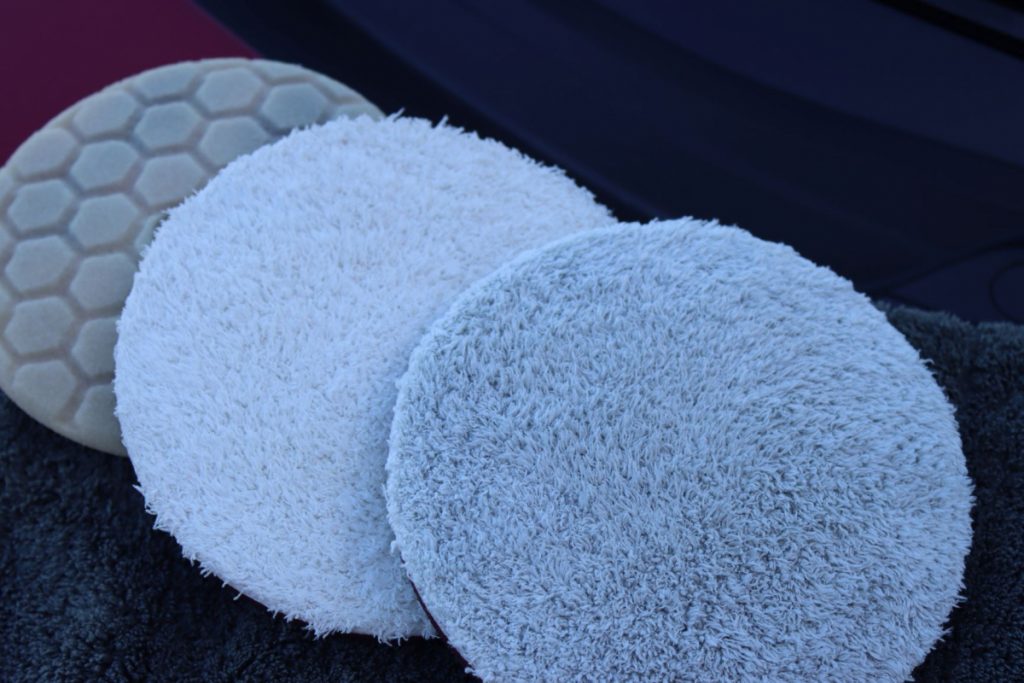
Polishing Pads
You’ll also need to consider which polishing pads to go for. There are three main types: wool, microfiber and foam. Wool can only be used for machine polishing, but microfiber and foam pads can be used for both machine and hand-polishing.
- Wool: this is the most aggressive type of pad because the wool itself is actually quite aggressive. They are typically only recommended for more experienced detailers to remove severe clear coat damage.
- Microfiber: this is the next most aggressive type of polishing pad. The microfiber itself is abrasive, so the cutting power is heavier than foam.
- Foam: this is the least aggressive type. Foam is the best choice to go for when using a finishing polish to refine the paintwork as much as possible.
If you’re a beginner, I recommend choosing foam pads. You can get different types that are designed to be more or less aggressive. So it’s a good idea to choose a “compounding pad” and a “finishing pad” so you’ve got the best of both worlds.
Although they’re a milder choice than microfiber, you can still remove significant levels of clear coat damage, it just will take slightly longer.
If you’ve had a bit of experience with polishing, and you’re struggling to remove scratches with foam, then consider using a microfiber pad. They’re more aggressive, so will remove the paint faster and more efficiently.
Personally, I use a microfiber pad for heavy compounding, and foam pads for polishing and removing light scratches and swirl marks.
Check out my comparison between foam and microfiber machine polishing pads to learn more.
You also need to consider the size of polishing pad. It really depends on what area you’re planning to polish. Most pads normally range from 3″ to 6.5″. Of course, the larger the pad, the less time it’ll take to polish an area, and the slower the pad will clog up with paint. However, large pads make it difficult to polish pillars and smaller areas on the car.
I recommend getting two sizes: one that’s between 3″-4″ and another that’s between 5″-6″. This way you’ll be able to polish all the areas on your car easily.
It’s also a good idea to get a few pads so you’re not using clogged up pads on your car. Clogged up pads makes polishing take longer, and yields better results. Normally you’ll need around 2-3 pads to cover an entire car.
Take-Home Points
- Beginners should choose foam pads, they’re versatile, come in different levels of “cut” and are the least likely to cause marring or scratches.
- Wool pads are very aggressive, whilst microfiber pads are somewhere in between foam and wool.
- Choose at least two types of pad: one for compounding and one for polishing.
- Make sure you have at least two different pad sizes so you can access each area of the car safely.
- You’ll need around 2-3 pads to cover an entire vehicle.
- Microfiber and foam work best for hand polishing.
If you want to know which polishing pads I use, then take a look at my recommended paint correction products page.
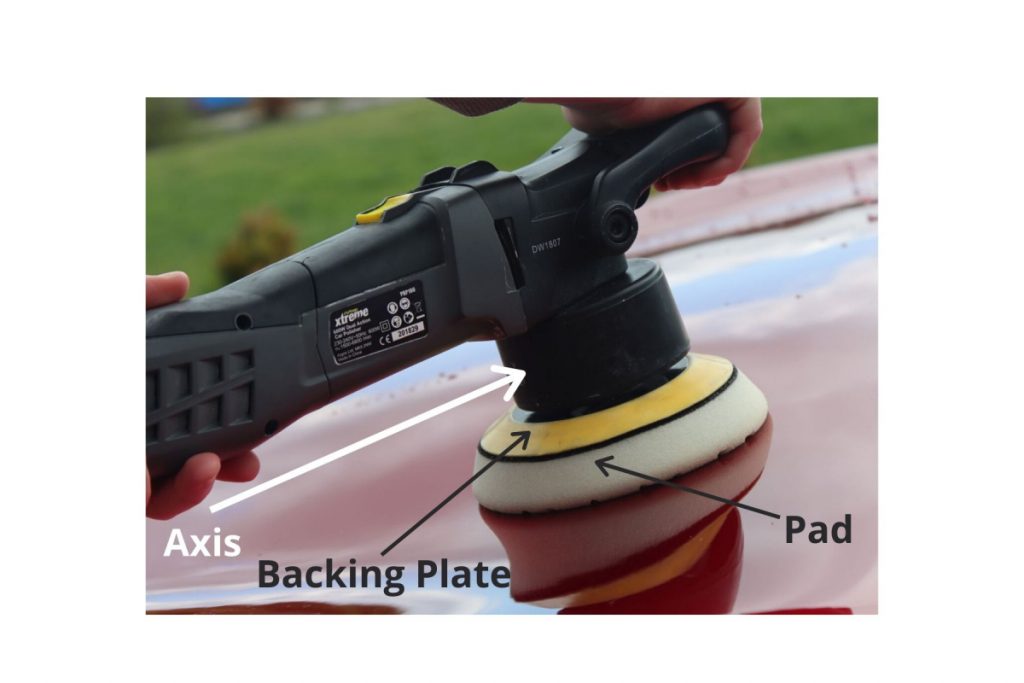
Backing Plates
You’ll only need backing plates if you’re planning to machine polish your car, and not if you’re just hand polishing. Backing plates are designed to join the polishing pad and machine polisher together.
Normally, machine polishers come with at least one backing plate. But you’ll need to make sure it’s the correct size. They can be easily screwed onto the machine polisher and unscrewed so you can use different sized pads.
Choose a backing plate that’s around 0.5″ to 1″ smaller than the polishing pad. This allows the pad to overlap the backing plate so you don’t scrape the paintwork with the backing plate.
Here’s a quick guide to the compatibility of pads and backing plates.
- 6.5 inch pads and 5.5-6 inch backing plates
- 5.5 inch pads and 4.5-5 inch backing plates
- 3.5 inch pads and 2.5-3 inch backing plates
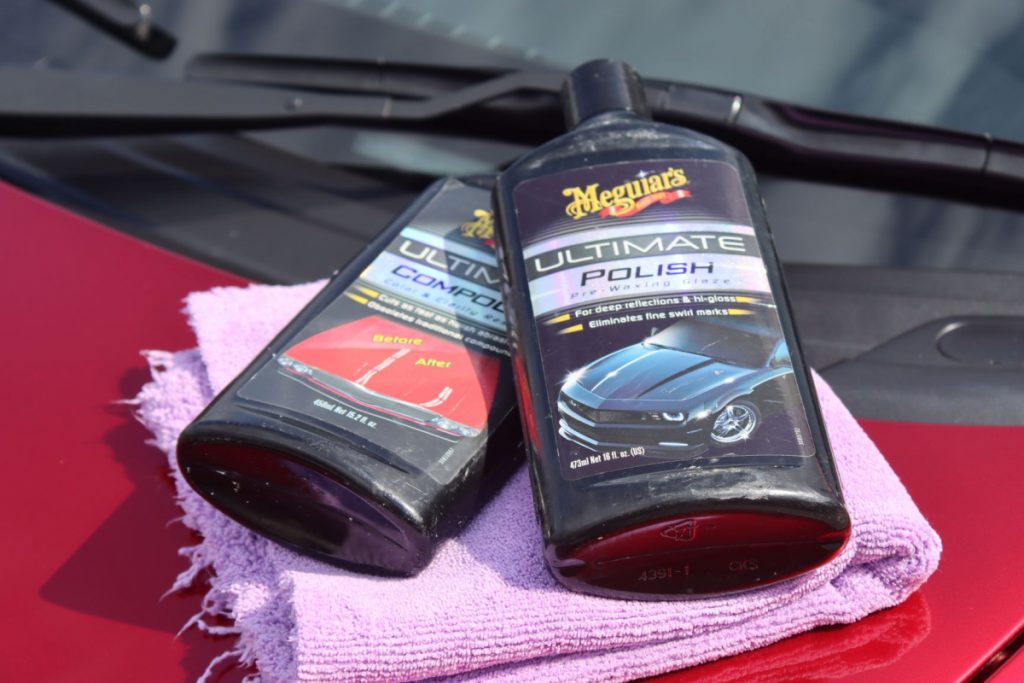
Compound or Polish Liquid
There are many different “polishes” and “compounds” on the market, and it can be really hard to choose the best option. So here’s a quick guide to the different choices and where they will work best.
- Heavy cutting compounds: these contain larger abrasive particles so cut the paint faster to remove deeper scratches. However they can leave behind some micro-scratches themselves.
- Medium cutting compounds: these are quite aggressive and will remove fairly deep scratches but not quite as much as heavy cutting compounds. They do leave fewer micro-scratches behind though.
- Mild cutting compounds/polishes or all-in-one’s: these will remove lighter scratches and swirls and typically a more refined finish.
- Finishing: these will not remove deep scratches and swirls but will refine the paintwork to a mirror finish by removing the micro-scratches left behind by compounds.
Things can get a bit complicated because what may be classed as a “mild cutting compound” by one brand, may be considered a “medium cutting compound” by another.
Most brands have a range of polishing and compounding liquids, so choosing products within the range can keep things a bit more straight-forward.
If you’re brand new to machine polishing, then selecting an single-step product is a good choice because you’ll be able to remove moderate scratches fairly easily, whilst still refining the finish to a good level of gloss.
If you choose a compound and a polish, the process of course will take double to time and you’ll need to buy more products. However, this usually yields the most professional results. If you choose this route, then go for a medium-heavy cut compound, and a finishing polish to use afterwards to refine the paintwork.
It’s always best to choose the least aggressive product, to avoid unnecessarily grinding more paint away. Clear coat preservation is key when it comes to paint correction.
Take a look at this complete guide to polishing vs compounding to learn everything you need to know about this topic.
Also, take a look at my recommending paint correction products to find out more about which polishes and compounds I use.
Microfiber Cloths
Whether you’re machine polishing or hand polishing your car, you’ll need plenty of microfiber cloths. I recommend having at least 3 microfiber cloths, here’s why.
- To wipe away the polish or compound off the paintwork.
- To wipe the pad with after you’ve polished a section to remove paint residue and prevent the pad clogging up.
- To remove the polishing oils with a panel wipe/ IPA solution.
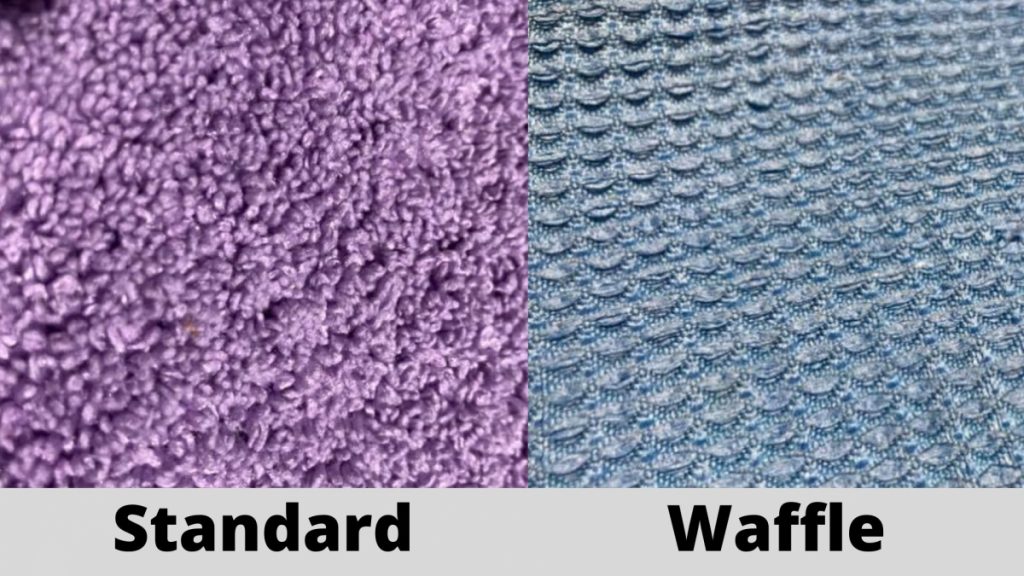
Any microfiber cloths that you use on the paintwork should be clean (preferably brand new), soft and plush. This the safest type to use on the paint to avoid scratches and swirl marks. Avoid using waffle-weave microfiber and stick to standard weave.
If you’re wiping down the polishing pad between sections, then use something less plush and soft, to prevent fibers getting stuck in the pad. Waffle weave is a good option to go for when cleaning the pad as it doesn’t leave fibers behind and will pick up a lot of the residue on the pad.
It’s a very good idea to inspect your microfiber towels before you use them to make sure they’re free from any dust or debris. Also, don’t forget to pull off the tags as they are a big cause of scratches!
Panel Wipe Solution
Polishes and compounds leave behind oils which actually disguise minor scratches and swirls, making the paintwork look glossier. This may seem like a good thing but it’s an issue for two reasons.
- These oils hide the true finish, so it’s difficult to tell if the scratches have actually been removed or just masked.
- The oily residue will reduce the durability of the sealant or wax applied afterwards.
So it’s a good idea to remove these polishing oils so you can properly inspect the paintwork, and make sure it’s actually clean.
Isopropyl alcohol mixtures (usually around 1:1 ratio with water) are often recommended to use to wipe down the paint after polishing to remove these oils. They are sometimes very effective, and other times, they don’t work that well. It really depends on the polish or compound you’ve used.
The best way to check if the oils have actually been removed or not, is to run some water over the paint. If the water is sheeted away, or beads up, then the oils are still present.
Most detailing brands offer a “panel wipe solution” which often comes in a spray format. These tend to be more effective, especially if you choose one from the same brand as the polish or compound you’re also using.
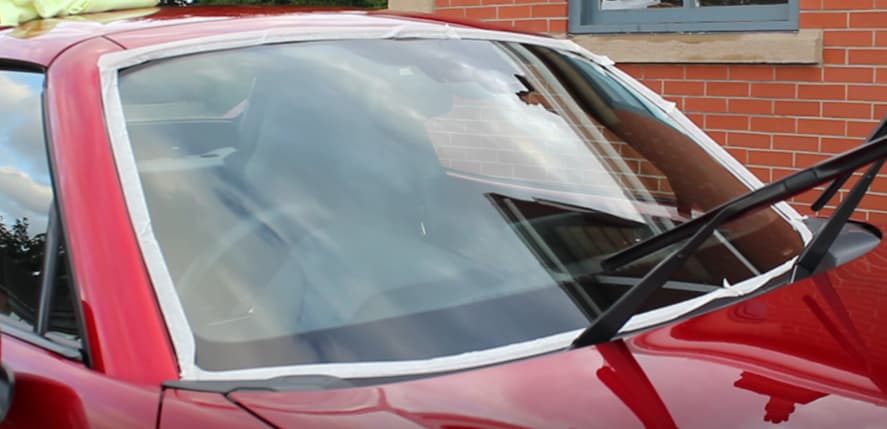
Low Tack Tape
If you’re machine polishing your car, then you’ll need to tape up all the trim around the windows and other areas of the car. Here’s why.
If the machine polisher touches the trim when its rotating, then bits of the plastic or rubber will be removed and get stuck in the pad. This causes two issues. 1. It damages the trim. 2. The residue in the pad will scratch the paintwork.
This can be easily avoided by using a low-tack tape on any plastic, metal or rubber areas of the car to shield them. Don’t worry, it won’t get stuck on or leave any residue. As long as you use something low-tack and don’t keep it on for longer than a few hours, especially in higher temperatures.
Inspection Light
It’s never a good idea to blindly polish or compound the paintwork without inspecting it properly. You should inspect the paintwork before starting, during passes and afterwards to see if the scratches have been removed.
There are plenty of high-quality and very bright detailing inspection lights available, but most of the time, a good LED torch, or even the torch on a smart phone is sufficient. So don’t feel like you absolutely have to splash out on a really expensive inspection light.
But it’s definitely not wise to avoid using an inspection light, or you’ll usually be left with sub-par results.
Paint Depth Gauge
If you want to polish or compound you car safely, and make sure that you don’t burn through the paintwork or remove too much clear coat, then you should invest in a paint depth gauge. This is pretty much a necessity if you’re machine polishing your vehicle.
They’re a pretty simple, portable device that’s used to measure the distance between the top of the paintwork, and the metal underneath. They help you understand how much paint you have to work with, and whether it is actually safe to polish the vehicle or not.
Whether they’re a necessity or luxury is a bit of debate. But you’ll definitely regret not getting one if you burn through your paintwork!
Most are around $150, but can range up to several thousands. However you can pick them up very cheaply online for $80 or less and they’ll do the job for most DIY detailers.
Preparing to Polish
So now you’v got all your gear together, you need to start preparing to polish! If you want a complete guide to make sure you’ve not missed any steps to get the best results, then take a look at my in-depth article.
Check out this guide to preparing a car before polishing to make sure you get professional level results.
Thanks for reading! I hope you’ve found this article useful. Don’t forget to check out the rest of the website to learn everything you need to know about car detailing!
