Detailing a brand new car is essential to keep it looking new for years to come. It’s definitely possible to get professional level results, by detailing the car yourself at home too.
In this article, I’ll be going through the 12 steps to detail your brand new car at home so it looks flawless and stays protected. So let’s get started.
12 Steps to Detail a New Car
- Perform a safe wash.
- Chemical decontamination using an iron fallout remover and tar remover.
- Physical decontamination using clay.
- Assess the paint condition.
- Compound, polish or glaze if necessary.
- Apply paint protection (wax, sealant or ceramic coating).
- Apply a tire and trim dressing.
- Protect the alloys using a coating or wax.
- Clean and seal the glass.
- Clean all the interior surfaces.
- Apply a fabric or leather sealant.
- Protect the dashboard.
Now let’s go through each of these 12 steps in a bit more detail.
Step 1: Perform a Safe Wash
The first thing you need to do when you get your brand new vehicle back at home, is wash it. Most new cars will have been stored outside for fairly long periods, and have been test driven a few times.
It’s important to wash the car as soon as possible to stop contaminants bonding to the paintwork because it won’t have any layer of protection on the clear coat at this point.
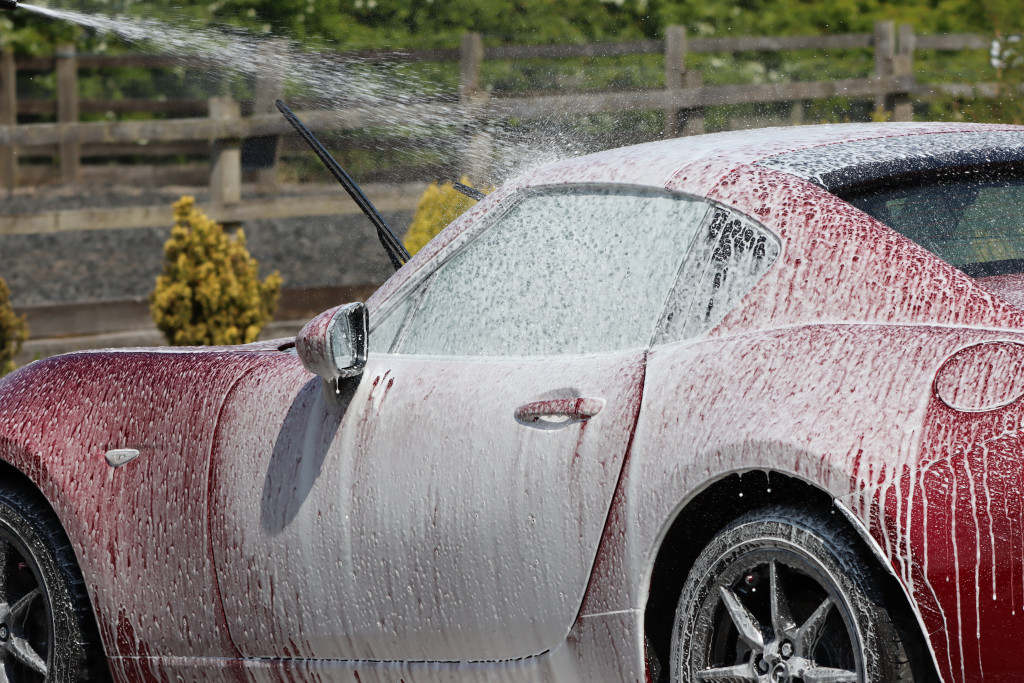
Start things off right by doing a full, safe wash to prevent instilling any swirl marks of scratches in the paintwork. Here’s how to safely wash your new vehicle.
- Rinse the car using a pressure washer with a fan, setting around 1-2 meters away from the paintwork to remove as much loose dirt as possible.
- Apply a snow foam or pre-wash spray to the exterior, let it dwell according to the manufacturer’s instructions and rinse off using a pressure washer.
- Prepare your wash buckets with car shampoo (without wax), one for the wheels and one for the paint.
- Clean the wheels using a soft microfiber wash mitt or soft bristle brush and clean the wheel barrels using an alloy brush, then rinse.
- Wash the paintwork from top to bottom using a microfiber wash mitt. Keep checking the mitt for dirt and rinse using the pressure washer periodically.
- Rinse the car down again using the pressure washer.
If you want a more detailed explanation of how to clean your car without scratching the paint then check out the complete article I’ve written on the topic for a step-by-step guide with common mistakes and useful tips.
Step 2: Chemical Decontamination
The next thing you need to do, is perform a full chemical decontamination. Most new cars will have travelled to the dealership by train, which means they are often subjected to heavy iron fallout contamination.
This should be removed as soon as possible to protect the clear coat.
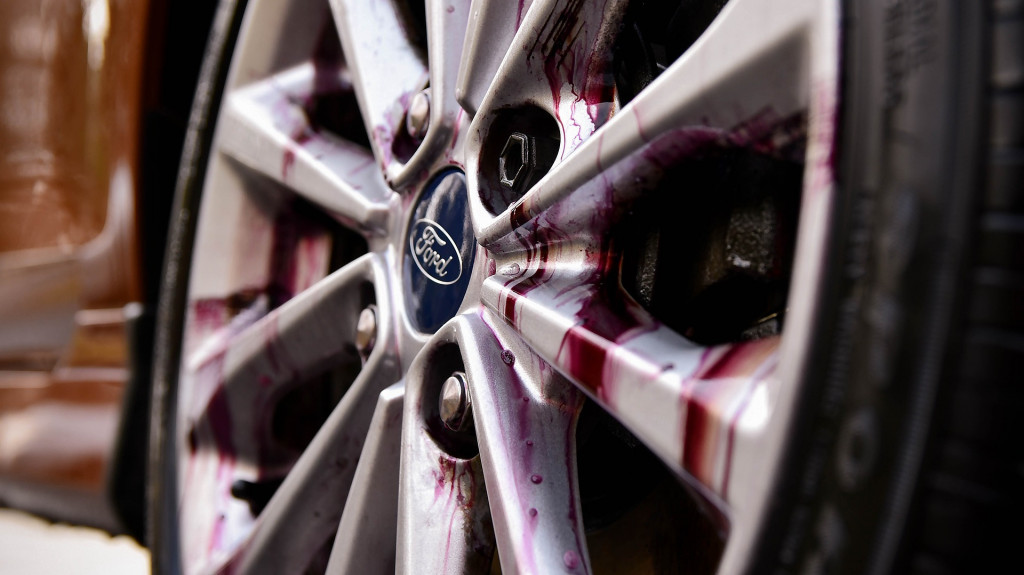
You can do this using an iron fallout remover spray. Here’s how.
- Spray the iron fallout remover onto the surface.
- Let it dwell for a couple of minutes (you’ll see purple/red spots where the spray is reacting with the iron particles).
- Rinse thoroughly using a pressure washer.
It’s important not to skip the chemical decontamination step and just jump to the physical decontamination, because removing as much contamination as possible before using clay will reduce the risk of swirls and marring in the clear coat.
You may also need to use a tar remover if you notice any tar spots. However, the vehicle may not have any if it hasn’t done many miles.
Check out these articles to learn more:
Step 3: Physical Decontamination
Once you’ve removed the iron fallout, you should tackle the rest of the contamination on your vehicle using clay.
A lot of brand new car owners make the mistake of thinking that new cars will be contaminant free, because they aren’t old enough to have bonded contaminants.
However, this is almost always not the case. New cars are very susceptible to contamination because they don’t have any protection applied. They’re also often stored outside and have travelled thousands of miles to get to your driveway.
You can check to see if your car has bonded contaminants by touching the freshly washed paint and glass. If it feels rough, you’ll need to use clay to remove these bound contaminants.
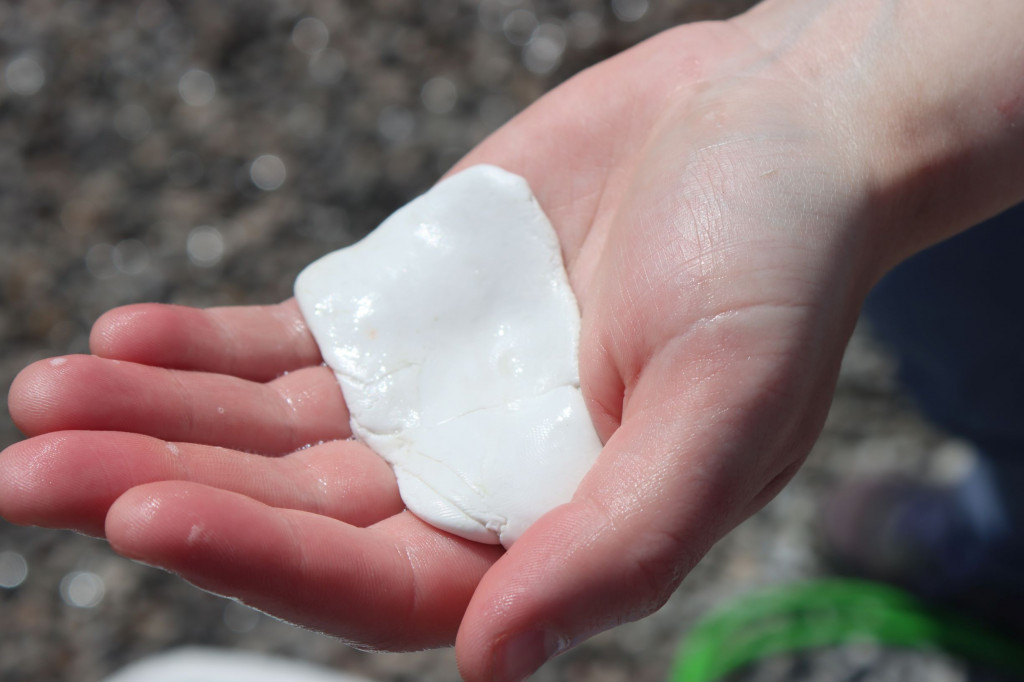
You can either use a clay bar, clay mitt or clay cloth. Personally, I prefer clay bars because you don’t have to reuse the same area and can keep folding it to prevent scratches and swirls.
You should always be careful when using clay, because it is an abrasive substance.
I always recommend using a soft-grade clay, because this is the least likely to damage the paintwork. However, it’s worth noting that clay will almost always cause some swirling or marring. This can either be removed by polishing or covered using a glaze (there’s more detail on these steps later on).
Here’s a quick guide to using clay as safely as possible to remove any contamination on your brand new vehicle.
- Cover the panel with car shampoo and water using the wash mitt(always use a fresh bucket, not the same one as you washed the car with).
- Knead the clay until it is soft and flat.
- Dip the clay in the wash bucket.
- Glide the clay across the panel in straight lines with minimal pressure.
- Keep checking the clay for contamination, if you see any, fold it to expose a fresh, clean side.
- Rinse the area thoroughly and dry using a plush, clean microfiber towel.
- Never drop the clay on the floor. If you do, then grab a new piece.
Make sure you check out my complete guide to claying to learn some essential tips to make the process safer and more effective.
Step 4: Assess the Paint Condition
The next step, is to assess the condition of the paintwork for scratches and swirl marks. Often, most new car owners expect the paint condition on their new pride and joy to be flawless, however, this is rarely the case.
Often, dealerships wash the car using sponges and brushes which causes all kind of damage to your car’s clear coat.
If you’ve not picked your car up yet, then tell the dealership not to wash it before you arrive. It’s always better to wash the car yourself to make sure you’re doing it safely.
When I bought my brand new MX-5 I was pretty horrified at the state of the paintwork. It looked as if it had been washed with a super gritty sponge or brush, and there were loads of ugly scratches and swirls.

You may be lucky, and notice that your car doesn’t have any of these swirls or scratches, or they may be confined to a small area or panel.
The best way to check for clear coat damage, is under bright lighting in a garage, or in direct sunlight.
If you can’t get either, then wait until it’s dark and use a torch to scan the paint and see if there are any swirls or scratches that need tackling.
Step 5: Correct the Paint
If you see any swirls or scratches in the clear coat, then you may want to correct the paintwork. It’s really up to you whether you want to perform this step. It’s not essential unless you want super glossy flawless looking paint.
There are two options you can go for to achieve this.
- Removing a layer of clear coat to permanently remove the scratches (polishing or compounding)
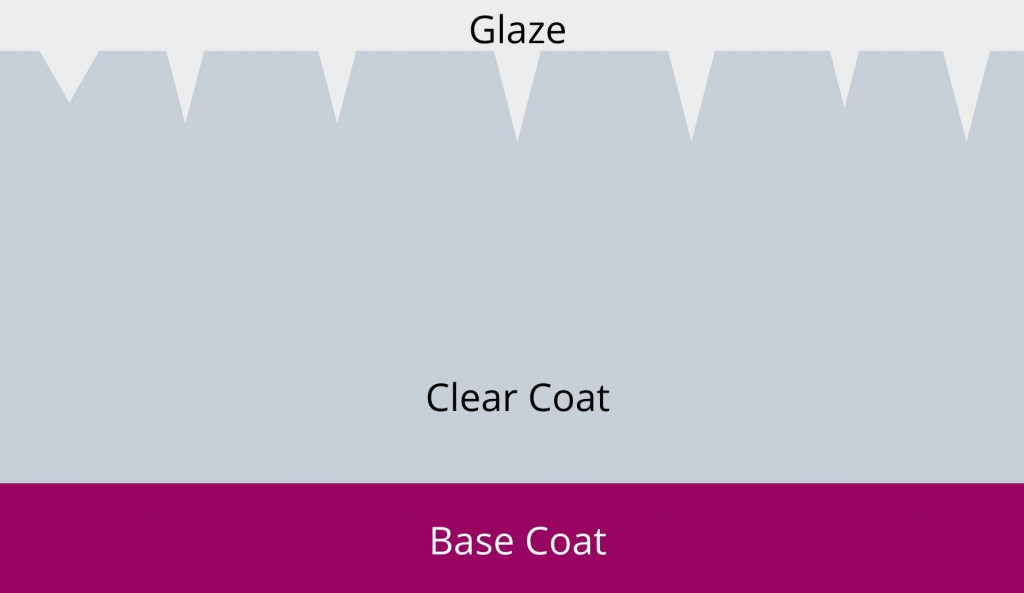
- Hiding the scratches and swirl marks temporarily (glazing)
I’ve written a full article on the pros and cons of polishing and glazing, so check it out if you want some more information.
To permanently remove the scratches, you need to flatten the clear coat again. This involves removing a layer of paint using either polishing or compounding techniques.
Check out this diagram.
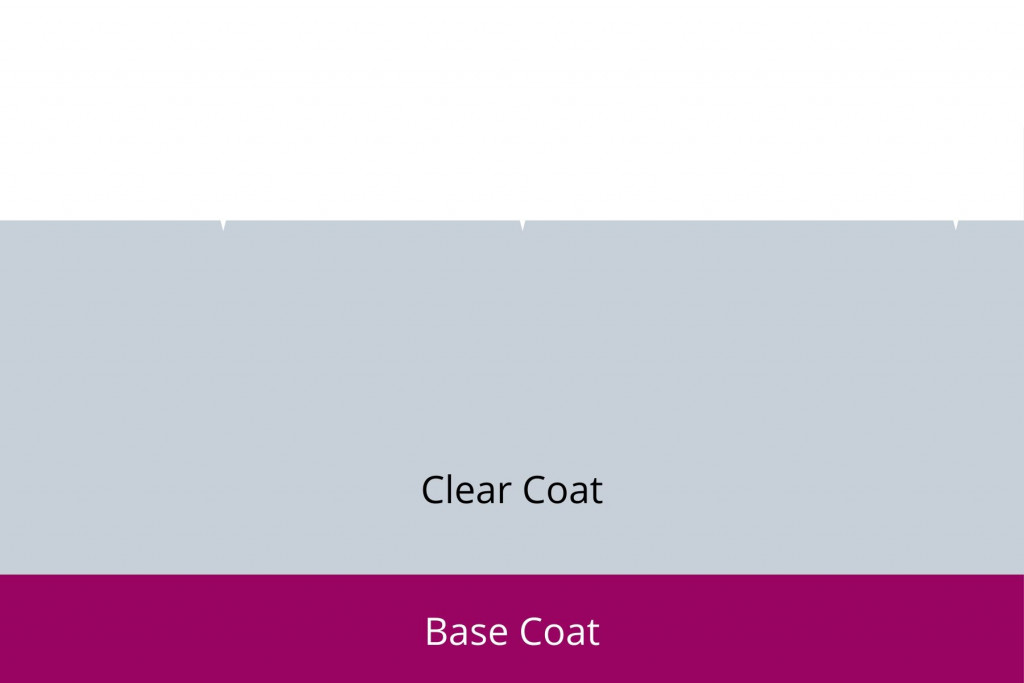
Removing a layer of clear coat will reveal flawless looking paint, however there are some things to keep in mind.
The clear coat is designed to protect the base coat (the colour) from fading, UV rays, corrosion etc. You can only polish it a certain number of times before you run out of paint. If you keep polishing or compounding, then you won’t be left with any clear coat.
There are two techniques designed to do this: polishing and compounding. Polishing is less aggressive and refines the clear coat to make it look glossier, whereas compounding removes more severe scratches and swirl marks.
Check out this article I’ve written on compounding vs polishing to find out everything you need to know.
Keep in mind that paint correction using polishes or compounds, requires a level of skill. It’s definitely something that’s possible to do on your own at home, but you need to know exactly what you’re doing because the results are permanent.
Take a look at this article I’ve written that discusses the risks of machine polishing to learn more.
If you don’t feel comfortable removing a layer of clear coat to tackle the damage, then you can use a glaze instead.
They don’t remove the scratches, but instead they contain fillers which mask it. This gives the illusion of flawless looking paint, but without actually removing any clear coat.
However, glazing is temporary and only deals with quite superficial damage.
I won’t go into too much more detail here, but check out the article on glazing vs polishing if you’re torn between these methods.
If you’re interested in any of these techniques, then take a look at my recommended paint correction products to see what I use.
Step 6: Apply Paint Protection
This step is certainly not optional. You need to make sure your brand new car has some protection to keep it looking shiny and new for years to come.
Here are some of the main reasons why paint protection is so vital.
- It protects the clear coat which in effect protects the colour underneath from corrosion and fading.
- The wash process is easier, faster and safer (less likely to cause scratches).
- It makes it less likely for contaminants to bond to the paint.
- You’ll get glossier and shinier paintwork.
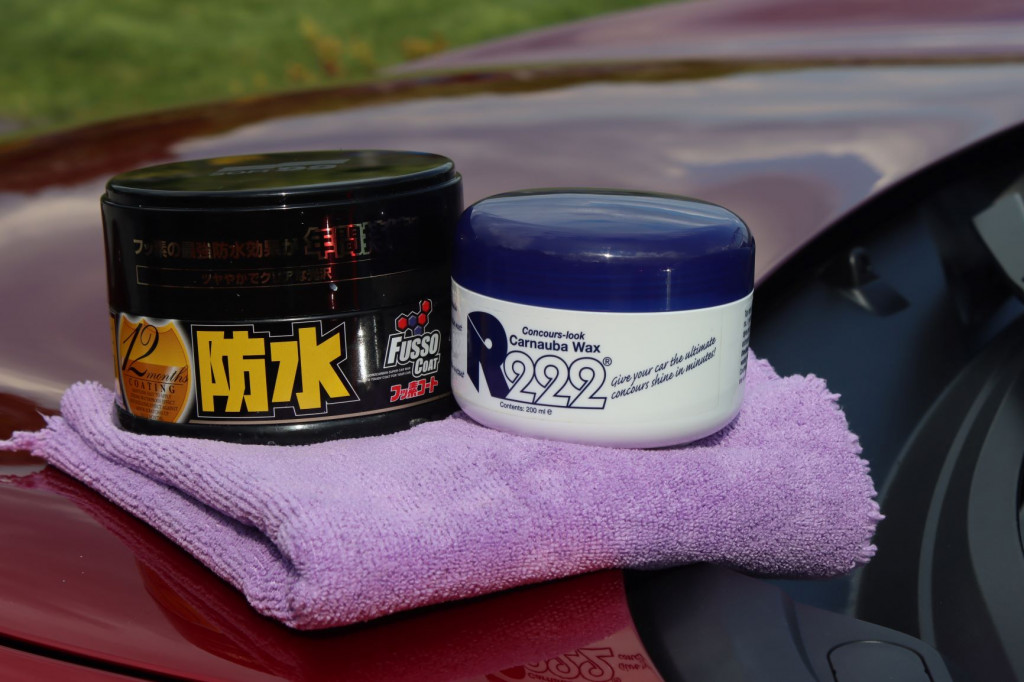
Paint protection comes in three main forms: ceramic coatings, sealants and waxes. Here’s a quick summary of each.
- Waxes are the easiest to apply, and usually come in a paste format. However they have fairly low durability so only last around 1-3 months before they need to be reapplied.
- Sealants are more durable and last for 6-12 months. They are easy to apply, but cannot be used over glazes because they won’t bond to the paint properly.
- Ceramic coatings are the most complicated to apply at home and require certain conditions. You also cannot apply them over glazes. However, ceramic coatings usually last between 2-5 years.
It’s up to you which product best suits your needs and how complicated you want the application process to be.
Personally, I prefer waxes and sealants because they are easier to use. I don’t mind that the durability is less, because I enjoy trying out new products!
Take a look at my recommended paint protection products page to see what products I use when I detail a car.
Step 7: Apply a Tire and Trim Dressing
If you want to keep your brand new vehicle looking fresh, then apply a tire and trim dressing.
This serves two purposes:
- It keeps the car looking clean and new.
- It protects the trim and rubber from fading and dirt.
Tire and trim dressings are often forgotten. But I personally think that fading rubber seals and black plastic as well as browning tires, completely ruin the look of an otherwise flawless finish.
If you’re really serious about keeping your vehicle looking brand new, then don’t skip this step and wait for the fading to occur before you apply a dressing. Instead, prevent the ageing process all together.
You can apply a tire dressing using a soft foam applicator or a brush to evenly coat the wheels. I really like Garage Therapy Tyre Serum because it doesn’t look too gloss and over the top (detracting from the paint), and it’s very durable.
It gives the tyres a dark finish, and protects the rubber trim without being overbearing.
I also use it to protect the rubber seals on my car too. Be careful when you’re applying it, not to let it drip on to the paint. It won’t cause any damage, but it can cause a sticky mess that’s annoying to deal with.
Use a microfiber cloth to wipe up any spillages straight away, and take your time when applying it.
Step 8: Protect the Alloys
It’s also wise to protect the alloys on your brand new vehicle, particularly if you’ve got painted or diamond cut alloys because they can be susceptible to corrosion if not properly cared for and protected.
There are two main products that you can use to protect your alloys:
- Ceramic coating
- Paste wax or sealant
- Spray sealant
You can use the same sealant or wax you applied to the paintwork to protect your alloys. Just make sure to use a new applicator for the wheels because you don’t want to ever transfer it back to the paint and cause cross contamination.
Sealants tend to be better because they are more durable. Waxes tend to have a fairly short lifespan on the wheels.
Ceramic coatings offer the most durable protection, but you’ll need to properly decontaminate the wheels first before applying one.
My favourite way of protecting the alloys quickly is to use a spray sealant. I use GYEON Wetcoat for this. You spray it on the alloy when it’s wet, then immediately power wash it away and it leaves a very hydrophobic coating behind that lasts a couple of months.
It’s the easiest and fastest way to provide your alloys with a good layer of protection without any mess. Then you can just dry the alloys using a microfiber towel or car dryer.
Step 9: Clean and Coat the Glass
This is another area of the car that most people forget to protect. You should always keep the glass squeaky clean to improve the visibility when driving. It’s the most important step of detailing because it makes driving safer.
Applying a sealant is also crucial for several reasons.
- It makes cleaning the windows easier.
- Sealants/ coatings are hydrophobic so water beads of the glass when you’re driving in the rain to improve visibility.
- It prevents contaminants binding to the glass, and stops those ugly white streaks from appearing.
Again, there are a few of options for this. You can use a ceramic coating, which is the most durable form of protection or you can use a sealant like RainX to apply a hydrophobic coating to the glass.
My favourite options are Soft99 Ultra Glaco and Pyramid Car Care Carbon Glass Coating which both provide around 12 months of protection.
Step 10: Clean the Interior
Most new cars will have pretty spotless interiors which show minimal signs of use. However, there will usually be a bit of light dust, dirt on the mats and carpet, and finger prints dotted about.
In the next few steps, I’ll be talking about protecting the interior. But before we do this, we need to ensure it’s spotless.
Here’s a quick guide to how I cleaned my new car’s interior when I got it back home.
- Take all the mats out.
- Hoover the interior and mats.
- Use a damp microfiber towel and mild all-purpose cleaner to wipe down all the surfaces (except any leather).
- Use a soft bristle brush to clean any difficult to reach areas.
- Use a mild leather cleaner to clean any leather seats and steering wheel.
- Wipe down again using a damp microfiber cloth.
- Use a glass cleaner on the interior windows and windshield.
It’s pretty simple and should only take you around 20 minutes to clean the interior properly on a new car. Then we can move onto the protection steps.
Step 11: Apply a Fabric or Leather Sealant
I really recommend applying a sealant to all the fabrics and leather in your car’s interior because it protects it from the following:
- Dirt and grease
- Spillages
- Dye transfer from clothing
- Fading, drying out and cracking
It also makes the cleaning process much easier and faster in the future.
Personally, I use the Leather Repair Company LRC4 Protection Cream.
Then I protect the fabric (mats and carpet) using Gtechniq I1 Smart Fabric. It’s antimicrobial and protects the fabric from spillages and stains. Plus I found that it can last upwards of 6 months, so long as you keep the interior well cleaned and maintained.
Step 12: Protect the Dashboard
The dash is often the first part of the interior to start looking worn out and old. This is because it’s exposed to the UV rays constantly, so it’s prone to fading.
If you want to keep your brand new interior looking fresh for years to come, then use a dashboard sealant to prevent it from fading and protect it from spillages, dirt and grease.
You’ll only need to top it up every 4-6 months or so, and it can keep your car’s interior looking brand new for years to come. I personally use Gtechniq C6 Matte Dash because I prefer the interior to have a matte look, rather than a glossy finish.
Why Is Detailing a Brand New Car Necessary?
Detailing a brand new car and protecting it, can be a lengthy process, but it’s definitely worth it if you want your vehicle to stay looking new. I’ve written a full article on the 6 reasons why you should detail a new car so check it out if you want to learn more.
Is a “DIY Detail” as Good as a Professional Detail?
This is another question new car owners ask. Will detailing a car at home be as effective as getting a professional detail?
Personally, I detailed my brand new car myself because it was more cost effective and I enjoy the process.
It’s definitely possible to get the same results as a professional detail but it does require some time, knowledge and experience.
How Soon Should You Detail a New Car?
You should detail a brand new car as soon as possible to make sure it’s protected. If you are detailing the car yourself, try and get it done as soon as you get the car home, or at least within the first couple of days before you do much driving.
How Long Does It Take To Detail a Brand New Car?
It will usually take around 4 hours to detail a brand new car that doesn’t require any paint correction. If you need to correct the paint (compound or polish), this will add several more hours to the process.
Take a look at this article I’ve written on how long it takes to detail a car to see a breakdown of each step and a time estimate for each stage of the process.
Thanks for reading! I hope you’ve found this article helpful. Don’t forget to check out the rest of the blog to learn more about detailing your brand new vehicle.
