If you want your car’s interior to look brand new again, and stay that way, then you’ll need to get to grips with interior detailing. This is the process of cleaning and protecting the inside of your car to keep it in the best condition possible.
In this article, I’ll take you through a complete guide to caring for your car’s interior, and making it look like it’s never been driven. So let’s get started!
The Quick Answer
To make a car’s interior look brand-new, all the surfaces need to be deep cleaned and protected. The plastics can be cleaned using an all-purpose cleaner, leather can be cleaned using a dedicated leather cleaner and fabric seats, carpets and mats should be cleaned using a wet vac.
Here are some of the best interior detailing tips:
- Use a soft brush to remove dust from crevices and air vents.
- Use a short-pile microfiber towel to wipe the interior, not a soft plush towel or terry cloth which can leave fibres behind.
- Deep clean the steering wheel using a leather cleaner to restore the matte look.
- Use a wet-vac to deep clean fabrics.
- Do not apply a dressing to the steering wheel, gear box or pedals as it makes the surfaces slippy.
- Apply an air freshener to the carpets so you don’t leave a sticky residue on the dashboard or seats.
- Use matte-effect dashboard and leather dressings to make the car look newer rather than glossy-effect.
- Apply a sealant to new leather, not a conditioner, unless the leather is uncoated.
- Clean the windscreen from the passenger side for better access.
- Use waffle-weave microfiber on the glass to avoid streaking and fibre residue.
These tips will definitely help, but if you want the best results, you need to learn the full interior detailing process.
Looking for some of the best products to keep your car’s interior fresh? Make sure you check out my recommended products page for all my current top picks.
What Makes and Interior Look Brand New?
So even if you keep your car’s interior relatively clean, it can still start to look old and tired over time. So what causes this?
Generally, it’s due to the details being neglected, and the surfaces not being adequately protected. Over time, with frequent driving, the following things can happen to the car’s interior if it’s not properly cared for.
- Build up of dust in crevices and vents
- Fading of interior plastics, fabrics and leather
- Shiny-looking steering wheel
- Faded and worn looking mats
- Light patches of staining on fabric seats
- Scuffs and scratches on piano black trim and other surfaces
These details are often neglected, and even if the car looks clean, then these details can be what causes the car’s interior to still look old and tired.
Deep Cleaning and Protecting
In order to transform a car’s interior and make it look brand new again, you need to focus on three things: cleaning and protecting.
Of course, the vehicle won’t look new unless it has been deep cleaned to remove all possible signs that the car has ever been sat in. This is the most basic step, and it won’t get you the whole way there.
Then, you need to protect the interior. This refers to the plastics, leather and fabrics. Applying some form of sealant or dressing really helps to prevent fading and stops the interior from looking tired and neglected over time.
Now, I’ll break this process down by discussing the different areas of a car’s interior, and how they can be cleaned and protected to make them look brand new again.
I’ve also created a downloadable checklist for interior detailing if you want to print it off so you can keep on track when transforming your car’s interior.
Vacuuming
The first port of call for any interior deep clean, is vacuuming. It’s super important not to neglect this step and do a so-so job, because it really makes the rest of the deep clean process a lot more difficult.
Of course, things are made a lot easier if you’re using a cordless hoover (vacuum), but it’s still easy to do if you are using a wired vacuum, you’ll probably just need an extension cable as well.
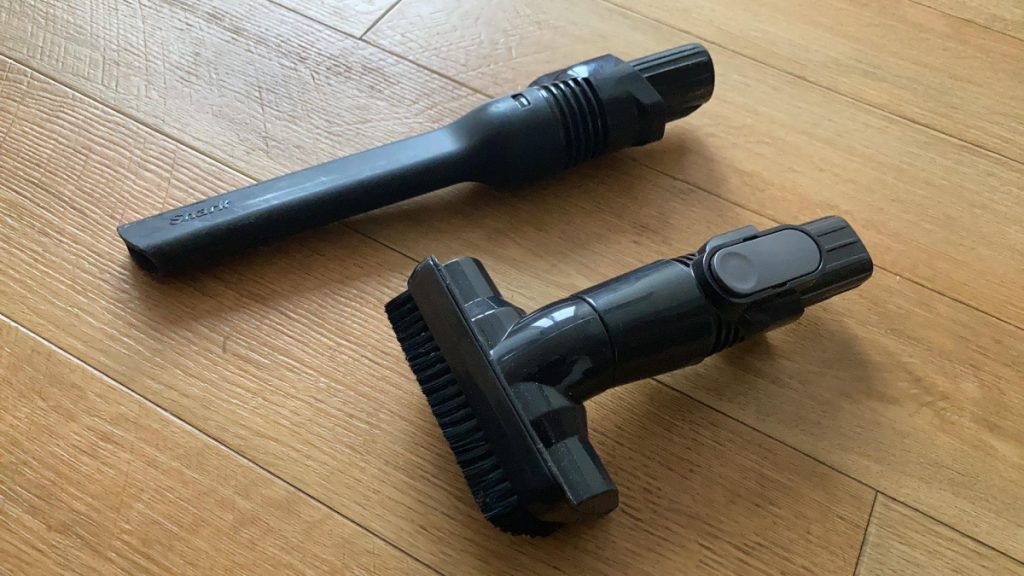
You’ll need to two types of attachent:
- Crevice
- Brush
The crevice attachment is very useful for accessing difficult to reach areas on and around the seats, as well as the corners of the dashboard and carpet. Just be careful when using a crevice attachment on plastic trim, as it can cause scratches since it’s made of plastic.
The brush attachment is super useful for carpets and mats of course, as well as cloth seats. However, it’s also really great to use on the dashboard because it covers a larger area than the crevice attachment and it’s safer and less likely to cause scratches.
If you’re dealing with a particularly dirty car, then it may take up to half an hour to fully vacuum the interior. But don’t rush it. It may seem tedious and you may want to skip ahead to the next steps, but removing as much dirt as possible using a vacuum is essential if you want to make the rest of the cleaning process easier.
Dashboard
The next step, is to tackle the dashboard. I use the following tools to do this:
- Damp microfiber towel
- Dry microfiber towel
- Small soft brush (paintbrushes can work well)
- All-purpose cleaner (APC)
Normally, the main issue with the dashboard, is the level of dust. So in order to address this, you can use a damp microfiber towel and an all-purpose-cleaner to wipe down the dash. The towel only needs to be very lightly damp to do this. Don’t soak the interior or you risk the water running into the electrics.
I also use a small soft brush to access the difficult to reach crevices that the vacuum could not access.
This step should only take around 5-10 minutes to do a thorough job on a dirty car, and it’ll be even faster if the vehicle has been regularly maintained.
The next step, is to protect the dashboard. This area is subjected to UV rays all day, which can lead to fading over time. This should be prevented if you want to keep the interior looking new and fresh.
You can do this by applying a dashboard sealant or dressing. This is usually done using a microfiber cloth or applicator pad. I prefer applicator pads as you tend to get a more even coverage.
Matte-look dashboard dressings work best if your intention is to make the interior look new again, because shiny interiors aren’t typically seen on brand new cars.
Upholstery and Carpet
The next thing you need to to take a look at, is the fabric in your car’s interior. This means the carpet, and cloth seats if you have them.
Normally, these are prone to staining quite easily, either from dirt or sweat over-time. Regular cleaning will help, but they may need periodically deep cleaning to keep them looking fresh.
Here’s what you’ll need to deep clean the fabric in your car’s interior:
- Small brush (soft leather brushes work well)
- Microfiber towel
- All-purpose-cleaner (APC)
- Wet-Vac
First, apply the all-purpose-cleaner to the fabric, then spread it evenly using a microfiber cloth. I find that using a brush is really helpful here to work the product into the surface in circular motions. Then use the wet vac to extract the dirt and cleaner from the material.
Alternatively, you can use a microfiber towel to soak up any excess cleaning product, however it will not be as effected as a wet-vac/ extractor.
You may need to repeat this process a few times to get the best results if you’re dealing with tough stains.
Try not to soak the fabric though, as you can actually leave water stains behind and make the seats look worse. So use the product sparingly and instead use the brush to really work it in properly, then soak it up using the microfiber towel. To remove any excess APC, use a fresh, damp microfiber cloth.
Now we need to think about protecting these fabric. I use an Gtechniq I1 Smart Fabric for this. It’s designed to create an invisible hydrophobic coating on the fabric to repel stains and dirt. It’s what I use in my car to keep the carpets clean, but it’s also great on cloth seats.
Here’s a video of the coating in action.
Leather
If your car has leather seats, or leather on the dashboard, then you’ll need to treat these surfaces differently than the fabrics and plastics we’ve just discussed. Leather requires more car and attention to keep the colour looking vibrant, and the finish feeling soft.
To understand how to actually care for the leather, you need to understand what type you’re dealing with. There are three main types: aniline, semi-aniline, and pigmented.
Aniline is uncoated, and doesn’t repel water. Whereas, semi-aniline and pigmented leather is coated, making it more durable. Pretty much all modern cars have coated leather.
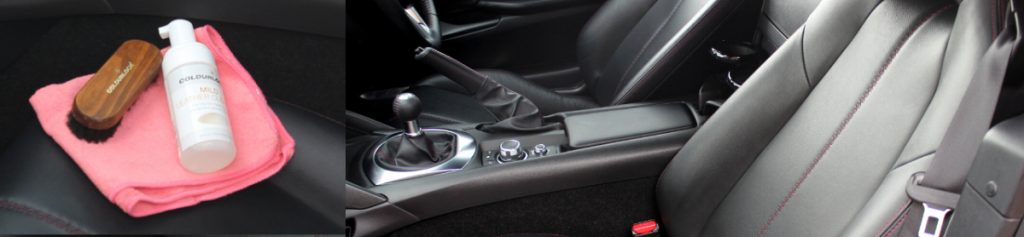
Cleaning the leather is relatively simple. My number one tip though, is to use a specific leather cleaner, rather than an APC, to make sure you’re not exposing the leather to harsh chemicals. It also helps to maintain the coating which keeps it looking newer.
I use Colourlock’s Leather Cleaner which is in a foam format, and spread it using a microfiber towel, and leather brush to clean the corners and stitching. It works really well to remove any stains, oils and dirt.
In terms of protecting and maintaining the leather, you have two choices of product, a conditioner, and a sealant. Most people are only aware of conditioners, however, generally sealants are the most suitable option.
Since modern cars have coated leather, applying a conditioner doesn’t really do anything as it cannot penetrate the coating, so it’ll just get wiped straight back off the surface.
Unless you’re dealing with uncoated leather (aniline) or the coating has worn away from several years of driving, then there’s no need to use a conditioner. You can check if there’s a coating by adding a couple of drops of water. If it soaks in, then the leather is not coated and you should use a conditioner.
The best product for most situations, is a sealant. This works on coated leather, and on top of a conditioner if you need to use one, to protect it from UV rays, dirt, sweat, friction and stains. So it basically keeps the leather looking newer for much longer.
I personally use the Leather Repair Company LRC4. It lasts 2-3 months, is really easy to apply and leaves a natural looking finish.
If you want to learn more about automotive leather care, then check out this complete guide to cleaning and caring for car leather to learn everything you could possibly need to know about the topic.
Steering Wheel
My pet-hate is shiny looking steering wheels. It’s not uncommon to see relatively clean looking cars, and then a super shiny steering wheel that ruins the appearance.
Most people don’t even realise it, but steering wheels should be matte, not shiny. Take a look at the interior on a brand new car in the showroom, and you’ll see what I mean.
This shine on the wheel is left by oil, dirt and sweat build-up. I know, pretty disgusting. Not only is it super unhygienic, but it also looks terrible.
Luckily, it’s very easy to fix. You’ll just need the following:
- APC or leather cleaner (if you have a leather steering wheel)
- Two microfiber towels
- Small brush
All you need to do, is work the APC or leather cleaner into the wheel using a microfiber towel and the small brush. Then, wipe clean using a damp microfiber cloth.
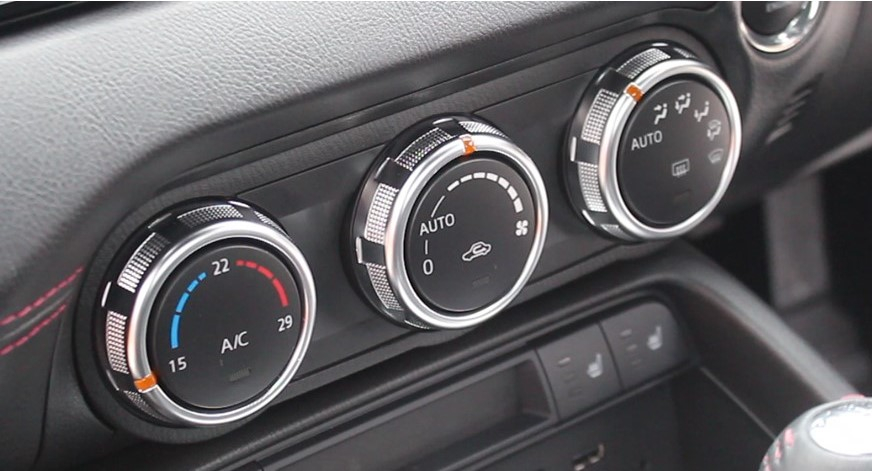
Vents, Controls and Gear Stick
Now we’ve got the larger areas of the interior out of the way, it’s time to take a look at some of the details.
This is where a lot of people tend to slip up. But if you want your car’s interior to actually look brand new, then don’t ignore these areas of the car.
You can use a soft detailing brush to do this, but I’ve also found that a super soft paint brush works just as well. Use it to brush out all these areas and remove any signs of dust.
If you run into any stains, dirt or tough to remove dust, try wetting the brush very lightly (don’t soak it) to dislodge the dirt more easily.
Avoid using a brush on any shiny black trim, because this type of plastic scratches very easily. Instead, just use a very soft microfiber towel.
You can also use a damp microfiber towel to wipe down any controls, just be careful not to over-saturate the area to prevent water running into any electrics.
Mats
Deep cleaning and protecting the mats in your car is essential to keep it looking brand new. There are two types of mats: rubber and fabric. Let’s take a look at both.
Fabric Mats
Fabric car mats are much like carpet. They are best cleaned by first vacuuming with a brush attachment. Then you can spray an all-purpose cleaner or foaming fabric cleaner, and work it in using a brush. Then use a wet/vac or extractor to remove the dirt.
Fabric mats should be protected using a sealant to help repel dirt and water to keep them looking clean. I use Gtechniq I1 Smart Fabric, the same sealant I1 use on cloth seats and the carpet.
Rubber Car Mats
Rubber car mats are usually a bit easier to keep clean than fabric mats. Here’s how.
- Remove the mats from the car and shake to remove any loose debris.
- Rinse the mats with high pressure water.
- Apply an APC, and scrub into the rubber using a brush.
- Rinse again pressure water and repeat if necessary.
- Dry using a towel.
If you don’t already have mats for your car, then you should definitely go ahead and get some because they make the interior cleaning process much easier.
Glass
Keeping the glass clean is also essential, not only to make the car look new, but also to make it safer for driving.
However, cleaning glass can be a bit of a pain. It can be difficult to access certain areas of the windscreen, and get a streak free-finish. So here’s are my top tips for cleaning interior glass.
- Use waffle-weave microfiber towels or fish-scale glass cloths, not soft plush towels or terry cloths as they leave fibres on the glass.
- Access the windscreen from the passenger side, as it prevents the wheel from getting in the way. Or stand outside the car and reach in.
- Wipe in a cross-hatch motion to ensure even coverage.
- Keep wiping until all the product is removed. Do not leave the glass cleaner to dry by itself or you’ll get streaking.
- Use a glass cleaner that doesn’t contain ammonia, because it can damage window tints.

Headliner
This is a really neglected area of the interior, that definitely needs addressing if you’re dealing with an older vehicle. It can become stained if the car isn’t treated with care, and ruins the look of an otherwise spotless interior.
The headliner can usually be cleaned effectively using a microfiber towel and an all-purpose-cleaner. However, make sure you don’t over-saturate it or it can start to sag. Always dry it using a microfiber towel after cleaning to avoid this happening.
Pedals
Some people think I’m a little crazy for for doing this, and it’s probably a fair opinion, but I don’t think a car’s interior looks brand new again until the pedals have been cleaned.
Not only does it finish the look of the interior, but it also stops the mats from getting as dirty. Plus, it’s really easy and quick to do. Here’s how.
- Cover the carpet and behind the pedals with a microfiber towel to stop these areas from getting soaked.
- Spray the pedals at close range with an all-purpose-cleaner.
- Use a toothbrush to scrub the pedals.
- Spray with water to remove the APC.
- Dry with a terry cloth or microfiber towel.
Maintaining the Interior
So you’ve got your car’s interior looking super clean, and protected the fabric, leather and dashboard. But if you want it to stay looking that way, then you’ll need to maintain it.
This deep clean probably will take a while, but luckily, it never has to be done again if you keep on top of it. Check out this video on my YouTube channel to see how I clean and maintain my car’s interior.
Here’s my interior detailing schedule that keeps my car looking brand new, despite being driven several hundreds of miles a week.
Weekly: takes 5-10 minutes
- Vacuum mats, carpets and seats
- Brush down the mats and clean using an APC
- Wipe all surfaces using a damp microfiber towel
- Clean the glass
Monthly: takes an additional 10 minutes
- Brush out all crevices and air vents
- Deep clean the steering wheel
- Use a leather cleaner on the seats
Every 3-4 Months: takes an additional 15 minutes
- Deep clean the leather seats and apply a sealant
- Apply a dashboard sealant
As you can see, it really doesn’t take that long and it keeps the car’s interior looking brand new all the time.
Don’t forget to download the interior detailing checklist before you go.
Thanks for reading! I hope you’ve enjoyed this article. Check out the rest of the website to learn tonnes more about car detailing.
