Claying a car can be a daunting process if you’ve never done it before, but it’s actually really easy. You just need to remember a few rules and have a good understanding of the claying process to get the best results.
In this article, I’ll explain everything you need to know about using a clay bar, how to prepare the paint, and what to do afterwards.
Claying: The Basics
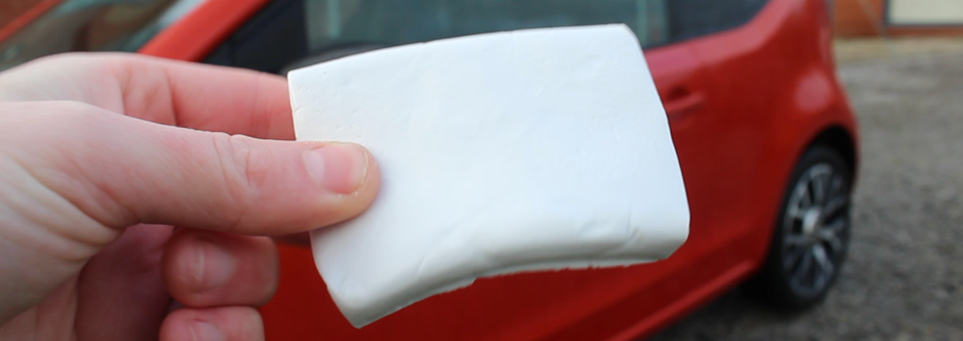
Automotive clay can come in various forms such as bars, mitts and cloths. The purpose is to remove bound contaminants on the paint and glass to make the surface smooth again.
Clay is an abrasive substance so should be used with caution. It is likely that claying the car will inflict some minor swirl marks or marring in the paintwork which can be dealt with afterwards. The risk of inflicting this type of damage can be reduced by using a good lubricant.
What You Need to Clay a Car
- Either a clay bar, clay mitt, or clay cloth
- Clay bar lubricant e.g. car shampoo, Optimum No Rinse or a dedicated clay lubricant
There are many types of clay bar lubricants on the market. Some brands have a dedicated clay lubricant spray, but these tend to be quite expensive.
I usually use Optimum No Rinse which is is a multi-purpose product. I dilute it to 1:64 (product: water) and put it in a spray bottle which I then use to dispense the product onto both the paint and the clay.
Alternatively, you can use car shampoo as a lubricant. Simply put the appropriate dilution of the shampoo in the bucket and then use a mitt to apply it to the panel. You can then dip the clay bar in the bucket as well to add some more lubrication.
If you’re unsure which clay lubricant you should use, check out my guide to the best (and worst) clay lubricants for more information.
How to Clay Bar a Car (Quick Guide)
- Wash the car
- Use an iron fallout remover and tar remover spray first (see this article for more info)
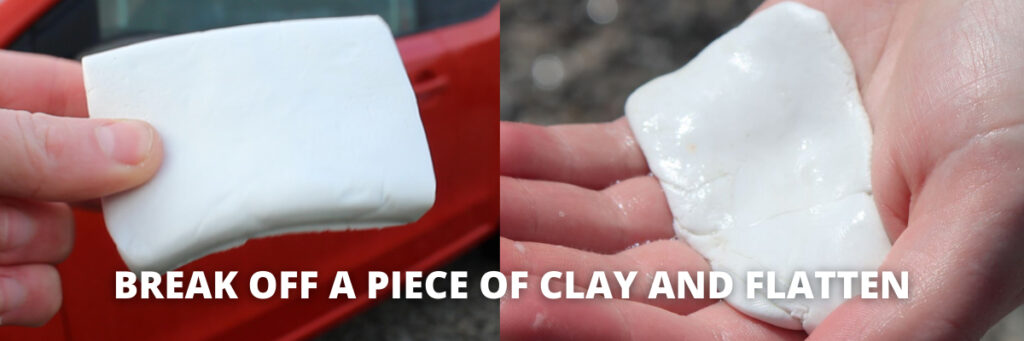
- Break off a piece of clay from the bar and flatten/ stretch it out
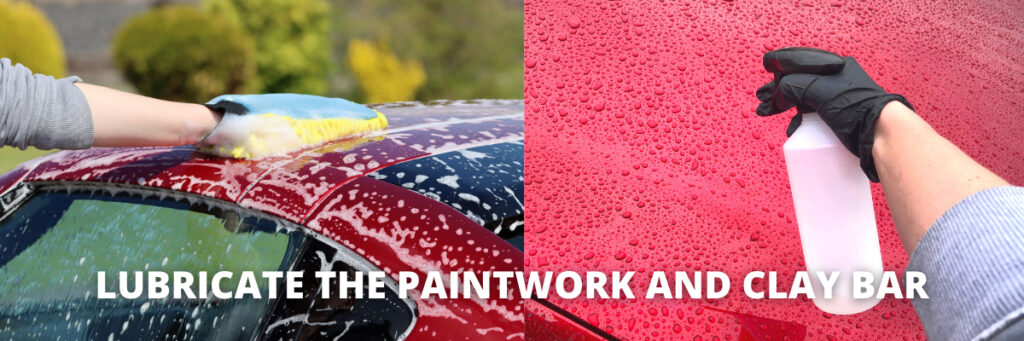
- Apply the clay lubricant to the clay itself and the car
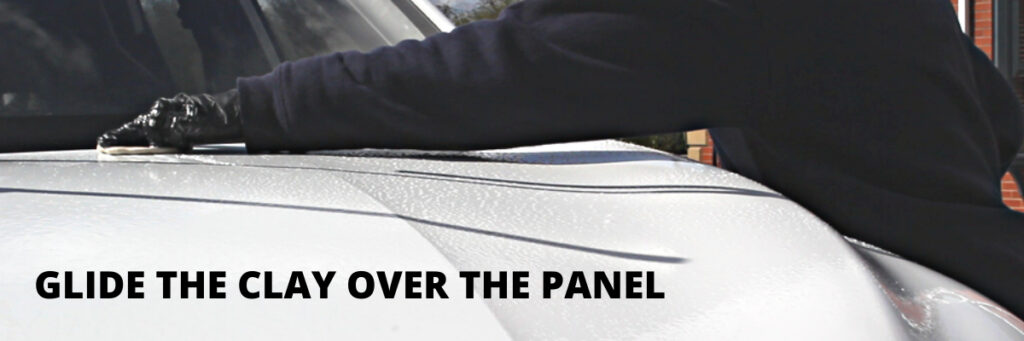
- Working a section at a time, glide the clay gently over the paint without applying pressure, in straight-line motions
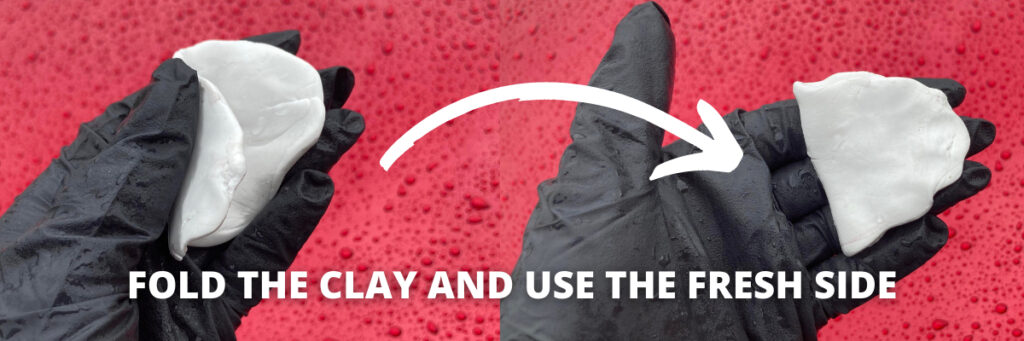
- Fold the clay after going over each panel before moving onto the next
The Purpose of Clay Barring
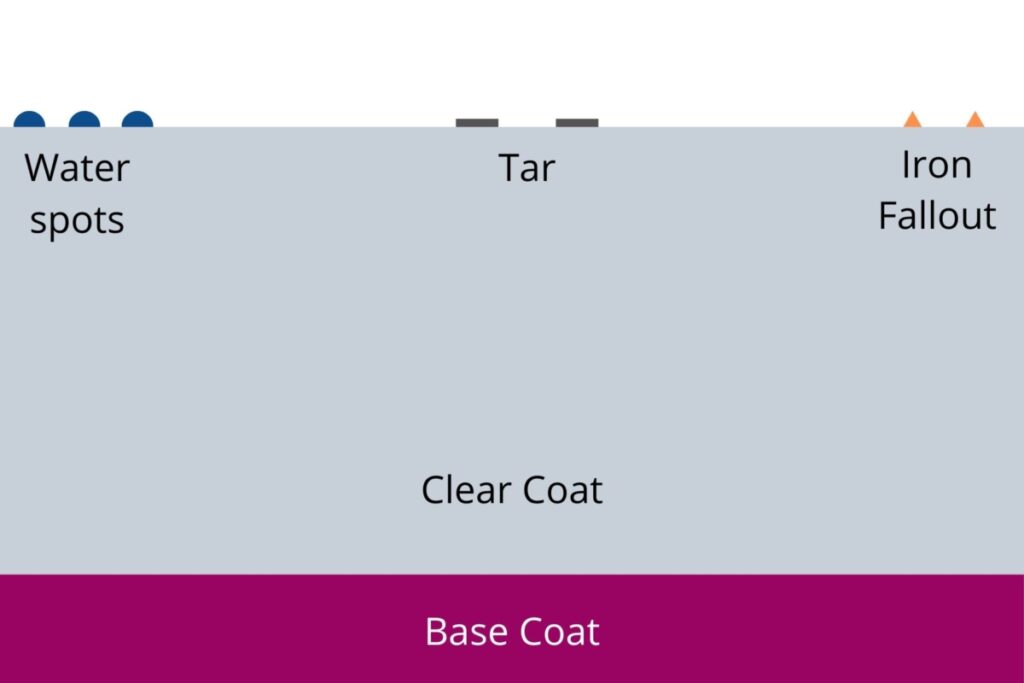
The process of claying a car is designed to remove “bound contamination” on a car’s exterior surfaces such as the paintwork and glass. Bound contaminants include:
- Tree sap
- Iron fallout deposits
- Tar spots
- Dried bugs
- Mineral deposits (water spots)
- Overspray
These contaminants need to be removed via claying because they cannot be removed by regular washing as they bond themselves strongly to the car’s exterior, especially if left on there for a considerable amount of time.
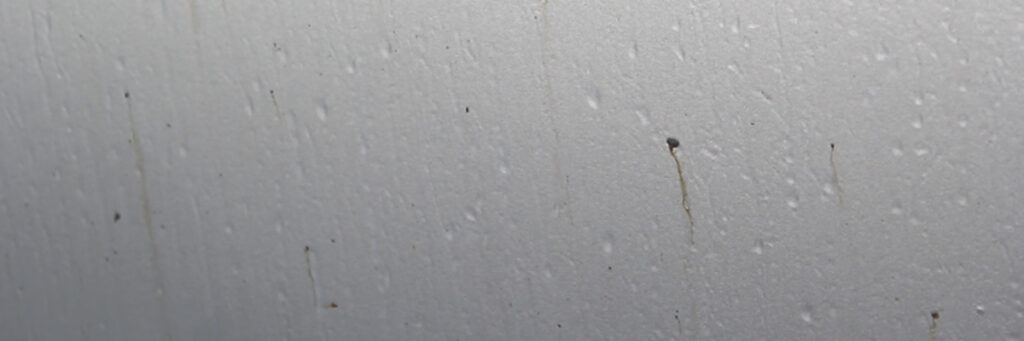
If a car’s paintwork is contaminated, then it will feel rough to the touch. It is important to remove this contamination by claying in order to ensure the paintwork is completely clean before machine polishing a car and applying a ceramic coating.
You may also want to clay the car as it improves the visual appearance by ensuring it is fully cleaned and helps waxes and sealants to last longer on the surface as well.
Types of Clay
There are several types of claying solutions on the market. The most common being:
- Clay bars
- Clay mitts
- Clay cloths
- Clay gloves
Clay bars allow you to decontaminate more intricate areas compared to clay mitts etc., however they do not last as long.
Clay mitts, cloths and gloves are larger so speed up the process and they can typically be used on several vehicles and can be washed to ensure the contaminants they collect are properly removed.
There are also several “grades” of clay bars available. Heavier and more aggressive clay bars are designed to lift more severe contamination, but they are more likely to cause swirls and marring. In most cases, a softer clay is suitable as this causes the least damage to the paintwork.
A good example of this is the Bilt Hamber Soft Clay variant.
Preparing a Car for Claying
Before you clay a car it is very important that it is washed thoroughly. A clay bar should only be used on clean paintwork to ensure that excessive swirling and marring is not induced.
As I mentioned earlier, claying is a process designed to “decontaminate” the car. However, there are is also another stage of the decontamination process that I’ve not yet mentioned called “chemical decontamination”.
Before claying a car, it is recommended that you use two other chemicals on the paintwork after it has been washed.
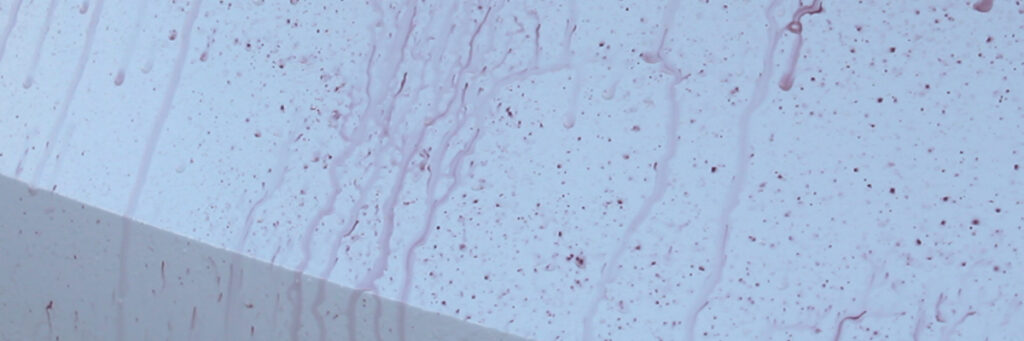
- Tar remover
- Iron fallout remover
Clay bars are capable of removing both tar and iron fallout, however it is best to use these two chemicals to remove these types of bound contaminants prior to claying. This will help to keep the clay bar cleaner during the claying process, which helps to reduce the risk of marring the paintwork excessively.
If you want to learn more about this, then check out my article explaining how to use clay, iron fallout and tar removers to both chemically and physically decontaminate the paintwork.
The Claying Process
Now the car has been cleaned and chemically decontaminated, it’s time to actually clay the vehicle. Here’s how to clay bar a car.
Knead the Clay Until it is Flat
Most clay bars are quite large and it is not necessary to use the whole bar to clay the car. It is better to break off a section and use this instead. That way, if you do drop a piece on the floor then you can throw it away without having to worry about having no spare clay left!
If you are struggling to knead the clay because it feels too firm, just run it under some warm water and it will be more pliable.
Lubricant the Clay and the Paint
If you are using a dedicated clay lubricant spray, or a rinse-less wash product like Optimum No Rinse (diluted 1:64), then spray the lubricant onto the panel liberally and onto the clay itself. You can do this on wet paintwork, unless the product instructs otherwise.
If you are using car shampoo, then make sure you fill up a clean bucket with water and add the appropriate amount of shampoo. Use a clean mitt dunked into the bucket to wipe the shampoo solution onto the panel. You can also dip the clay into the bucket for added lubricity.
Glide the Clay Over the Panel
Start at one side of the panel and methodically work your way to the other side to avoid claying the same area multiple times, or missing any sections. Glide the clay gently in a straight-line motion across the panel. Do not apply any pressure. If the clay starts to become stuck then you will need to add more lubricant.
Inspect the Clay
After claying each small section you should inspect the clay. If you notice any contaminants on the bar, fold it in on itself before moving to the next section so a fresh side is used. It’s good practice to fold the clay bar after claying each panel.
The process is super easy and doesn’t take long. Claying a medium-sized car should only take around 20-30 minutes.
However, you need to keep in mind that clay is an abrasive substance and is likely to cause some level of marring or swirling. You can reduce the amount of damage though by taking the appropriate precautions.
- Use a high-quality lubricant
- Check the clay frequently and fold it so the contaminants are not rubbed into the paintwork which otherwise will damage. If the clay becomes too contaminated, use a fresh piece.
- Never drop the clay bar on the floor. If you do, you will need to use a new piece of clay. Do not be tempted to just fold it and carry on!
- Use straight-line motions and be gentle. You do not need to apply any pressure.
- Do not keep claying the same area. You should only need to go over an area once.
What About After Claying?
Once you have clayed the car, it is a good idea to wash the car again using a wax-free car shampoo and a clean microfiber wash mitt. This helps to remove any contaminants which have been lifted by the clay bar but have not properly stuck to it. Once you have wash the car, rinse and dry as normal.
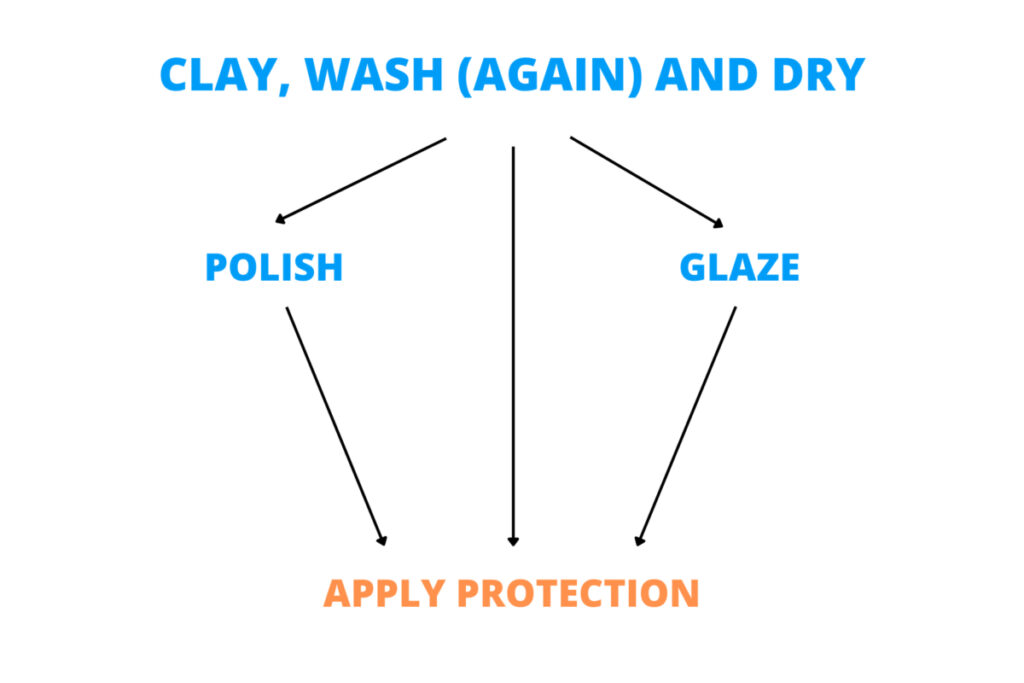
Now there are a few possible options to choose from.
As I mentioned earlier, claying is likely to induce some minor swirls and marring into the paintwork that you may want to deal with.
You can either:
- Polish the car
- Apply a glaze
- Skip ahead to applying paint protection
Option #1 Polishing
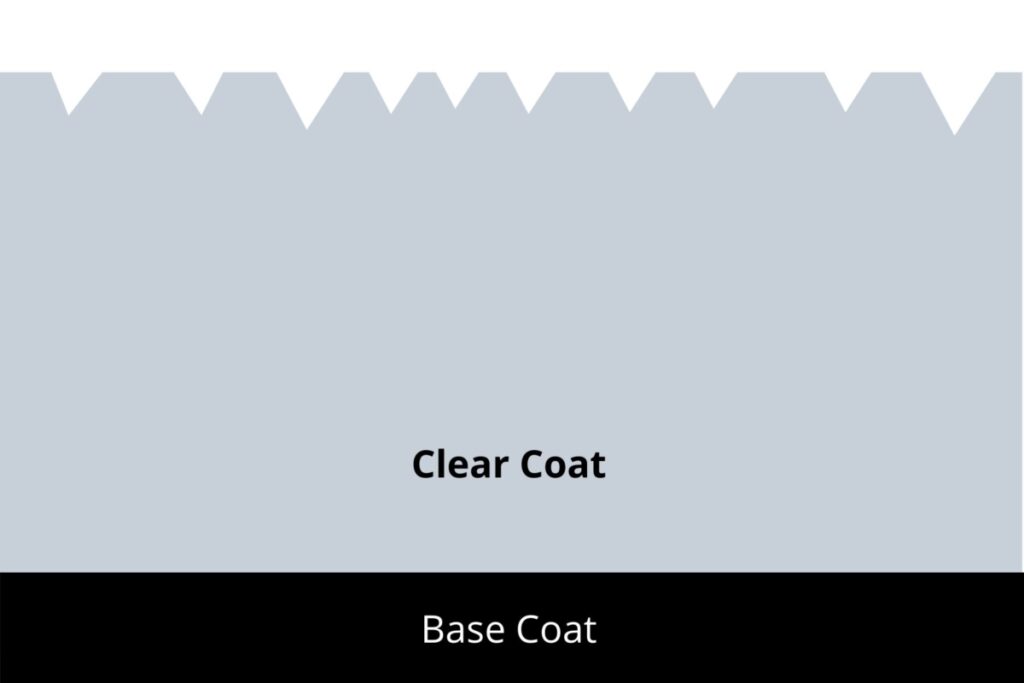
Polishing a car can either be done by machine or by hand. It removes a thin layer of the clear coat to reveal a fresh, flat layer which is free from damage. This helps to make the car look glossier by removing the swirls and marring induced by the clay.
Polishing should be approached with caution though to avoid removing excessive amounts of clear coat. Although it is the only way to permanently remove the defects, it is not always the best option particularly for older cars.
Check out this article which explains the risks associated with polishing in more detail.
Before polishing
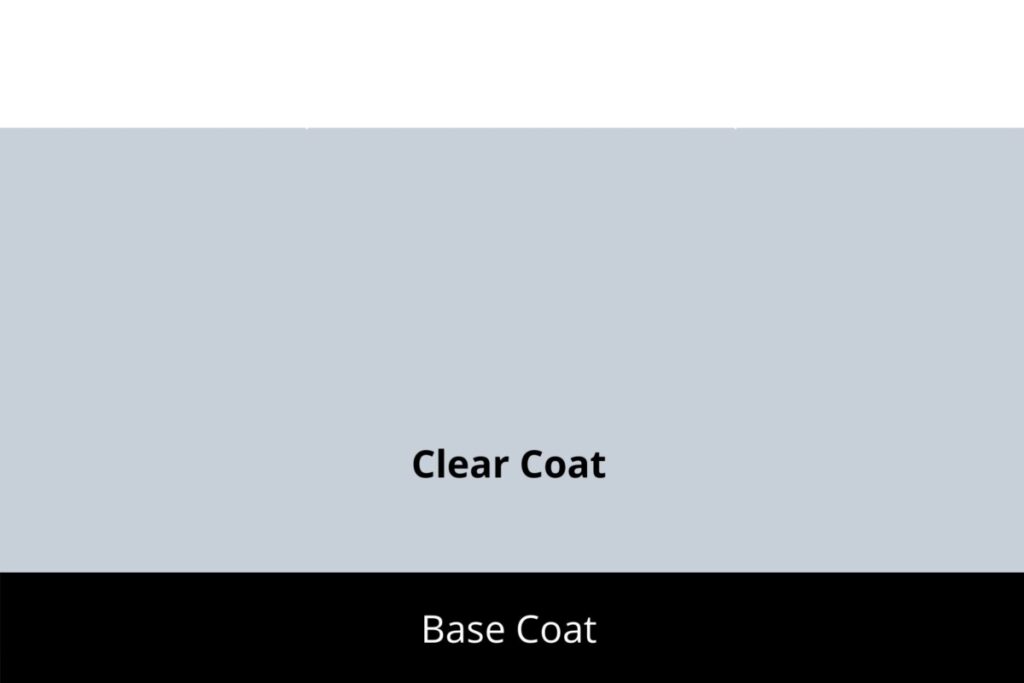
After polishing
Option #2 Glazing
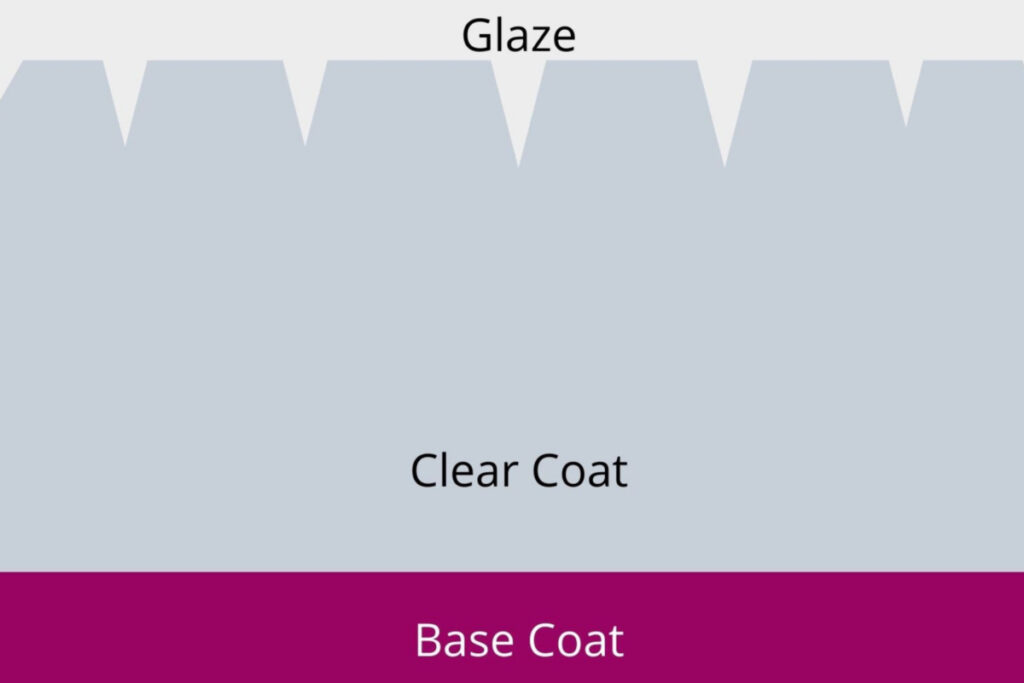
Glazes are products which fill in minor swirl marks and marring and essentially mask the defects inflicted by claying. This solution is not permanent and the glaze will only last a few months, however it does help to preserve the clear coat. It’s also much faster than polishing and better for older cars.
My favourite glaze is called Poorboy’s Black Hole. It’s super easy to use and leaves a lovely glossy finish.
Apply Paint Protection
After claying a car it is essential that you apply some form of paint protection to the vehicle. This helps to prevent contamination from building up as quickly in the future and keeps the car cleaner between washes. It also helps to make the car look glossier.
There are three main types of paint protection products:
- Waxes
- Sealants
- Ceramic coatings
Waxes and sealants can be applied either after glazing or polishing, however ceramic coatings must only be applied after machine polishing and never on top of another product such as a glaze.
If you are a beginner and it is your first time claying a car, I would not recommend using a ceramic coating as it is trickier to apply than either a wax or sealant.
If you want some options, check out my recommended paint protection products list for my top picks.
How Often Should You Use a Clay Bar
As I have already mentioned several times in this article, clay is abrasive and highly likely to cause some level of marring or swirls and hence it should only be done when necessary.
As a general rule, a car which is stored outside and washed every couple of weeks will likely need claying every 1-2 years. However, you should not clay your car every year or two as part of a routine.
Instead, you should check the paintwork for contamination. If it feels rough, then you can clay the car but if it feels smooth then there is no need to, no matter how long its been since it was clayed previously.
Check out my article explaining the different factors which affect how often a car needs claying to learn more about this topic.
Frequently Asked Questions
Here are the answers to some more questions you may have about claying.
Do you clay before or after washing?
It is vital that a car is washed before using a clay bar. Otherwise, severe scratches and marring will be induced into the paint.
Do you need to wash a car after claying?
It is recommended that a car is washed after using a clay bar to remove any contaminants that may have been lifted by the clay bar but had not stuck to it.
Do you dry a car before using clay?
It is not necessary to dry a car before using clay unless you are using a dedicated clay lubricant which instructs you to use it on dry paintwork.
Can you clay bar glass?
Clay bars can be used on glass safely as long as plenty of lubrication is used, in the same manner as it is used on the paintwork. Check out my guide to claying glass to learn everything you need to know.
Do you need to polish after claying?
The process of claying is likely to induce some swirl marks or marring into the paintwork so in most cases polishing after claying is necessary if you want perfect paintwork. However, in some cases polishing is not recommended if the paint has already been polished several times in the past.
If it is not safe to polish, then a glaze can be used instead to cover up the clear coat damage temporarily.
Should the clay be thrown away after use?
It is recommended that a clay bar is thrown away after using it. In order to reduce the risk of inflicting clear coat damage, it is better to use a fresh piece of clay on every car.
Here are some more articles you might find useful:
