Ceramic coating your car is the best way to protect it and help keep it cleaner between washes, but it will still need maintaining regularly to ensure you get the best level of performance.
In this article I’ll take you through the step-by-step process to wash a ceramic coated car and all the equipment and products you’ll need to get the best results.
Quick Guide to Cleaning a Ceramic Coated Car
To clean a ceramic coated car, start by first cleaning the wheels. Then, pre-wash the paintwork using a citrus pre-wash or snow foam. Next, wash the paint using a microfiber wash mitt and pH neutral, wax-free shampoo. Finally, rinse and dry the car using a microfiber towel.
- Wash the wheels
- Pre-wash the car using either a citrus pre-wash or snow foam
- Wash the car with a microfiber mitt and a pH neutral, wax/ gloss-free car shampoo
- Rinse and dry the car with a microfiber towel
If you want to see the process in action, check out this YouTube video on my channel to show a full maintenance wash on this ceramic coated car.
Equipment and Products Needed
- Pressure Washer and Fan Attachment
- 3 x 20 L buckets of clean water
- Wheel & Tire Cleaner
- All-Purpose Cleaner (APC)
- Wheel Mitt
- Wheel Barrel Brush
- Tire Brush
- Soft Detailing Brush
- Pre-Wash Chemical (Citrus or Snow Foam)
- pH Neutral, Pure Car Shampoo
- 2 x Microfiber Wash Mitts
- Microfiber Drying Towel
- Tire Dressing
This page contains product affiliate links. We may receive a commission if you make a purchase after clicking on one of these links.
I’ll be explaining why each product is needed in each individual section and be giving my personal recommendations.
Check out this in-depth article on the best products for washing and maintaining a ceramic coating
Rules for Cleaning a Ceramic Coated Car
- Always use separate buckets and tools for the wheels and paintwork.
- Use a pH neutral, pure shampoo to wash the coating. Do not used wax-infused or gloss-enhancing shampoos, or any household products.
- Use microfiber mitts to wash the car, and never use sponges or brushes.
- Don’t scrub at the paintwork with your wash mitt. Use plenty of lubrication and wipe gently to avoid scratches.
- Don’t wash the car in direct sunlight because the water and chemicals will dry on the surface very quickly.
- Wash the car from top to bottom.
- Use a microfiber towel to dry the car. Never water blades (squeegees), chamois leather or bath towels.
Step 1. Clean the Wheels
When cleaning any vehicle you should wash the wheels first. This is because they are the dirtiest area of the car so sometimes dirt may splash up onto the paintwork during the cleaning process, and you don’t want this happening when it’s been freshly washed!
One of my favourite products for this process is P&S Brake Buster because it works very effectively on both the wheels and tires so you don’t have to dig out two separate products. Here are links to P&S Brake Buster (USA Amazon link or UK Link).
I also recommend using an all-purpose-cleaner (APC) such as Koch Chemie Greenstar (USA Amazon Link or UK Link) diluted to approximately 5-10% to clean out the wheel arches.
Here’s how to clean the wheels:
- Fill up one of your buckets with 15-20 L of water (this will be used to rinse out the tools)
- Rinse all the loose dirt and brake dust off the wheels, tires and arches using a pressure washer
- Spray the APC into the arches and scrub with a suitable brush (the EZ Go Brush is great for this)
- Spray your tire cleaner onto the sidewall and scrub (I use the In2Detailing Tyre Brush)
- Spray your wheel cleaner onto the alloy face and barrel and agitate using a mitt and soft brush to reach inside the barrel of the wheel, and a small detailing brush to clean around the wheel nuts
- Periodically rinse your mitt and brushes in the clean bucket of water, or rinse down with the pressure washer
- Rinse the wheel, arch and tire thoroughly with the pressure washer
Recommended Products:
- Koch Chemie Greenstar APC (USA Amazon Link or UK Link)
- P&S Brake Buster (USA Amazon link or UK Link)
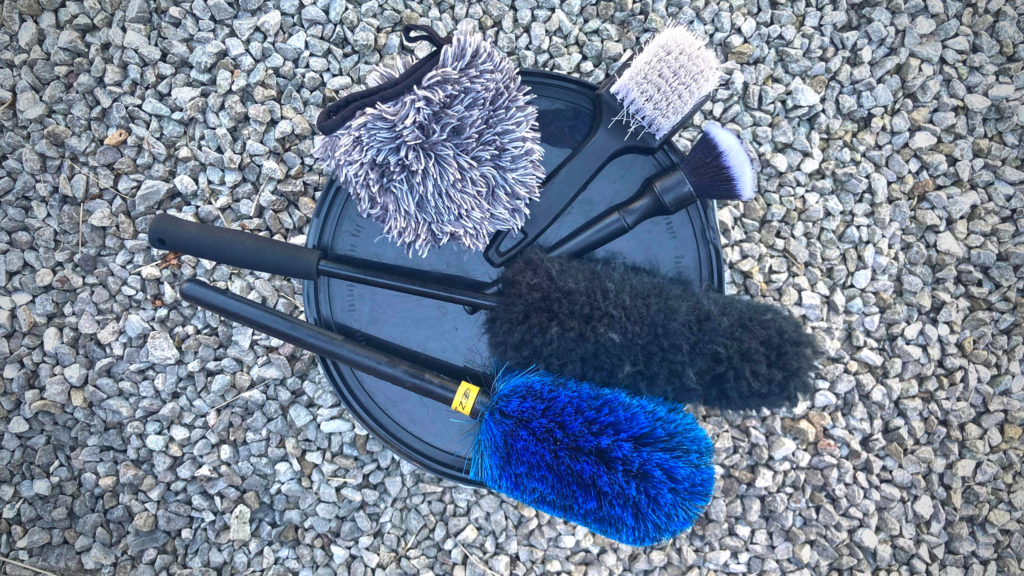
Recommended Tools:
Are you wheels also ceramic coated? Check out my guide to cleaning ceramic coated wheels for some extra tips and best practices.
Step 2. Pre-Wash the Car
Pre-washing the car is one of the most important steps of the cleaning process in my opinion.
Although ceramic coatings provide more scratch-protection in comparison to bare paintwork, they are certainly far from scratch-proof and can still collect swirl marks during the wash process.
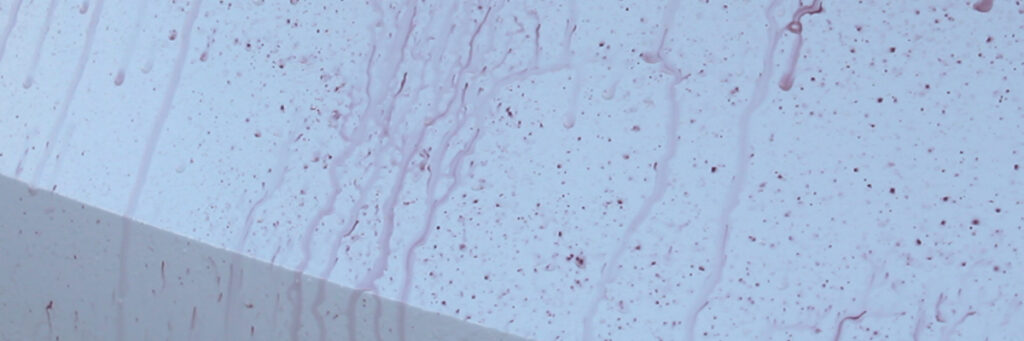
Dirt and grit that builds up on the car between washes is abrasive and will scratch the coating if it is wiped along it (especially without adequate lubrication). Hence, one of the easiest ways to prevent this is to “pre-wash” the car which essentially removes as much dirt as possible before you touch the paint with a mitt.
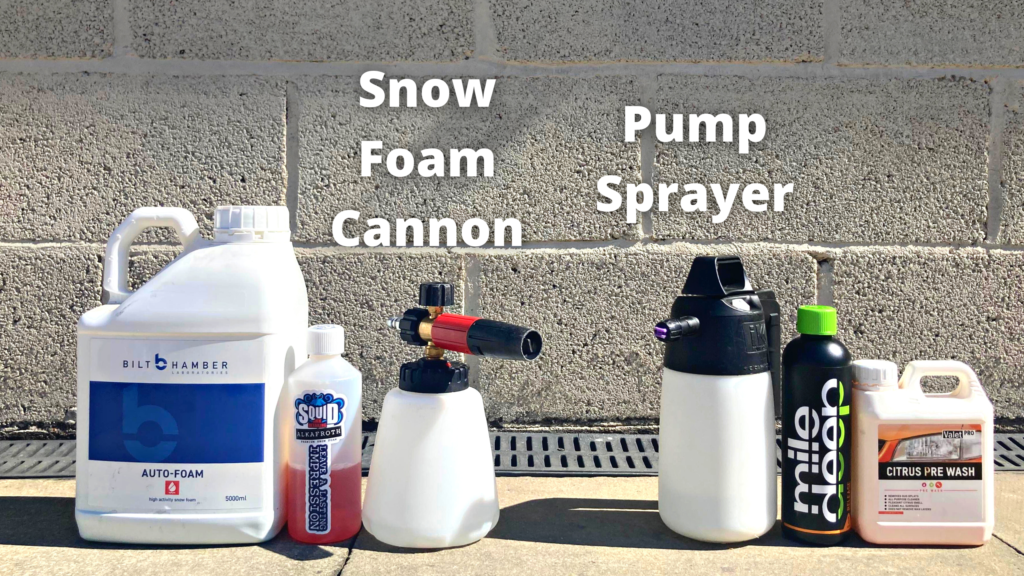
To pre-wash the car you have two options:
- Use a snow foam in a snow foam cannon
- Use a citrus pre-wash in a pump or trigger sprayer
Snow foaming is the more fun option, and it is faster than using a pump or trigger sprayer. However, both methods are very effective (depending on what chemical you actually use).
Some snow foams/ pre-washes are better than others. They can usually be categorised into two types of product:
- pH neutral: these are fine for lightly dirty vehicles that are maintained every 1-2 weeks
- Alkaline: these have more cleaning power so work best for dirtier cars (my preferred option)
Here are my recommendations that you can check out:
Snow Foam:
- Squid Ink Alkafroth
- Bilt Hamber Auto Foam (Amazon link)
Citrus Pre-Wash:
- Mile Deep Release
- Valet Pro Citrus (Amazon link)
There is a bit of a debate in the detailing industry as to whether you should rinse a car before and after applying the pre-wash chemical, or just afterwards.
I personally think there are two occasions where rinsing beforehand is beneficial:
- If the car has a thick layer of mud on it. This can be easily blasted away with the pressure washer to give the pre-wash chemical less work to do on the remaining dirt.
- If it is a warmer day and you are struggling to keep the panels cool. Spraying the car with water first will cool the car down so the pre-wash chemical doesn’t dry onto the car as quickly.
I’d advise you to try both methods and see which you prefer!
Here’s how to pre-wash the car step-by-step:
- Rinse the car with a pressure washer if necessary
- Mix up your pre-wash chemical either in your snow foam cannon or sprayer to the desired dilution
- Spray the chemical over the car to evenly coat it
- Allow the chemical to dwell for the recommended time (usually 4-10 minutes) but do not allow it to dry out. You may need to rinse earlier if you notice the chemical start to dry.
- Rinse the pre-wash chemical off the car with a pressure washer in a methodical way to ensure you have gone over every area thoroughly.
Step 3. Contact Wash the Car
Okay so now we’re going to actually wash the vehicle and remove all the remaining dirt and traffic film from the coating. If you did a good job in step #2, there shouldn’t be much dirt to remove here!
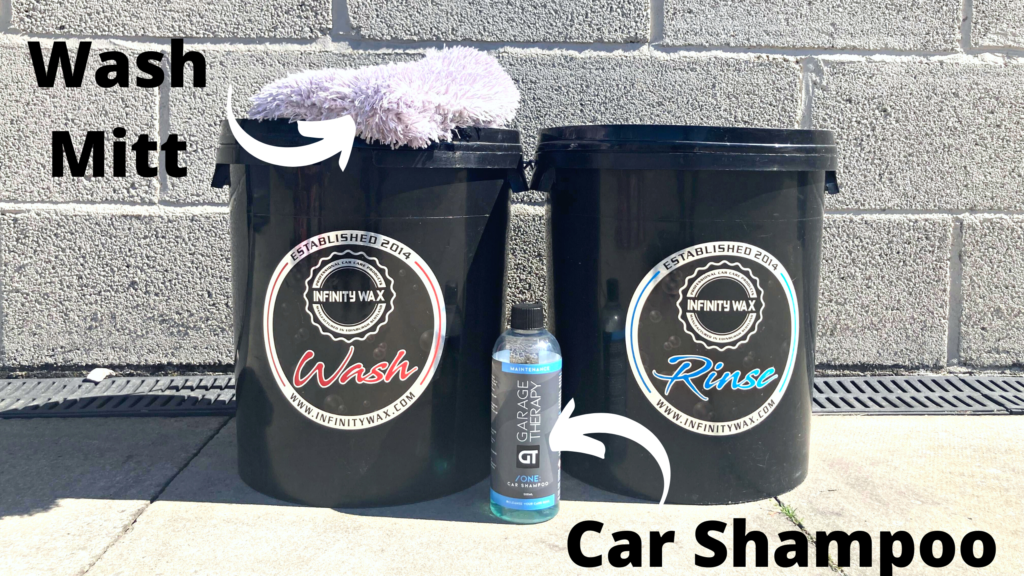
Make sure you use a dedicated pH neutral car shampoo which does not contain any gloss-enhancing agents or waxes which would clog up the coating. Here are my recommendations:
- Garage Therapy /One: Car Shampoo
- Pyramid Car Care Revival Shampoo
- Turtle Wax Hybrid Solutions Pro Pure Wash (Amazon link)
Do not use any household cleaners on your car including dish soap. These are not good for the ceramic coating and can damage it and hinder the performance dramatically.
I also do not recommend using a snow foam in place of the shampoo in this step. Snow foams do not offer enough lubrication to clean the car safely to prevent swirl marks.
In terms of the tool used to actually wash the car, I always recommend using a microfiber wash mitt and never a sponge or brush. Sponges and brushes are abrasive and will scratch the ceramic coating. Microfiber mitts are soft and a much better option.
My favourite wash mitt is The Rag Company Cyclone (Amazon link).
It’s a good idea to get two wash mitts and use the first one for most of the vehicle and the second one for the very lowest sections as these accumulate the most dirt.
Here’s how to safely wash your ceramic coated car:
- Fill up two buckets with 20 L of water.
- Add the recommended dilution of shampoo to one bucket and mix.
- Dip your wash mitt into the soapy solution and ensure it is thoroughly coated.
- Wash the car with the mitt starting from the top and working panel by panel. Use straight line motions to glide the mitt (without adding pressure) over each section.
- Rinse the mitt out in the bucket of clean water after washing each panel.
- Once the whole car has been washed, rinse the shampoo away using the pressure washer.
Step 4. Dry the Car
Once the car has been rinsed, it’s time to dry it. I always recommend drying the car immediately after washing as otherwise it will get water spots which can actually damage the coating if left to bake on there in the sun.
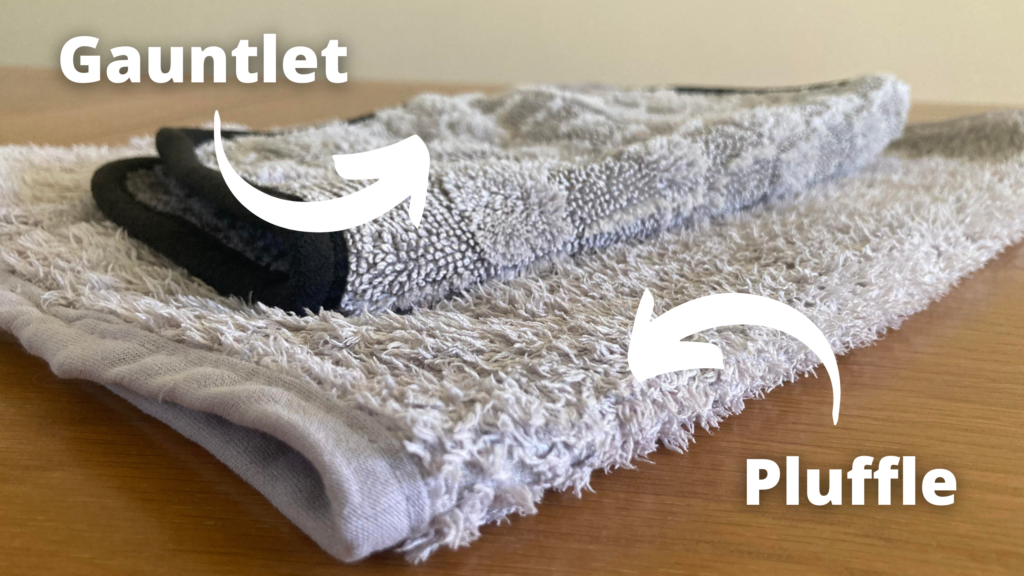
To dry the car you’ll need two microfiber towels, one for the paintwork and one for the wheels. Never use the same towel for both these areas is it increases the risk of inflicting scratches.
Recommended Towels:
- Paintwork: The Rag Company Pluffle (Amazon link)
- Wheels: The Rag Company Gauntlet (Amazon link)
Ensure the towel is completely clean and free from any debris, and is very soft. You should only ever use microfiber towels, and never bath towels as these are too harsh and will scratch the coating.
Never use a water blade (squeegee), or chamois leather to dry a car as these tools cause scratches.
Here’s how to dry a ceramic coated car safely:
- Use low-pressure water (such as an open ended hose) over the car. Water is cohesive so this helps to push most of the water off the paintwork making the drying process easier.
- Use the microfiber towel to dry the windows.
- Place the microfiber towel on the paintwork and gently pat dry. Avoid swiping at the panel.
- Dry the car from top to bottom.
- Use your separate microfiber towel to dry the wheels.
Apply a Tire Dressing
No car looks truly clean unless you apply some kind of tire dressing. This will complete the “detailed” look and keep the tires looking cleaner for longer.
Here are links to some great options:
How Often Should You Wash a Ceramic Coated Car
Ideally a ceramic coated car should be washed every 1-2 weeks to maintain the coating’s performance. As a minimum the car should be washed monthly.
You may need to wash the car more frequently if:
- It is stored outside
- It is driven very frequently
- It is driven in poor conditions e.g. in the rain, or on roads with lots of road salt
Advanced Coating Maintenance
If you have applied the coating yourself and don’t have a professional detailer to maintain the coating periodically, then there are some additional steps that are worth preforming.
Decontaminating the Coating
Contaminants such as iron fallout and tar can build up on a ceramic coated car over time, especially if it is driven frequently.
To decontaminate a ceramic coating you can use the following products:
- Decontamination Shampoo: this will help to un-clog the coating by deep cleaning it
- Iron Fallout Remover: this will remove embedded iron particles in the coating which cause it to feel rough
- Tar Remover: this removes ugly tar spots which usually build-up behind the wheels and on the rear of the car
Using a decontamination shampoo every 4-6 months on a ceramic coated car will help to keep it performing at it’s best. I recommend using the Garage Therapy /ZERO: Decontamination Shampoo for this process.
This is also a good time to use the iron fallout remover. My recommendation for this is Bilt Hamber Korrosol.
Tar removers can be used as and when necessary, as the amount of build-up of tar spots depends on many different factors. My favourite tar remover is Autoglanz Spar Tar.
IMPORTANT RULE: never use a clay bar on a ceramic coated car as this will permanently damage the coating. Instead, stick to using chemical decontamination products such as shampoos, iron fallout remover and tar remover.
Topping up the Protection
If you have performed the decontamination steps above and are finding that the coating’s performance hasn’t fully recovered, then you can also top up the protection using a compatible product.
Many ceramic coating brands offer top up sprays which are applied in one of two ways:
- They can be sprayed onto a wet car and rinsed immediately to leave a layer of protection behind
- They can be sprayed onto a microfiber towel and wiped over a dry car to spread the product then buffed away using a fresh, dry microfiber towel.
Make sure you always check the specific instructions for the product you’re using.
I’d advise using a top up spray from the same brand as the coating on the car to ensure it’s compatibility.
Here are some of the most popular coating manufacturers and the top-up protection products they recommend using to maintain their coatings.
Gyeon:
- Q2M Wetcoat
- Q2M Ceramic Detailer
CarPro:
- Reload
- HydrO2
Gtechniq:
- Easy Coat
- C2 Ceramic Sealant
Carbon Collective:
- Speciale SiO2 Detailer
- Rapide
Garage Therapy:
- Ceramic Sealant
- Sigma
Infinity Wax:
- Synergy QD
- Synergy Vitality
Looking to learn more? Check out this complete guide to ceramic coatings for more information.
