Washing your car is an essential part of its maintenance. Not only does it keep it looking nice and shiny, but it also stop the paint corroding and fading over time.
But unfortunately, the vast majority of car owners aren’t washing their cars correctly, and are causing hundreds of tiny scratches in the paintwork.
In this article, I’ll take you through exactly how to wash your car safely (without scratching it), what you’ll need to do it, some top tips, mistakes to avoid and FAQs at the end. So let’s get started!
Quick Guide to Car Washing
To wash a car without causing scratches and swirl marks, first prewash the vehicle using a snow foam or citrus prewash and a pressure washer. Wash the car using multiple-mitts or using the two bucket wash method and a good quality car shampoo. Dry the car using a microfiber towel.
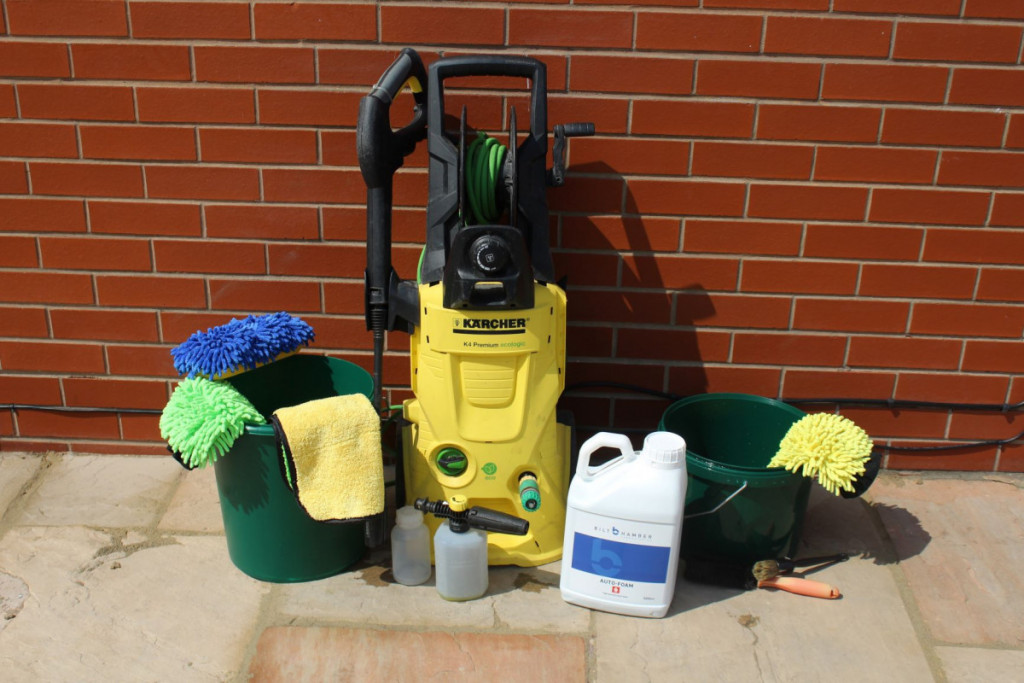
What You’ll Need
Here’s what you’ll need to wash your car properly and safely at home by hand.
- Car shampoo (never dish soap or bleach)
- A couple of microfiber wash mitts (not sponges)
- A hose with nozzle attachment
- Two large buckets
- Large, soft and clean microfiber towel
Also Recommended:
- Pressure washer
- Snow foam cannon and snow foam
- Hard bristle brush
- Soft bristle brush
- Dilutable all-purpose-cleaner
Looking for some more of the best car washing products? Make sure you check out my recommended products page for all my current top picks.
8 Steps to Wash Your Car Safely
Okay, so now you’ve got everything prepared, here are the 8 steps to wash your car without scratching the paint.
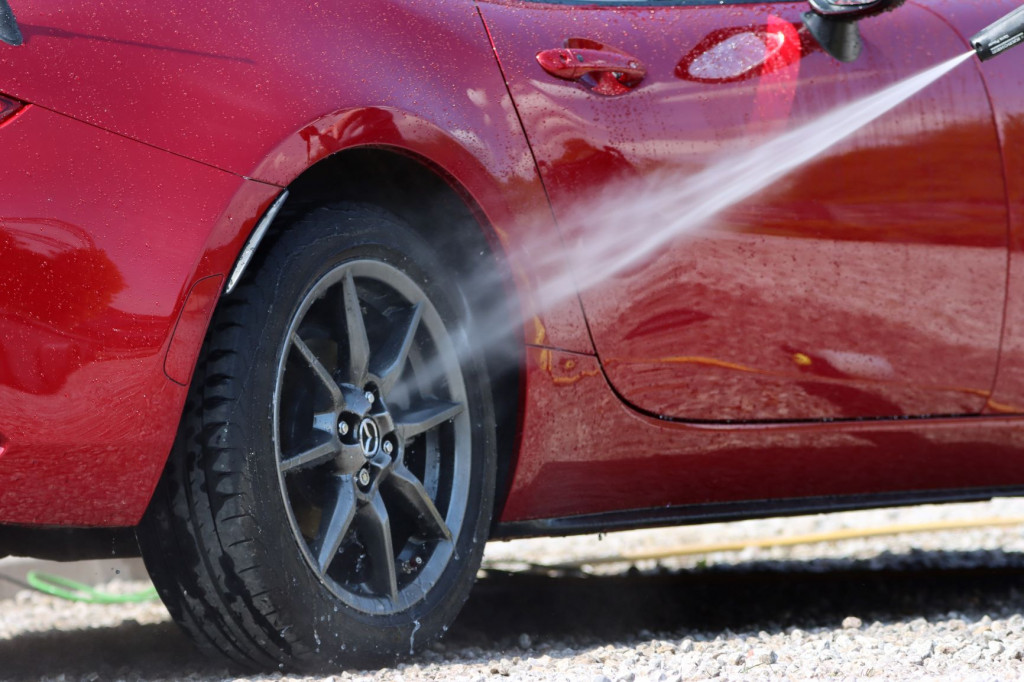
- Wash the wheels first
- Rinse the Paint with a Pressure Washer
- Pre-wash the car
- Rinse the pre-wash away
- Wash the paintwork using a microfiber wash mitt
- Rinse the vehicle down
- Dry the car using a microfiber towel
- Clean the glass
To prevent scratches and swirl marks you need to keep the following thing in mind:
- Reduce the potential for friction as much as possible
How Do Scratches Occur?
If you’re coming to this article, it’s probably because you’ve either scratched your car in the past when washing it, or seen someone else scratch their car when washing, and you are trying to avoid the same result.
So it’s a good idea to understand how these scratches in the paintwork occur.
Your car’s paintwork consists of several layers.
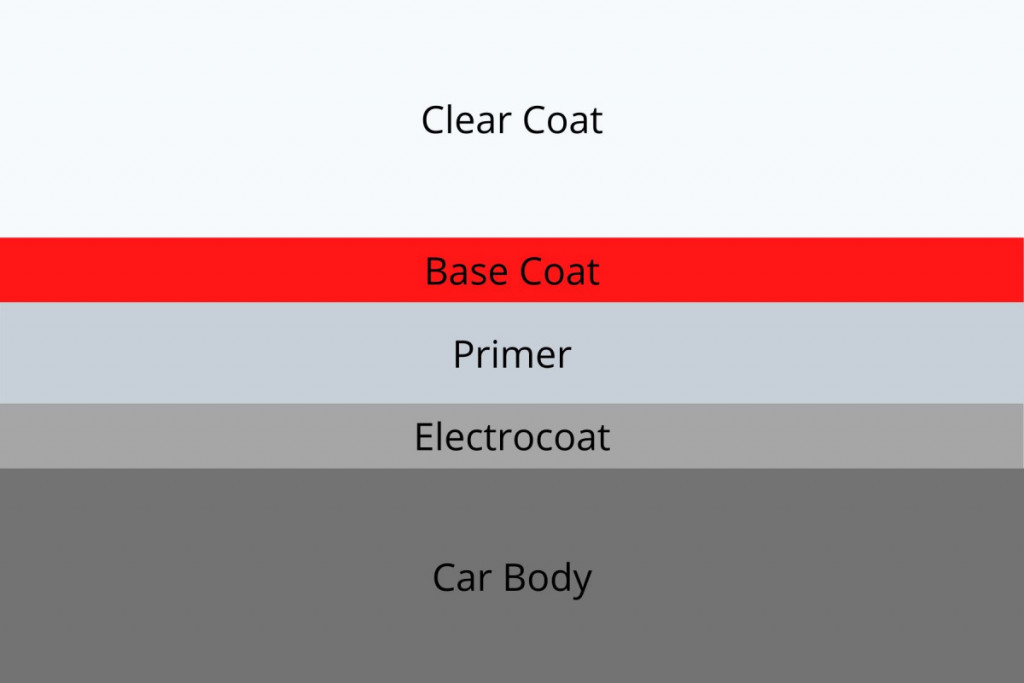
The clear coat sits on top of the base coat (the colour) to protect it from corrosion, fading and other types of damage.
Despite the protective role of the clear coat, it’s actually incredibly delicate. This means that any type of friction can cause scratches and swirls. Even running your finger along the paint will cause damage.
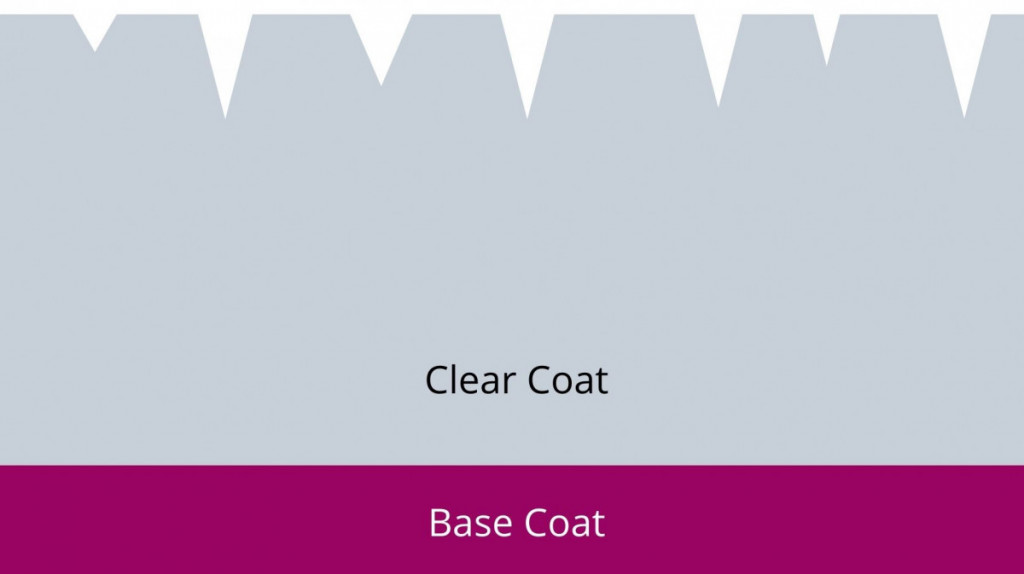
The biggest source of this friction, is when washing and drying the vehicle. And there are two ways in this process that friction can occur.
- Dirt, dust and grit are all abrasive, so when you drag them over the paint when washing, scratches will be caused.
- If you use aggressive tools that are mildly abrasive (sponges, brushes), then these will scratch the paint.
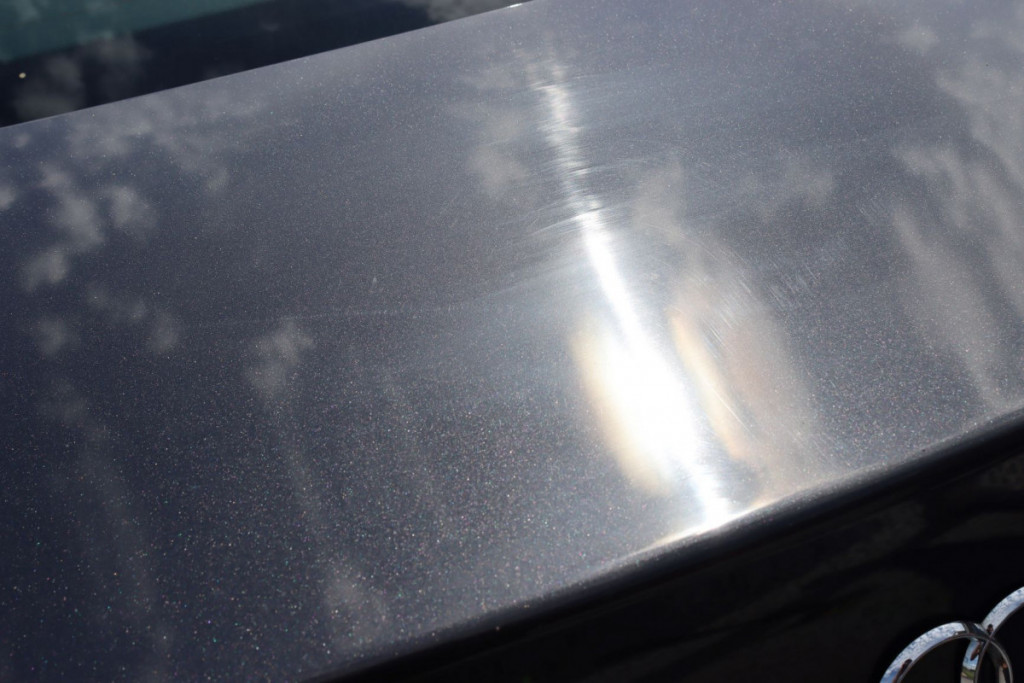
Check out this diagram and photo to show what happens to the paint when it’s washed with a gritty sponge.
So how do you tackle this? Well there are three rules you can keep in mind to prevent these sources of friction and protect the clear coat when you’re washing the car.
- Use non-abrasive tools that won’t scratch the paint by themselves
- Remove as much dirt as possible before actually touching the paint (using a pre-wash technique)
- Lubricate the paintwork as much as possible when you’re using contact to wash the panels
If you keep these three rules in mind, then your car’s paint will be scratch and swirl free after washing.
To illustrate this, I’ve broken down the entire wash process into 8 steps with some photos of me washing my own car to demonstrate. Now let’s talk about each of these steps in a little more detail.
After that I’ll be talking about some top tips, and biggest mistakes to avoid along with some FAQs. So keep reading if you want to keep your car’s paint scratch free and squeaky clean.
1. Wash the Wheels
The first step, is to wash the alloys and tires. For this step, you need to use a different wash mitt, and bucket as you are going to use on the paint.
This is because you don’t want to contaminate the wash mitt you’re using for the paint with the grit and dirt from the wheels, or you run a high risk of scratching the clear coat.
I think it’s a good idea to wash the wheels before the paintwork, because some dirt can splash up on the paint in the process, and you don’t want to muddy up the freshly washed paintwork.
To wash the wheels, I first rinse them down. Then I use a wheel shampoo and microfiber wash mitt to clean the alloys. I’ll use a soft bristle brush to clean difficult to reach areas. I also use a hard bristle brush and an all-purpose cleaner or dedicated tyre cleaner to scrub the tires and arches down.
I’ve written a complete guide to cleaning tires if you’re struggling to restore them back to looking black again.
I prefer to clean one wheel at a time, to stop the product drying on the surface. So once I’ve cleaned each one, I’ll give it a final rinse down before moving on to the next.
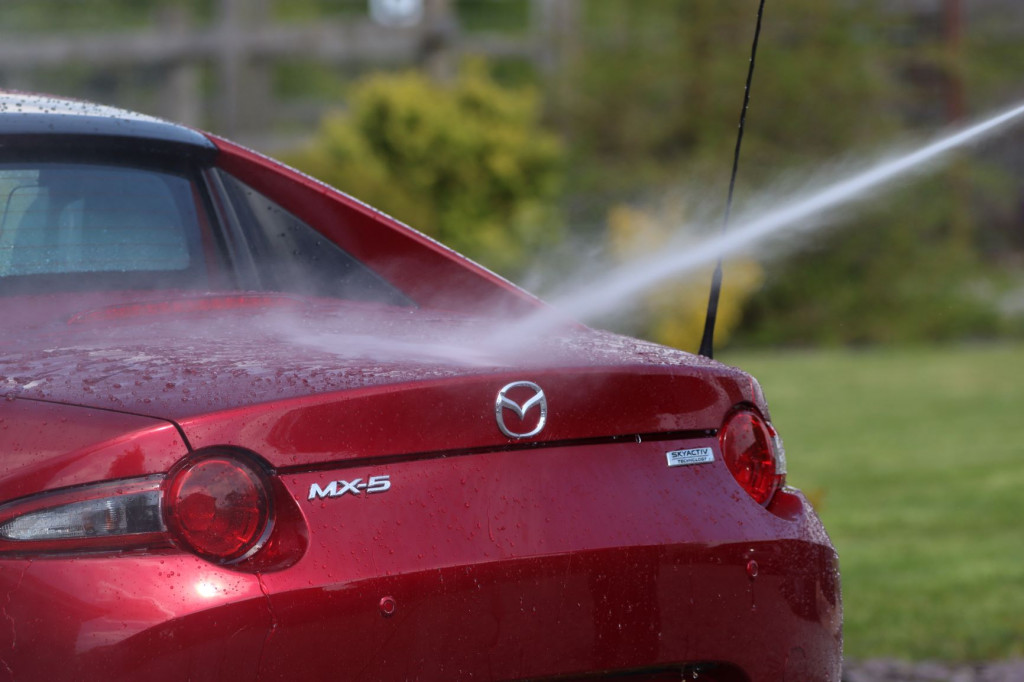
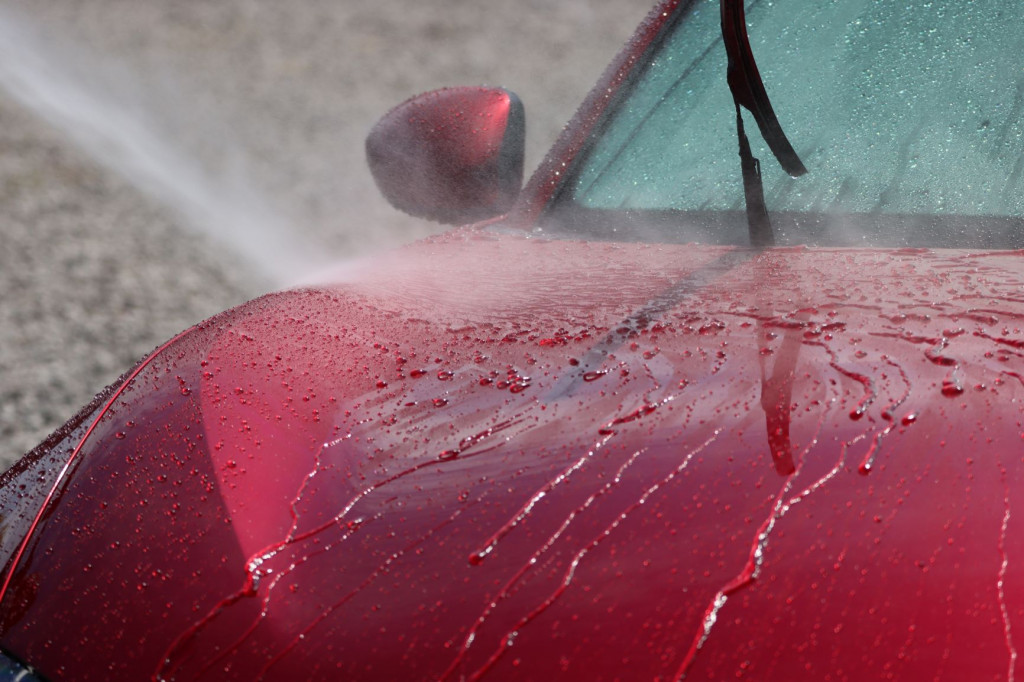
2. Rinse Any Loose Dirt or Debris From the Car
There’s a bit of a debate as to whether you should rinse the car before applying snow foam or just apply it to a dry panel.
In my opinion there are two reasons why you may want to rinse first:
- If the car is covered in thick mud
- If it is a warm day (as the water will cool the panels down)
If the car is only lightly dusty or just has a layer of traffic film rather than mud, then it’s fine to skip ahead to step 3.
However, if you are rinsing first, here are some tips…
Preferably, you should use a pressure washer with a fan attachment for this. It’s more effective at removing dirt than a hose, but if you’ve not got one, then just make sure you spend plenty of time with the hose trying to remove as much dirt as possible.
Rinse from top to bottom to push the dirt downwards off the car. But be careful not to point the hose at the ground and spray dirt up onto the car.
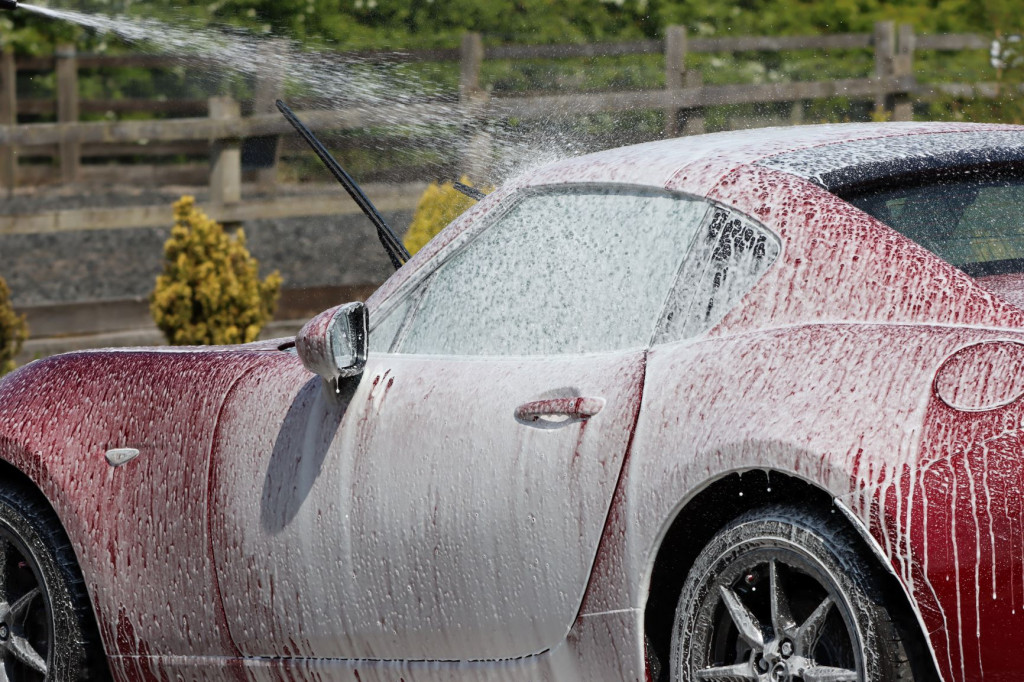
3. Pre-Wash the Car
The next step of the wash process, is called a pre-wash. It may not seem that important, but if you really want to prevent scratches and swirl marks, this is an essential step. It helps to remove as much dirt and dust as possible, that is stuck to the paint and couldn’t be removed by the rinse step.
The most popular way to pre-wash a car, is to use a snow foam cannon. It attaches to a pressure washer and coats your car in foam, which breaks down the dirt. However, if you don’t have a snow foam cannon, then you can use a pump sprayer, or even a regular spray bottle.
But I’d really recommend investing in a snow foam cannon.
Take a look at this article I’ve written about snow foaming to learn more.
You should let the foam sit on the car for around 4-10 minutes, depending on the temperature. Rinse it sooner if it’s hot because you don’t want it to dry on the surface.
Other good alternatives are citrus pre-wash sprays which are more aggressive and can be used in a pump sprayer.
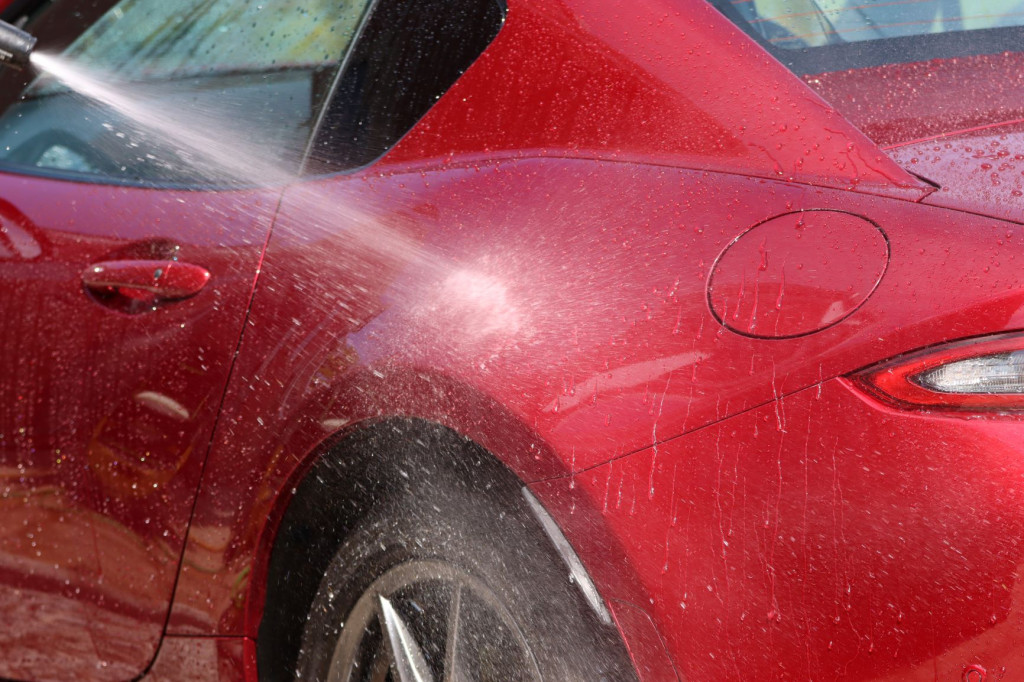
4. Rinse Again
The next step, is to rinse away this pre-wash solution.
Once you’ve given the car this second rinse, there shouldn’t really be much visible dirt left. This is great because it means you’ve removed a lot of the grit and grime without even touching the vehicle. So when you come to using a wash mitt, there’s less chance of causing scratches and swirl marks.
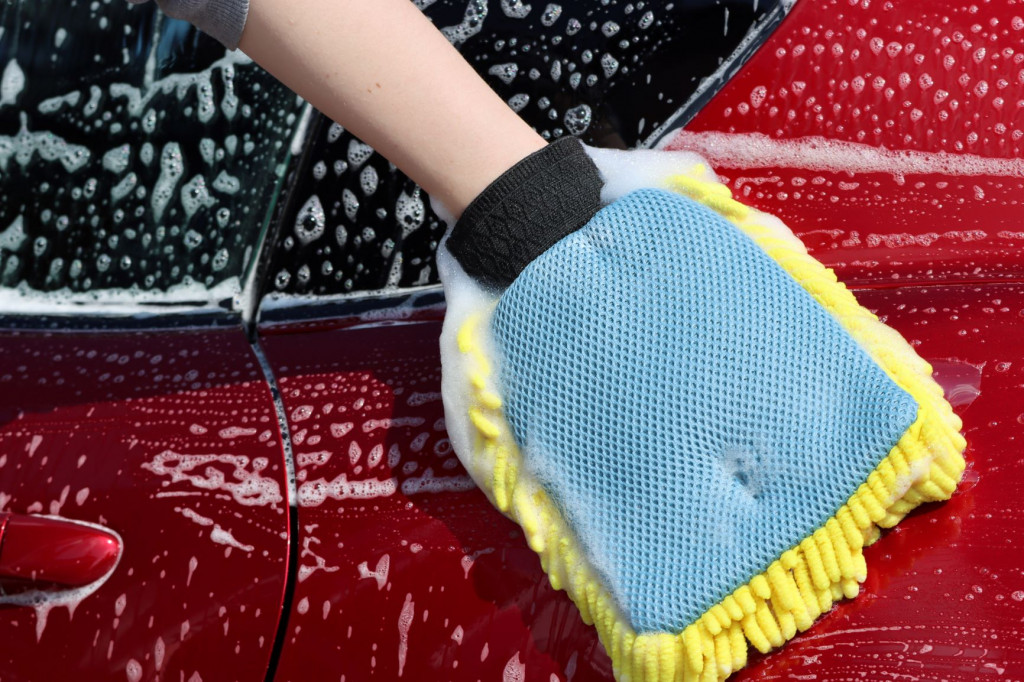
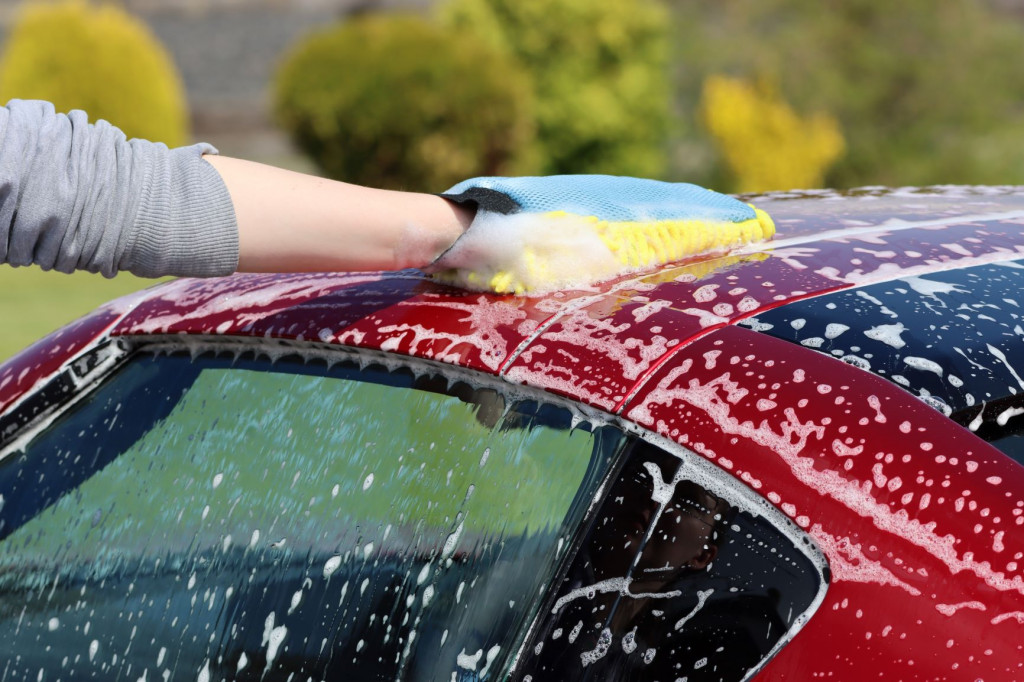
5. Wash The Paint Using a Microfiber Wash Mitt
Okay, so now we can move onto cleaning the paintwork. It may seem a bit strange that we’re on step 5 before it comes to actually washing the paint, but the previous steps are vital if you want to avoid scratches.
Always use a fresh wash bucket and car shampoo to clean the paint. Never use the same one that you used to wash the wheels or you will transfer dirt to the paint and cause scratches.
The biggest rule of washing the paint, is to never use a sponge. Sponges cause really bad swirls and scratches. Never use a brush either, they cause the same issue. Take a look at these two articles to learn more.
Instead, use a microfiber wash mitt. They are cheap, reusable and very gentle on the paintwork. So you dramatically reduce the risk of causing scratches and swirls.
Here’s how to wash the paintwork properly.
- Fill up a clean wash bucket with water and add the recommended amount of car shampoo to it.
- Dip the mitt in the bucket and wash from top to bottom
- Keep checking the wash mitt for dirt. If it looks dirty, rinse it with a hose or in a clean bucket of water, or swap it out for a fresh one
You should also always use a dedicated car shampoo, and not dish washing soap to wash your car. These not only remove waxes, but they also cause the paint to dry out which can accelerate the cracking and fading process.
I use the Garage Therapy Car Shampoo most of the time because it’s cost-effective, very foamy and has great cleaning power.
6. Rinse Down
Now you need to give the car a good rinse down again to remove all the car shampoo and lifted dirt. Rinse from top to bottom using a pressure washer or hose with a nozzle attachment.
Once you’ve rinsed the car down with pressure, you should rinse it with a normal hose pipe. This helps to remove as much surface water as possible as the light pressure effectively “rinses the water away”.
This makes the drying process a lot faster because you’ll be left with less water on the vehicle.
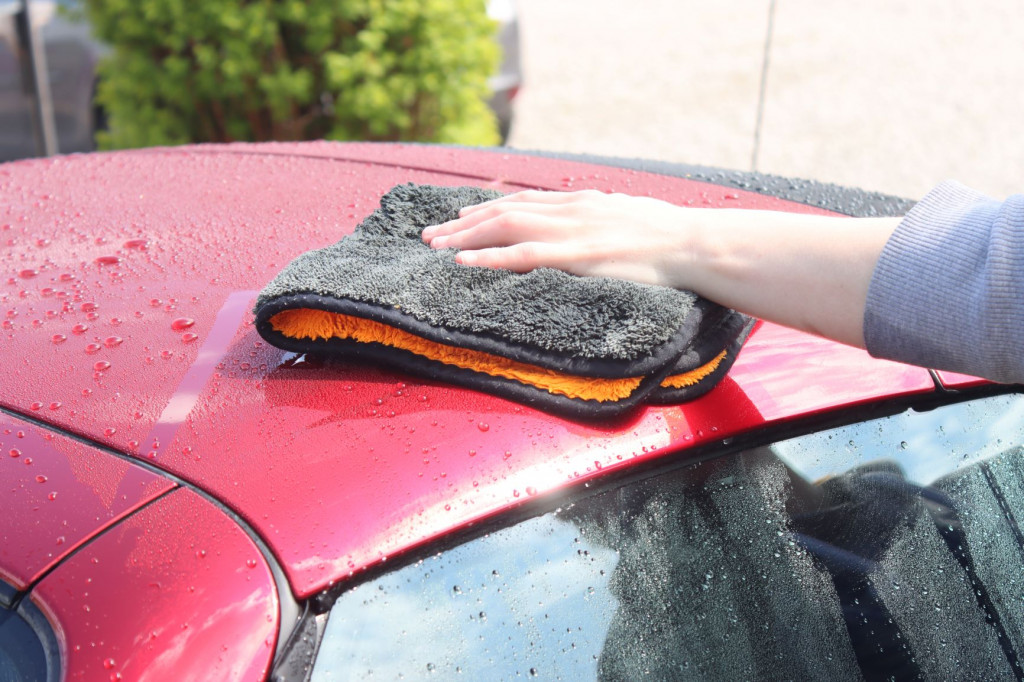
7. Dry Using a Microfiber Towel
Nearly there! The next step, is to dry the paintwork. It’s important not to skip this step or you’ll be left with water spots which can actually damage the clear coat. Take a look at this article I’ve written on why drying your car is super important.
You should use a microfiber towel to do this and not a bath towel as they are far to harsh and can actually cause scratches and swirl marks very easily. Microfiber is far more delicate and gentle on the paintwork.
To further reduce the risk of causing scratches, instead of wiping the surface, simply pat the microfiber towel (very very lightly), onto the paintwork. Using a damp microfiber towel makes this more effective. It stops you dragging any dust along the paint and causing swirl marks.
Again, use a separate microfiber towel to dry the wheels than you do the paint.
You do need to be careful though whenever drying your car, even if you use microfiber, because drying is one of the most common stages of the wash process that scratches can occur.
You can also use a car dryer to remove the water without actually touching the vehicle.
Never use chamois leather, bath towels or squeegees (water blades) to dry your car’s paintwork of you will cause scratches.
If you want to learn more about the effective drying process I use on my car, then check out this article I’ve written on the best way to dry your car to learn more.
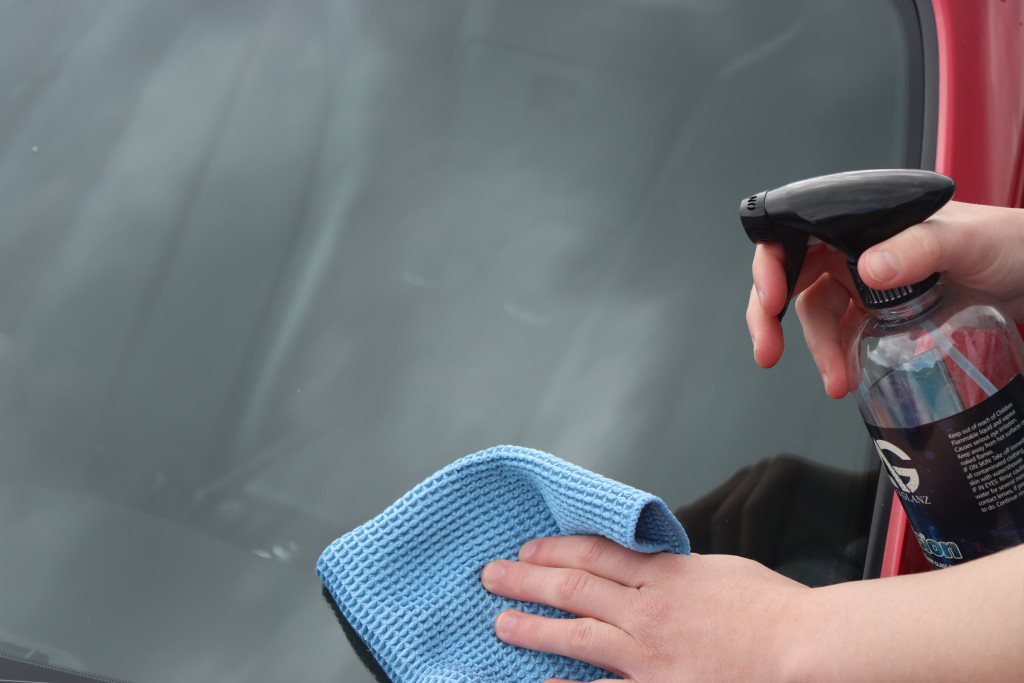
8. Clean the Glass
So once the drying stage is complete, the only thing left to do, is clean the glass. Often you’ll be left with some streaks from the wash process, but these are easily removed by using a glass spray and waffle-weave microfiber towel.
You should always use a waffle-weave or short-pile microfiber towel, not a plush, fluffy one because these leave fibres on the glass that can be really annoying.
Use a glass cleaner designed for cars, because some standard glass cleaners can damage the tint on the windows. Personally, I use one that leaves a water repellent coating on the glass to improve visibility when driving.
The Final Result
Once you’ve completed these 8 steps, your car should be super clean, and the paint scratch and swirl mark free.

Top Tips for Safely Washing Your Car
So those are the 8 steps! Now you know the basics, here are some of the top tips to keep in mind to make sure you are left with a clean car, but without scratches and swirls.
- Wash the car in the shade so the car shampoo doesn’t dry. You need to keep the surface lubricated so you don’t increase the risk of scratches.
- Use a grit guard at the bottom of the wash and rinse buckets so you don’t get grit on your wash mitt when rinsing it.
- Wash from top to bottom so you don’t transfer dirt to the upper sections.
- Move your wash mitt in straight lines. It ensures you cover the area evenly and don’t go over the same spot twice and rub dirt into the paint.
If you want some tips for washing dark coloured cars without causing scratches then check out this article I’ve written which includes 11 great tips.
Biggest Mistakes to Avoid
There are also some really important things you need to avoid doing to prevent scratches and swirls. Like I said at the start, most car owners are washing their car wrong, so make sure you’re not one of them!
- Don’t scrub at the paintwork with your wash mitt. Use plenty of lubrication and wipe gently to avoid scratches.
- Never use dish washing soap as it will cause the surfaces to dry out and removes any existing protection present on the paintwork.
- If you drop the wash mitt on the floor, don’t use it on the paint again. Don’t just rinse it, it won’t remove all the grit it has collected.
- Don’t wash the car in direct sunlight because the water and chemicals will dry on the surface very quickly.
- If you see you’ve missed a spot of dirt when it comes to drying, re-wash the area, don’t wipe it with the drying towel or you’ll definitely cause scratches. Instead, wet and wash the area properly.
- Make sure you wash the mitts and towels between cleaning cars, don’t use dirty tools.
Removing Scratches and Swirls
This is a huge topic, so I don’t want to delve too much into it in this post because it’s pretty hefty already! However, I do want to make a few points to help address any scratches you may already have in your car’s paint.
There are two ways to tackle this issue:
- Remove a layer of clear coat to flatten the surface and remove the scratches
- Use a product called a glaze, to fill in the scratches and hide them
Here’s a quick summary of the differences between these methods.
| Compounding and Polishing | Glazes |
| Removes part of the clear coat to remove scratches and produce a smooth a flat surface | Covers scratches using fillers to create the illusion of a smoother surface |
| Permanent | Temporary |
| More aggressive | Less aggressive |
If you want to learn more about these processes, then check out the following article.
Frequently Asked Questions
If you’e still got some more questions, don’t worry! Here are the answers to some of the most commonly asked questions about car washing.
Is washing at home better than using an automatic car wash?
Washing your car at home is definitely better than using an automatic car wash. Automatic car washes will scratch the paint because they use harsh brushes and rub dirt into the paintwork that has been collected from washing previous cars. Washing your car at home prevents these scratches fro occurring, as long as you do it properly.
Can I wash my car with just water?
You should not wash a car with just water because it will not remove all the dirt. You should always use a car shampoo and wash mitt to provide enough lubrication to clean the car effectively without causing scratches.
How long should it take to wash a car?
To wash a car properly, it will take around 1-2 hours. You should never rush the wash process because this increases the risk of causing scratches. Patience is key to washing your car safely so keep checking your wash mitt for dirt, and always pre-wash the car to remove as much dirt as possible before touching the paint.
How often should I wash my car?
Most cars that are driven daily and stored outside should be washed every two weeks ideally to prevent dirt accumulating. Cars that are driven less frequently and stored in a garage can be washed month. You should avoid getting the car too dirty because washing a car that’s especially filthy runs a higher risk of causing scratches and swirl marks.
Can you use laundry deturgent to wash a car?
You should never use household products like laundry detergent, dish washing soap or bleach to wash a car. They are too harsh on the paint, and will cause it to dry out which promotes cracking and fading. Instead, use a proper car shampoo.
What is the two bucket wash method?
This is when you use one bucket full of water and car shampoo, and one bucket full of just water. You use the water bucket to rinse the mitt between sections and then dunk it in the bucket with car shampoo. It avoids cross-contamination and prevents the wash bucket getting too dirty.
What is the three bucket wash method?
This is the same as the two bucket method (one rinse bucket and one wash bucket), but the third bucket is for the wheels. This is a better method than the two bucket system because it stops you transfer dirt from the wheels to paint work which causes scratches.
How to clean bird droppings off a car safely?
Use a microfiber wash mitt and plenty of lubrication (car shampoo and water) to gently lift the bird mess of the paint. Don’t scrub or you will cause scratches. If the car shampoo isn’t working, then use an all-purpose cleaner or citrus pre-wash spray to soften the dirt.
Thanks for reading! I hope you’ve found this article helpful. Take a look around the rest of the website to learn everything you need to know about making your car look its best!
