Leather seats aren’t too tricky to maintain, but there are definitely some guidelines you should follow and some mistakes to avoid. In this article I’ll take you through all the do’s and don’ts of cleaning leather seats, and the steps to follow.
What You’ll Need (Amazon links)
This page contains product affiliate links. We may receive a commission if you make a purchase after clicking on one of these links.
If you’re looking for a kit with all these products in, check out the Geist 3 Plus Kit (Amazon link). This is what I am using on my own car and am getting great results.
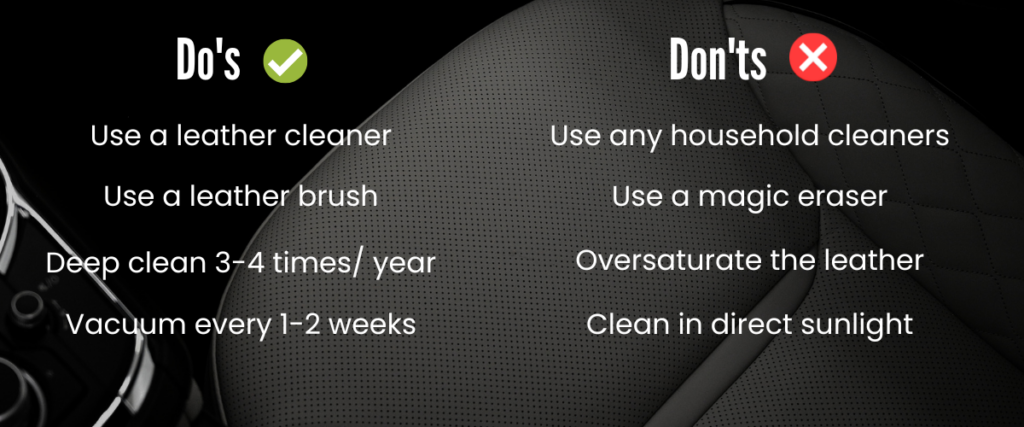
I’d always advise using a dedicated leather cleaner as opposed to any household cleaners on leather seats. Why? Leather is actually quite sensitive and some cleaners are too aggressive and will cause excessive wear and damage to the surface.
Even some interior cleaners are too aggressive, so I’d only recommend using a product which is specifically designed for use on leather to be on the safe side and keep the seats in the best condition.
I’d also advise using a leather brush or microfiber towel to clean leather. Do not use magic erasers as these are very abrasive and will cause damage to the leather.
Looking for some of the best detailing products to take car of your car’s interior ? Make sure you check out my recommended products page for all my current top picks.
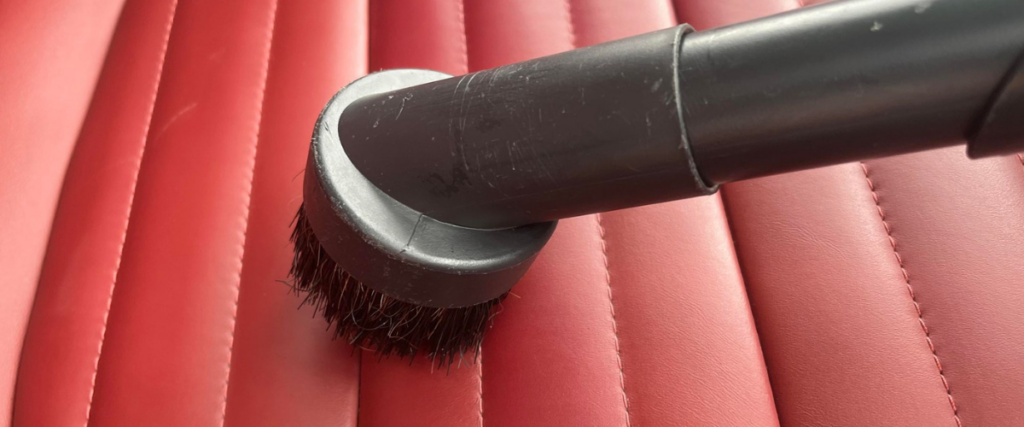
Step #1 Vacuum the Seat
The very first thing you need to do is vacuum the seat to ensure there is no debris before using the leather cleaner. Leather is very susceptible to abrasion, and if any debris is not removed before agitating the cleaner, it runs a high risk of inflicting damage and wear.
I like to use a soft brush attachment on leather seats (as opposed to a harder plastic crevice attachment) as this is a more gentle approach and is useful for getting any debris out of the stitching.
If you are finding it hard to remove loose dirt from the stitching, you could also try using a soft brush to help lift it and then vacuum it up afterwards.
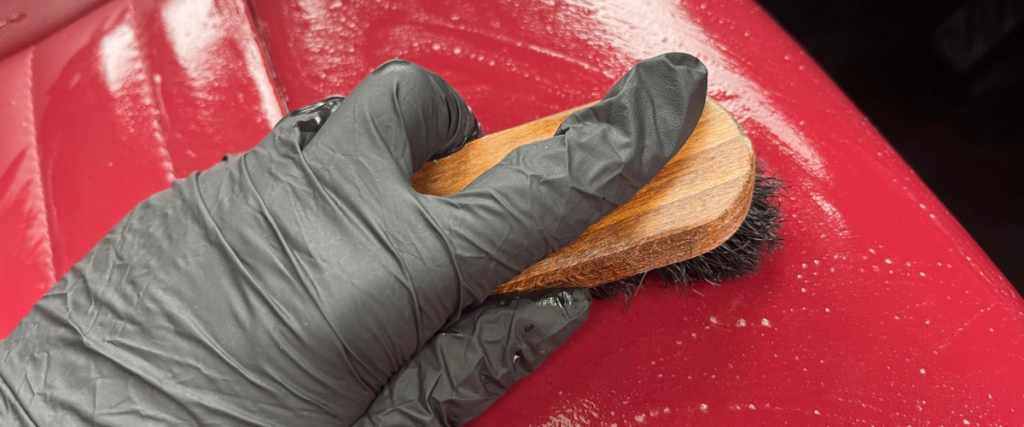
Step #2 Work the Leather Cleaner into the Seat
Depending on how dirty the leather is, you can apply the leather cleaner to a leather brush, sponge or microfiber towel. For leather which is relatively clean, a microfiber towel is fine, or a sponge if you prefer.
However, very dirty leather will usually require a brush in order to effectively clean the surface. Try not to use the brush too often though, as it is the most aggressive option.
It’s always best practice to apply the leather cleaner to the tool (brush, sponge or towel) rather than the leather itself to avoid oversaturation. Work the cleaner in gentle and avoid using too much product. It’s always best to clean a small area first and then move onto step #3.
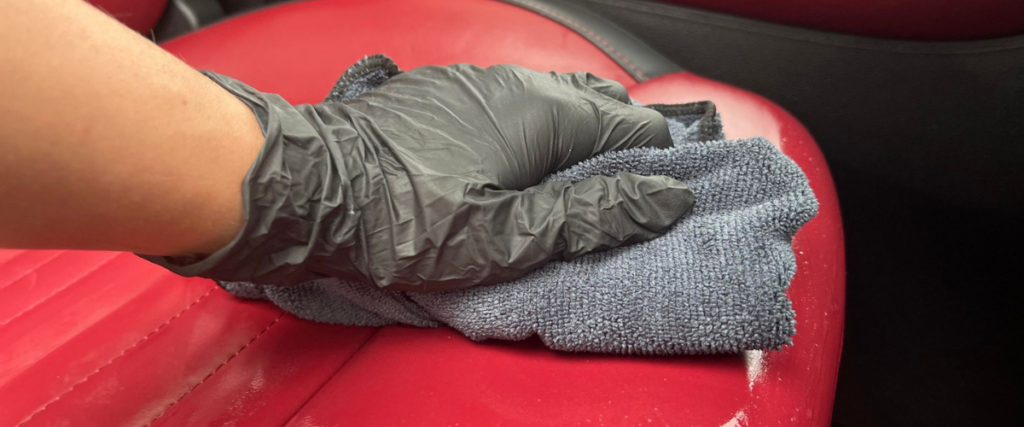
Step #3 Wipe Away the Residue
Once you’ve worked the leather cleaner in, use a clean, dry microfiber towel to wipe away the residue.
The aim after this step is to achieve a nice matte finish. Shiny leather is dirty leather, so if it still looks shiny, repeat steps #2 and #3 until the leather is completely clean.
It’s best to judge this after waiting a couple of minutes after you wipe seat, so the cleaner can fully evaporate and doesn’t give the illusion that the leather is shiny.
Step #4 Protect the Leather
There are two types of products that can be used to protect leather car seats:
- Leather sealants
- Leather conditioners
I’d always advise using a leather sealant, no matter the age of the leather. Leather sealants help to protect the leather against spillages, UV, dye transfer, and friction damage so it stays in good condition. Conditioners on the other hand are only required for older leather (over 3 years old on average).
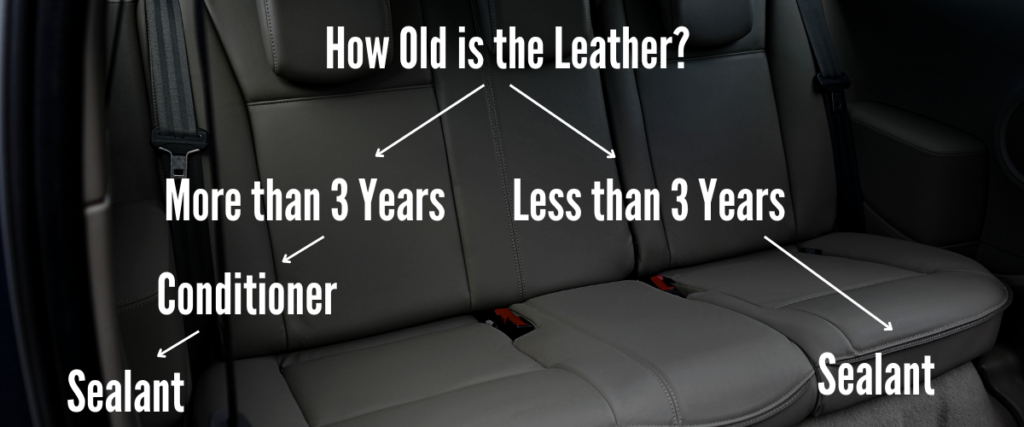
The reason being, that modern leather in car interiors has a protective top coat applied to it. If you apply a conditioner, then it will not actually penetrate the leather due to this top coat. Instead it’ll just sit on top and attract dust and grime.
However, this top coat does wear away over time and will lose its integrity. This happens when a car is about 3 years old on average. At this stage, a leather conditioner is useful because it will penetrate the leather and helps to keep it soft and prevent shrinkage which leads to cracking.
If you have a vehicle that’s over 3 years old, you should use a conditioner, followed by a sealant for the best results. The sealant will still be beneficial as it has more of a protective role compared to a conditioner.
Once you’ve applied the protection, try and avoid sitting in the car for at least a few hours if possible for the best results.
How Often Should You Deep Clean the Leather?
Leather car seats should be deep cleaned using the steps above roughly 3-4 times per year, depending on usage. If the leather looks shiny, this means it’s dirty so needs to be properly cleaned and then protected.
In order to keep the leather seats in good condition all year round, you should vacuum it regularly (every 1-2 weeks ideally). You can also spot clean any dirty areas as and when necessary using the leather cleaner.
More FAQs
Can I use any household cleaners to clean leather car seats?
It is not recommended to use any household cleaners to clean leather car seats including: dish washing soap, antibacterial wipes, vinegar or household cleaning sprays. This is because these chemicals will likely damage the leather because the pH falls outside the safe range for leather cleaning.
How do I make leather car seats feel soft again?
The best way to make leather car seats feel soft again is by applying a leather conditioner followed by a leather sealant regularly. If you are trying to reverse any hardening, this can be done every 1-2 months.
How do I know if my car seats are real leather?
- Push your thumb into the leather
- If it wrinkles, it is real leather
- If it just presses in but doesn’t wrinkle, it is vinyl
Check out this video by Fresh Start Detail Co. to demonstrate.
