Over time, snow foam cannons/ lances can get clogged which means they either end up producing weak, thin foam, or in some cases no foam at all. In this article, I’ll explain how to quickly and easily clean and maintain your foam lance so it keeps running at 100%.
What You’ll Need
Some foam lances are easier to dismantle than others, hence some equipment may/ may not be needed. I’ll be demonstrating the steps using images for four different lances (including the MJJC and MTM) so you should easily be able to figure out how to dismantle yours (even if the design is not identical).
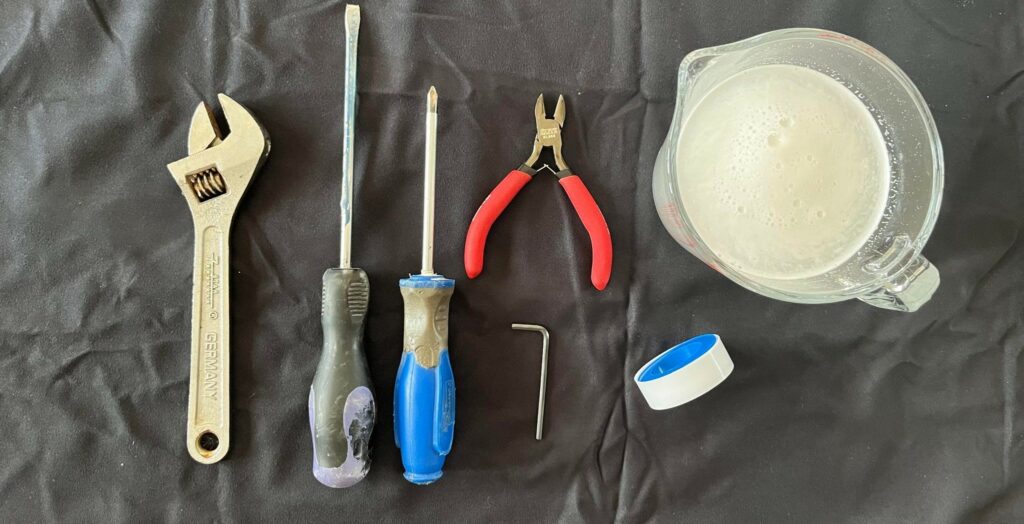
Here is a full list of equipment that you may need:
- Pliers
- Adjustable spanner
- Flat head screwdriver
- Phillips screwdriver
- 2 mm (approx.) diameter pin/ screwdriver/ allen key/ toothpick
- Nitrile gloves
- PTFE tape
- Descaler solution (teaspoon or bicarbonate of soda in two cups of water)
Now I’ll take you through the steps needed to dismantle and clean the foam lance. This should only take about 10-15 minutes of work.
Step #1 Remove the Pin Holding the Nozzle
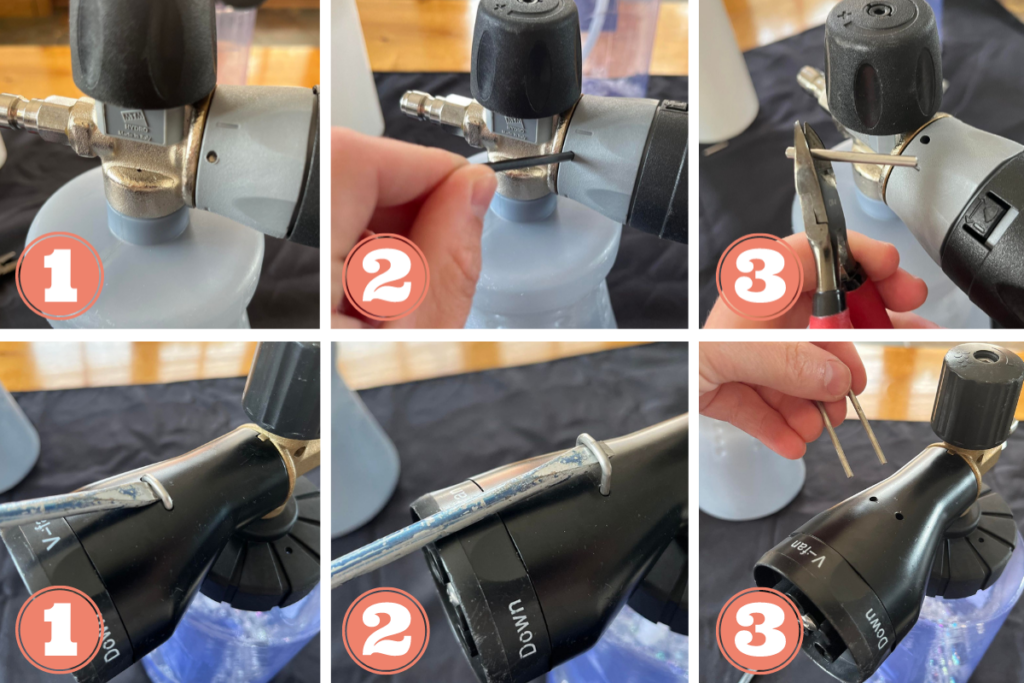
Most foam lances have a pin that holds the nozzle onto the head of the foam lance. Use your 2 mm diameter pin (or toothpick) to push this through to the other side so it releases the nozzle. If you are having a hard time pushing the pin all the way through, use the pliers to pull it out of the other side. Or you can use a rubber mallet to help push the pin through.
Instead of a single push pin, some foam cannons have a prong which can instead be removed by hooking it with a flat-head screw driver and pulling it off.
Here are images of the two different types of foam cannons to demonstrate the pin.
Step #2 Remove the Foam Lance Nozzle
Once the metal pin has been removed, the nozzle should easily slide off the head of the foam lance. This step is the same for basically every foam cannon on the market.
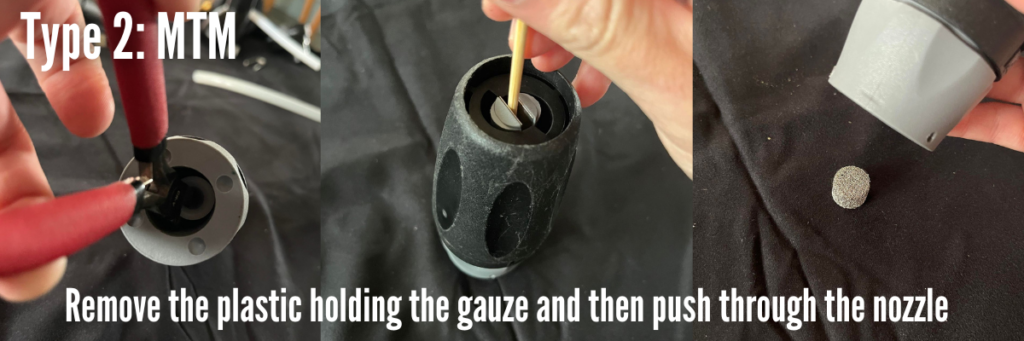
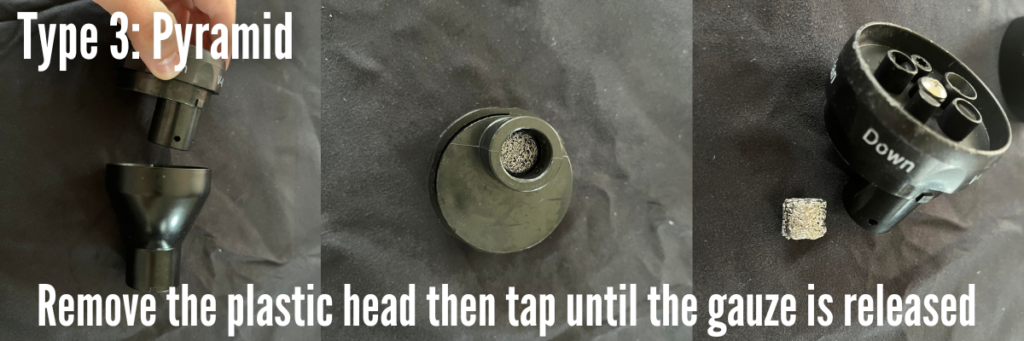
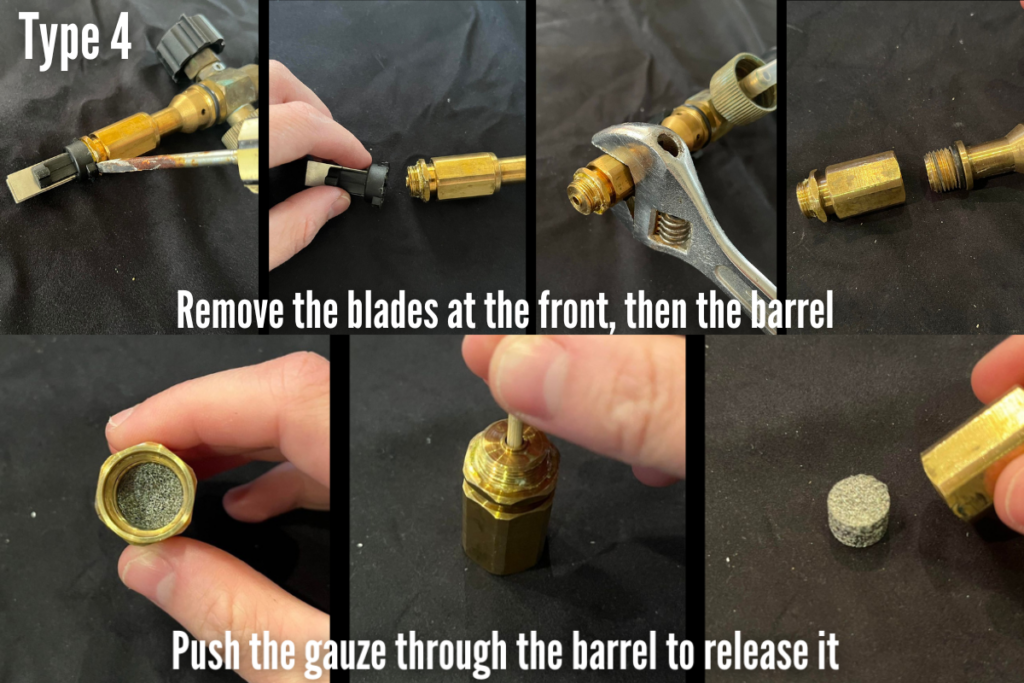
Step #3 Remove the Gauze (Filter)
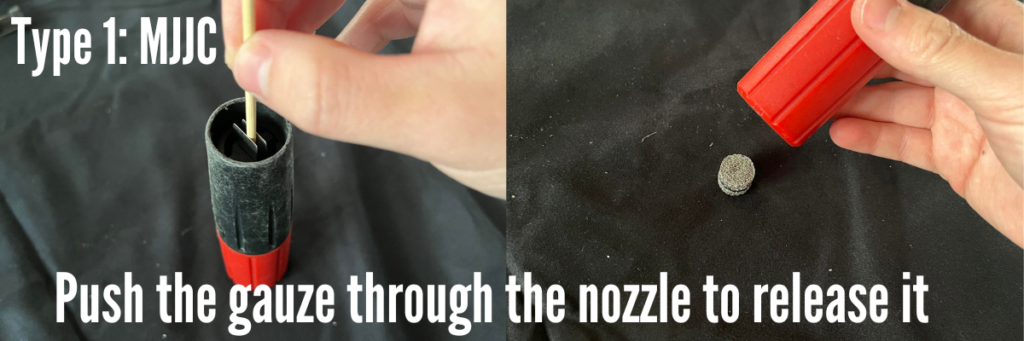
All foam cannons will have a gauze and this is the most common areas which can become clogged leading to poor quality snow foam.
In a lot of foam lances, you can push the gauze through the nozzle (using a toothpick or similar) to release it. However, on some lances so you may also need to remove the nozzle blades and barrel to access the orifice. Please see the images below to help.
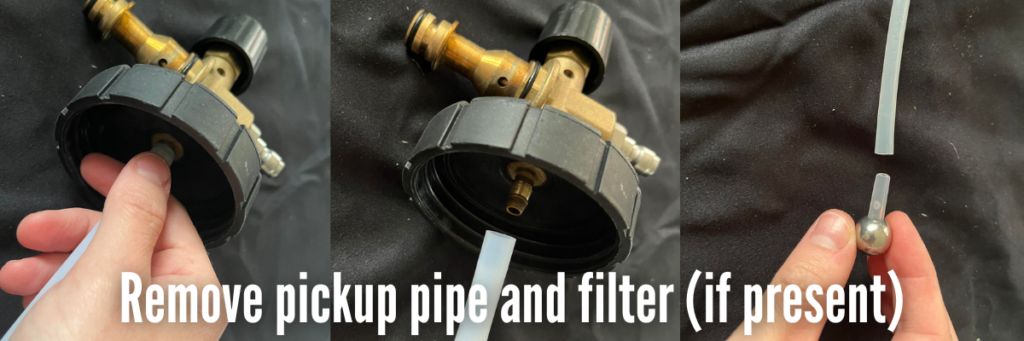
Step #4 Remove the Pickup Pipe
Pull the pickup pipe off the head of the foam lance. Sometimes this can be quite hard to remove so you may need to try and twist it, or try running it under warm (not hot) water to loosen it. Some foam cannons also have a removable filter on the end of the pickup pipe.
Check for blockages in the pickup pipe and rinse through with water if necessary.
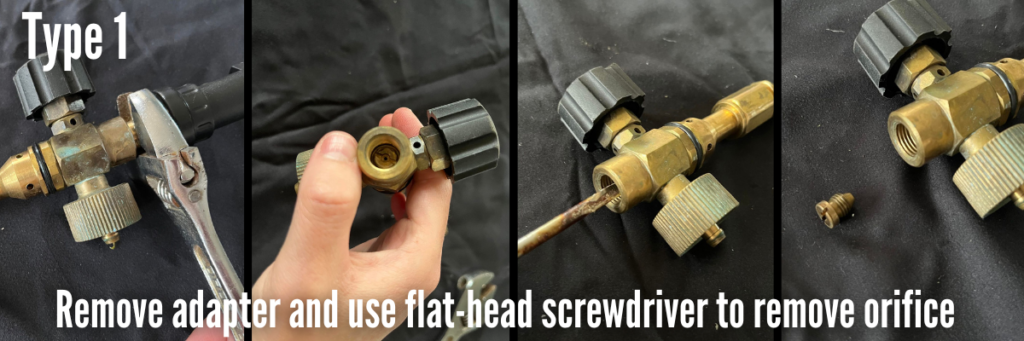
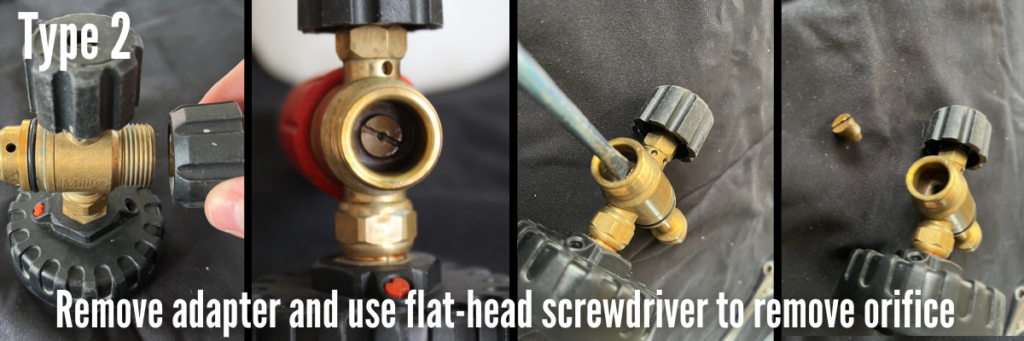
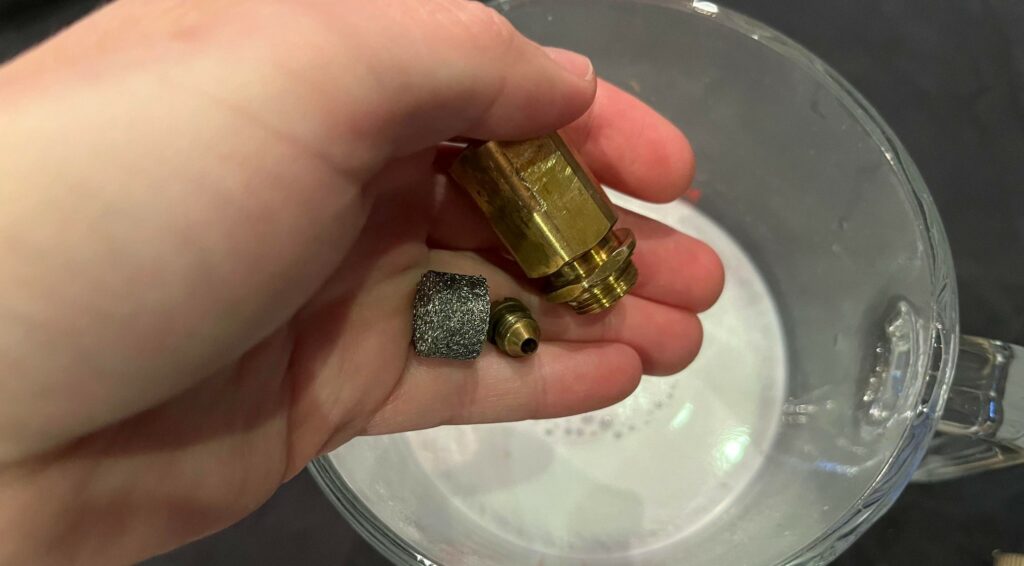
Step #5 Remove the Orifice
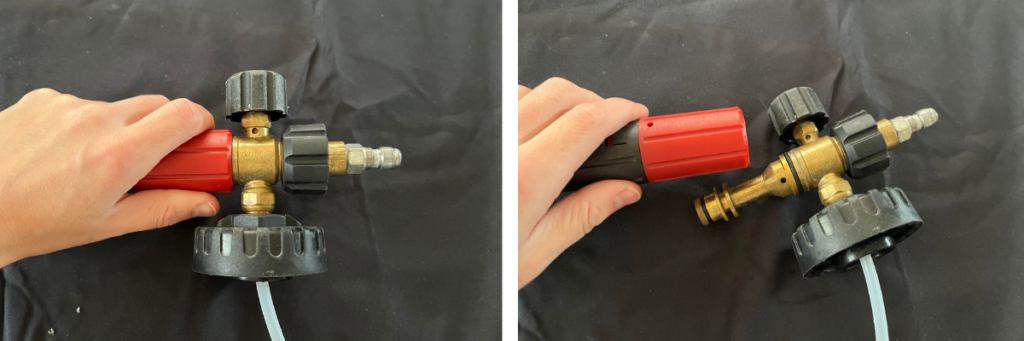
The orifice of a foam lance is typically located behind the adapter which is used to attach the lance to the pressure washer.
Remove the adapter by using an adjustable spanner (you will need to replace the PTFE tape during reassembly) Then, use a flat-head screw driver to unscrew and release the orifice.
The only foam cannon (to my knowledge) that does not require a spanner to remove the adapter is the MJJC. In this case, you can just unscrew the adapter by hand to access the orifice.
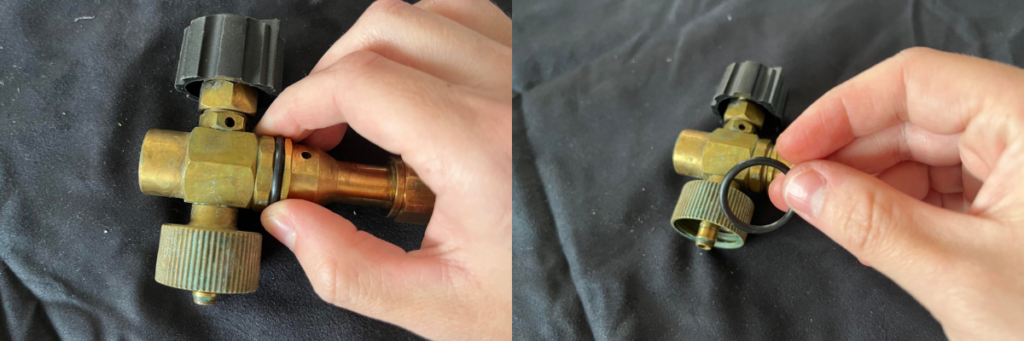
Step #6 Remove the O-Rings
You don’t want to place the O-rings in the cleaning solution as it can damage them, so remove them before proceeding and be careful not to misplace them! If they look damaged already, make sure you replace them with fresh ones when you reassemble the lance.
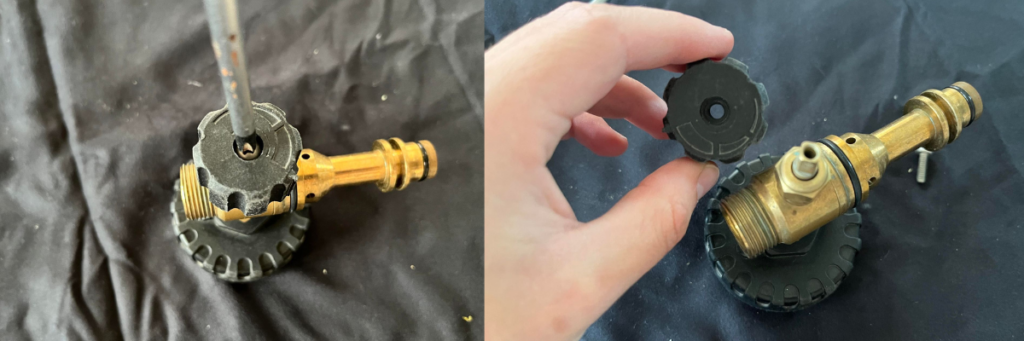
Step #7 Remove the Dial
This is an optional step and not something I do every time. If you want to really deep clean the lance, you can remove the dial on the top by unscrewing it with a Philips screwdriver.
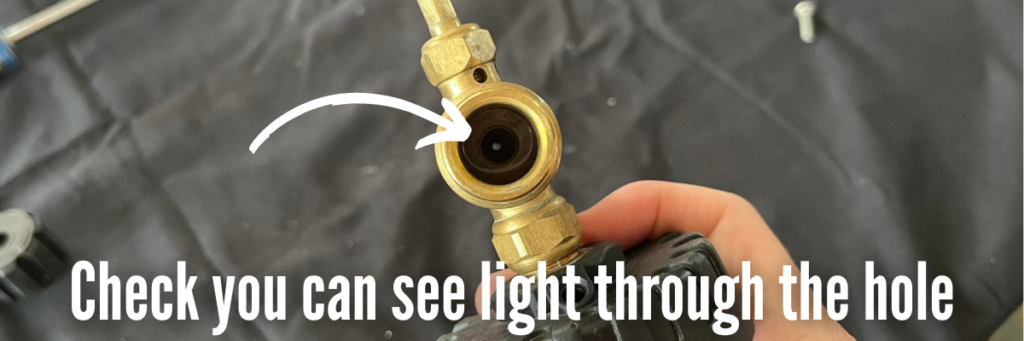
Step #8 Check for Blockages
If there are no blockages, you should be able to see the hole all the way through the foam cannon (and through the top if you removed the dial). If you see any blockages, use a toothpick or similar to push it out.
Step #9 Soak the Metal Components in the Descaler Solution
You can then place all the dismantled metal components in your descaler solution to soak. It’s best to leave them to soak for around 12 hours before rinsing them thoroughly with clean water. Make sure you wear gloves during this step.
Step #10 Reassemble the Foam Lance
Follow steps #1 to #7 in reverse to reassemble your foam lance and check the all the moving parts are working fine. Give your foam cannon a try to make sure it’s operating properly.
To prevent your foam lance from becoming clogged, make sure your fill the tank with clean water then spray it through for about 10-15 seconds to flush all the chemical out. This should be done after every use and will decrease the need to perform deep cleans as frequently.
Is Your Foam Lance Still Not Working Properly?
Make sure you check out this article on 8 reasons why your foam cannon might not be working properly to troubleshoot.
Why Should You Clean Your Foam Lance?
Dried snow foam residue and limescale can begin to build up in a foam lance over time causing it to become clogged and either produce thinner foam, or no foam at all. Cleaning the foam cannon regularly prevents this build up and keeps the foam lance performing properly.
How Often Should You Clean Your Foam Lance?
If you are using your foam cannon weekly, it is a good idea to clean it every 12 months, or when you notice the performance declining. If you use your foam cannon daily, it is worth cleaning it every 6 months to maintain the optimal level of performance.
