Preparing a car for waxing is super important. It’ll give you the best possible glossy looking finish, and make sure your car is protected from the elements for longer. But how do you actually prep a car’s paint before applying a coat of wax.
In this article, I’ll be going through the main steps you need to take to make sure your car is properly prepped. So let’s get started.
Prep to Wax a Car
To prepare a car for waxing, you should wash the car thoroughly using a car shampoo then dry the car. For best results, decontaminate the paintwork using iron fallout remover, tar remover and clay, and then polish or use a pre-wax cleanser to make the wax last longer.
You can apply a wax on top of a sealant but it’s best to make sure your sealant has cured first by waiting at least 12 hours between applying wax over the top.
If you really want to enhance your car’s shine, then consider adding a glaze underneath the wax to fill in any light imperfections in your paint’s clear coat.
The Full Process
So I’m going to go through the full process for prepping your car before waxing. It’s not necessary to do this all the time. It depends in what condition your car is in and when it was last waxed.
Wax is pretty great because you don’t have to prepare the paint as well as you would if you were applying a sealant or even more so, a ceramic coating. However, you will get the best finish if you go through all these stages.
Just keep in mind that you don’t have to do this every single time you wax your car. You can simply top up the wax by adding another layer.
1. Wash the car using a wax-free/ gloss-enhancing shampoo
It goes without saying that you should always freshly wash a car before applying any form of paint protection. However, I wanted to make this point very clear.
Your car should be squeaky clean before applying any waxes. When you apply a wax, you’re rubbing the paint’s surface. So if there’s any level of dust, you run the risk of scratching the paint, inflicting swirls and marring.
It’s important to use a car shampoo that doesn’t contain any wax. Using a shampoo like Chemical Guy’s Clean Slate or Garage Therapy /ZERO: Decon Shampoo can help remove old layers of wax to give you a cleaner surface to work with.
Check out my complete guide to washing a car without causing scratches.
2. Decontaminate if Necessary
If you want to make sure the wax goes on as smoothly as possible, and you get the best finish, then make sure you decontaminate the paint if it needs to be.
Your car is exposed to contaminants like bird mess, tar, iron fallout, bugs and tree sap all the time. And they don’t always come off with a normal routine wash. Instead, they bond to your paint.
You can check your these contaminants by running your hand over the paint when it has been freshly washed and dried (do not do this if the car has not just been cleaned as rubbing dust into the paint will cause swirls). If it feels rough, then you’ll need to get rid of these contaminants.
There are two steps to this:
- Chemical decontamination (using iron fallout remover and tar remover)
- Physical decontamination (using a clay bar or clay mitt)
Check out my recommended products for the decontamination process here.
Remember though, decontamination is not necessary if the car doesn’t have any contaminants. You shouldn’t just clay the car as part of a routine, as using a clay bar is likely to cause some minor swirl marks which will need to be removed by polishing.
Instead, you can even just to the “chemical” part of the decon process more often as this will keep the paintwork feeling smoother but without inflicting swirls with the clay bar.
Decontamination helps ensure the paintwork is super clean, ensuring the wax properly cures and lasts as long as possible. However, it is not strictly a necessary step.

3. Dry the Car
Next, I go ahead and dry the car with a microfiber towel. I am always careful not to drag the towel across the surface. Instead I get it slightly damp, and very lightly press it onto the panel to soak up the water. This minimises the chances of inflicting clear coat damage.
Don’t leave your car for long between drying and waxing. Make sure you get to work waxing when your car has been freshly washed, or dust will gather on the surface.
3. Cleanse or Polish the Paint
Paintwork cleansers are also known as pre-wax cleaners and ensure the surface is very clean and ready for a wax to be applied, maximising it’s durability.
Good examples of paintwork cleansers are R222 and DoDo Juice Lime Prime Lite, which are both non-abrasive.
If your car has swirl marks or scratches and you want to remove them here using a polish. If you do decide to polish the car, then you’ll need to have thoroughly decontaminated it (step 2). Or you can cover them using a glaze in the next step.
Either way, it’s a good idea to ensure the surface is free from old waxes or sealants to maximise the durability of the product you’re applying.
Check out my guide on 5 different ways to remove old waxes and sealants.
4. Use a Sealant or Glaze (optional-step)
Adding a glaze or sealant is optional, and both products intend to have a different effect.
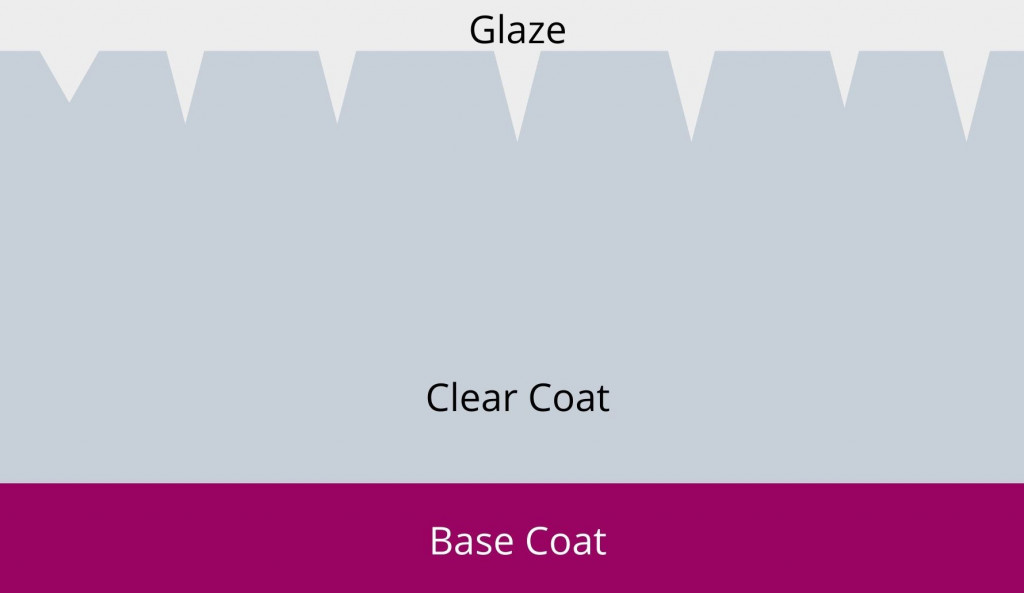
A glaze enhances your paint’s finish and makes it look glossier, by filling in light imperfections in the clear coat such as swirls or marring (check out the diagram below). This helps to create a mirror finish because the light reflects evenly off the surface.
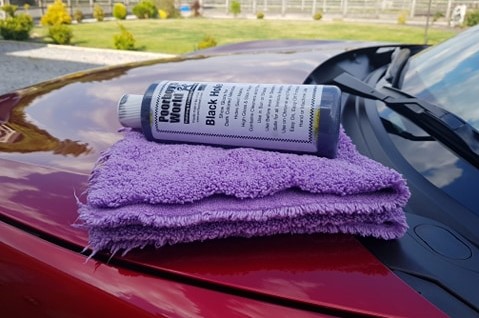
Glazes have no protective ability, so they need to be applied before waxing. My favourite paint glaze is Poorboy’s Black Hole because it’s super easy and quick to apply. Plus is smells pretty great too!
Check out my complete guide to glazes to learn everything you need to know.
Sealants are a form of paint protection. They need to be applied before a wax because they need to properly bond to the paint’s surface to get the best durability.
It’s not recommended to use a glaze and a paint sealant together, because both need a clean paint surface to work properly.
If you want to apply a sealant before applying wax, then give the sealant time to cure. Normally, 24 hours is recommended between applying your sealant and wax. So apply your sealant, let it sit for a day, then give your car a quick wash again to make sure the surface is clean, then apply your wax.
Try and store the car inside so it does not gather dust as well, or the vehicle may need washing again before applying the wax.
5. Apply the Wax in a Thin Layer
Now you’re ready to go ahead and apply your wax. The method of application will depend on which wax you’re using.
Some need to be left on the surface for 10-15 minutes before buffing off, and others need to be buffed off right away. Always check the manufacturers instructions on the back of the packaging because every wax is different.
There are some rules that apply to every wax though.
- Always use a clean pad to apply the wax. Foam and microfiber work well, but they must be freshly washed to avoid rubbing dust and dirt into the paint and inflicting clear coat damage.
- Always use a good quality microfiber towel to buff the wax off. Never use any other type of cloth or fabric, because you again run the risk of scratching up your clear coat.
- Make sure you apply the wax evenly in thin coats. Less is more when it comes to waxing.
- Usually one coat of wax is enough, sometimes two can be beneficial, but any more than 2 coats of wax is generally not going to add anything.
Applying Waxes over Sealants or Coatings
You can apply wax to clean bare paint, or over the top of a sealant. It is generally not advised to apply a wax over the top of a ceramic coating, as this will hide some of the properties of the coating.
Wax isn’t as durable as a paint sealant, but it’s easier to apply. It’s up to you whether you want to apply wax over a sealant, or just use the wax on it’s own.
Some car owners like adding wax over sealants because the wax adds a nice warm glossy finish, and the sealant underneath provides the more durable protective layer.
Personally, I prefer just to use either a wax or a sealant on it’s own. This is because you only really get the properties of whatever is on the top layer. So I don’t really see much point in layering. Instead, I just top up the wax or sealant whenever it needs to be.
If you want the wax to last longer, apply it to bare paint. It won’t last as long if you apply it over a sealant. However, the sealant underneath will last a long time so you will still get good protection. It’s up to you which you prefer to do, try both and see how you get on!
Frequently Asked Questions
Here are the answers to some common questions you may still have.
Do you apply a wax to a dry or wet car?
Waxes should only ever be applied dry, and not to a wet car. Any water will prevent the wax from being spread in an even layer, and prevent the wax from curing properly, meaning it will not last as long on the paintwork.
The exceptions to this are “wet waxes” or “spray and rinse” sealants which should be applied to wet cars, but this will always be stated on the instructions.
How many coats of wax should I apply to my car?
You should apply one or two coats of wax to your car. One coat is usually enough, but two will ensure complete coverage. There are no additional benefits for most waxes of applying more than two layers as any extra layers are likely to be buffed away with your microfiber cloth.
Do you need to polish a car before waxing?
You do not need to polish a car every time before waxing it. Polishing removes a layer of the paintwork, so you should only polish the car if you are trying to remove scratches and swirl marks on a car with a good layer of paint left.
Check out my article on this topic here.
Thanks for reading! I hope you’ve found this article helpful. Don’t forget to check out the rest of the blog posts to make sure you’re making your car look it’s best!
